Category: Beauty

  • Which Halo Hair Extensions Are Best for Sensitive Scalps and Daily Wear?

    Finding the right hair extensions can be tricky when comfort matters as much as style. For anyone with a sensitive scalp, heavy or tightly applied extensions often cause irritation, making them unsuitable for daily use. For those with sensitive scalps or who plan to wear them often, the best halo extension option is lightweight and made from high-quality hair, since it sits gently on the head without pulling on natural strands.

    Unlike tape-ins or bonded methods that can strain the roots, halo extensions use an invisible or adjustable wire that distributes weight evenly. This design reduces pressure on the scalp, allowing for all-day comfort while still adding volume and length. With proper care, they can be worn frequently without compromising hair health.

    Choosing the right option comes down to material quality, secure fit, and natural blending. Extensions crafted from 100% human hair tend to last longer and look more seamless, while adjustable bands ensure a snug but gentle fit. These details make them practical for everyday styling without discomfort.

    Key Takeaways

    • Halo extensions offer a scalp-friendly option for long wear
    • Human hair provides the most natural look and durability
    • A secure, lightweight design ensures comfort all day

    Choosing the Best Halo Hair Extensions for Sensitive Scalps and Daily Wear

    Selecting halo hair extensions for sensitive scalps requires attention to comfort, lightweight design, and natural blending. Materials, construction, and fit all play a role in how well these extensions can be worn daily without irritation.

    Key Features for Sensitive Scalps

    People with sensitive scalps should prioritize lightweight halo extensions that use a thin, flexible wire or band. A clear nylon wire is often less irritating than thicker elastic bands, as it distributes weight more evenly. Breathable wefts made from fine lace or mesh help reduce friction against the scalp. This prevents discomfort during long wear. Smoothly finished seams and flat wefts also reduce pressure points, which is especially important for daily use.

    Length and weight matter, too. Extensions that are too heavy can tug at the natural hair and cause strain. Many hairstylists recommend choosing 120g–160g sets for fine or sensitive hair, as these provide fullness without excess bulk. For added comfort, some brands offer adjustable wires or silicone-lined bands. These features allow a more secure fit without digging into the scalp.

    Top-Rated Halo Hair Extensions for Comfort

    Several halo hair extensions stand out for their comfort-focused designs. Brands that use remy human hair extensions often receive high marks for softness and natural blending, which reduces the need for tight placement.  Some of the best halo hair extensions available in 2025 include models with adjustable invisible wires and multi-layered wefts that sit flat against the head. These features reduce bulk and make the extensions less noticeable during daily wear.

    For those who want a budget-friendly option, certain synthetic halo extensions can also be comfortable if they use soft fibers and a thin, flexible band. However, they may not offer the same breathability as human hair versions.

    Comparing Human Hair and Synthetic Options

    Human hair extensions remain the most comfortable and natural choice for daily wear. They blend seamlessly with real hair, can be heat-styled, and usually feel softer against the scalp. Remy human hair, in particular, minimizes tangling and lasts longer with proper care.

    Synthetic halo extensions are lighter in some cases, which can benefit sensitive scalps. However, they often lack the same breathability and may feel warmer against the skin. They also have limited styling flexibility since heat tools can damage most synthetic fibers.

    Material Quality and Daily Wear Considerations

    The type of hair used in halo extensions directly affects comfort, durability, and how natural the blend looks. For people with sensitive scalps, lightweight construction and gentle materials reduce irritation during long hours of wear.

    Longevity and Maintenance for Everyday Use

    Extensions made from 100% human hair typically last longer than synthetic options. The cuticles remain aligned, which helps prevent tangling and keeps the hair smooth with daily brushing. This makes them a practical choice for those who plan to wear halos often. Synthetic fibers may feel lighter but usually show signs of wear faster. They can be more prone to frizz and may not tolerate heat styling, limiting versatility. For sensitive scalps, the lighter weight can feel comfortable, though the shorter lifespan may require more frequent replacement.

    Daily maintenance includes gentle detangling, washing with sulfate-free shampoo, and storing the halo flat or hung when not in use. Consistent care extends the life of the hair extensions and keeps them looking natural. Users should avoid heavy styling products that can build up and weigh down the band.

    Conclusion

    Halo hair extensions suit individuals with sensitive scalps because they distribute weight evenly and avoid direct attachment to the scalp. This reduces tension, making them more comfortable for long hours of wear.

    They also require less daily upkeep compared to clip-ins or tape-ins, which helps maintain both hair health and extension quality. With proper care, halos can last longer and remain in good condition. For daily wear, lightweight designs and adjustable wire or band systems provide flexibility and comfort. Choosing the right length, thickness, and style ensures a natural look while minimizing scalp strain.
  • How To Pick The Best Mole Removal Method For Your Skin

    Ever looked in the mirror and felt like one tiny mole was all you could see? You’re not alone. A lot of people feel that way, whether it’s because of how it looks or how it feels rubbing against clothes. Some moles just pop up and hang around, while others seem a bit odd. That’s when people start thinking, “Should you get this removed?”

    The tricky part? Not every mole is the same. And neither is every skin type. What works well for one person might not be right for another. So, if you’ve been thinking about removing a mole, knowing the options, and what actually makes sense for your skin, is where it all starts. Let’s break it down, step by step.

    Start with Knowing Your Mole

    Before thinking about removing anything, it’s smart to understand what kind of mole you have. Is it flat or raised? Has it changed color or grown over time? Does it look different from other moles on your body? These small signs can be big clues.

    A doctor or dermatologist can examine it closely. Sometimes, they use special tools or may suggest a biopsy if it looks unusual. This step is not just helpful, it’s important. It helps rule out anything dangerous like skin cancer.

    Common Removal Methods Explained Simply

    Once you’re cleared for mole removal, there are several methods that a specialist might recommend. Here’s a quick brief to each one:

    1. Surgical Shaving

    A quick and simple method. The top part of the mole is gently shaved off. It works well for small,
    raised moles. There’s usually little to no downtime, but a faint mark may stay.

    2. Surgical Excision

    This method of mole removal is a bit more detailed. The mole and some surrounding skin are cut out. Stitches are used to close the area. It’s best for deeper moles or when doctors need to test the tissue. Healing takes longer, and a scar may form.

    3. Laser Removal

    Light pulses break down the pigment in the mole. This method suits flat and non-cancerous moles. It’s gentle and doesn’t involve cuts, though you might need more than one session. It’s not right for every type of mole, so checking with a doctor first is key.

    4. Cryotherapy

    This one uses extreme cold to freeze the mole. It works better on smaller, surface-level moles. It’s fast but might not remove deeper ones fully.

    5. Electrosurgery or Radiofrequency

    These use heat or radio waves to remove the mole. Recovery is fast, and it’s often used for cosmetic reasons. But it might not be the best choice for big or suspicious-looking moles.

    What Should You Think About Before Picking One?

    Here’s where it gets personal. The best mole removal method depends on more than just the mole. Your skin type, the area it’s in, and what you’re hoping for afterward all play a role.

    Let’s say you’ve got sensitive skin or tend to scar easily. That matters. Or maybe the mole is smack in the middle of your cheek, you probably want the cleanest finish possible.

    Think about this, too:

    • Is the mole raised, flat, or kind of deep?
    • Does it itch or look uneven?
    • Where is it? Face, arm, shoulder, somewhere that rubs?
    • Are you in a rush to heal, or is time not a big issue?
    • Are you paying out of pocket or going through insurance?

    Here’s something else to consider: some clinics do more than just basic removals. They look at your skin type, use special tools to map the mole, and help you choose a method that fits both your health and how you want your skin to look afterward.

    These clinics usually focus on both the medical side and cosmetic results, offering personalized removal care that feels safe and actually works, not just a one size-fits-all fix.

    A Quick Word on At-Home Fixes (Just… Don’t)

    You’ve probably seen those kits online. The ones that promise easy removal from your bathroom mirror. It’s cheap, quick, but also risky. Here’s the thing: when you use creams, razors, or DIY gadgets, you’re playing a guessing game.

    You don’t know if the mole is harmless or something more serious. And cutting or burning it off without training can lead to infections, deep scars, or worse, missed warning signs.
    Short version? Leave it to the experts.

    Last Words

    Getting rid of a mole isn’t just about looks. It’s about comfort, confidence, and peace of mind. The best part is, you don’t have to figure it out alone. A good skin specialist will check your mole, listen to your concerns, and help you decide the right path.

    Whether it’s for health reasons or just to feel better in your skin, there’s a method that fits your
    needs. And once it’s done right, you’ll wonder why you waited so long.

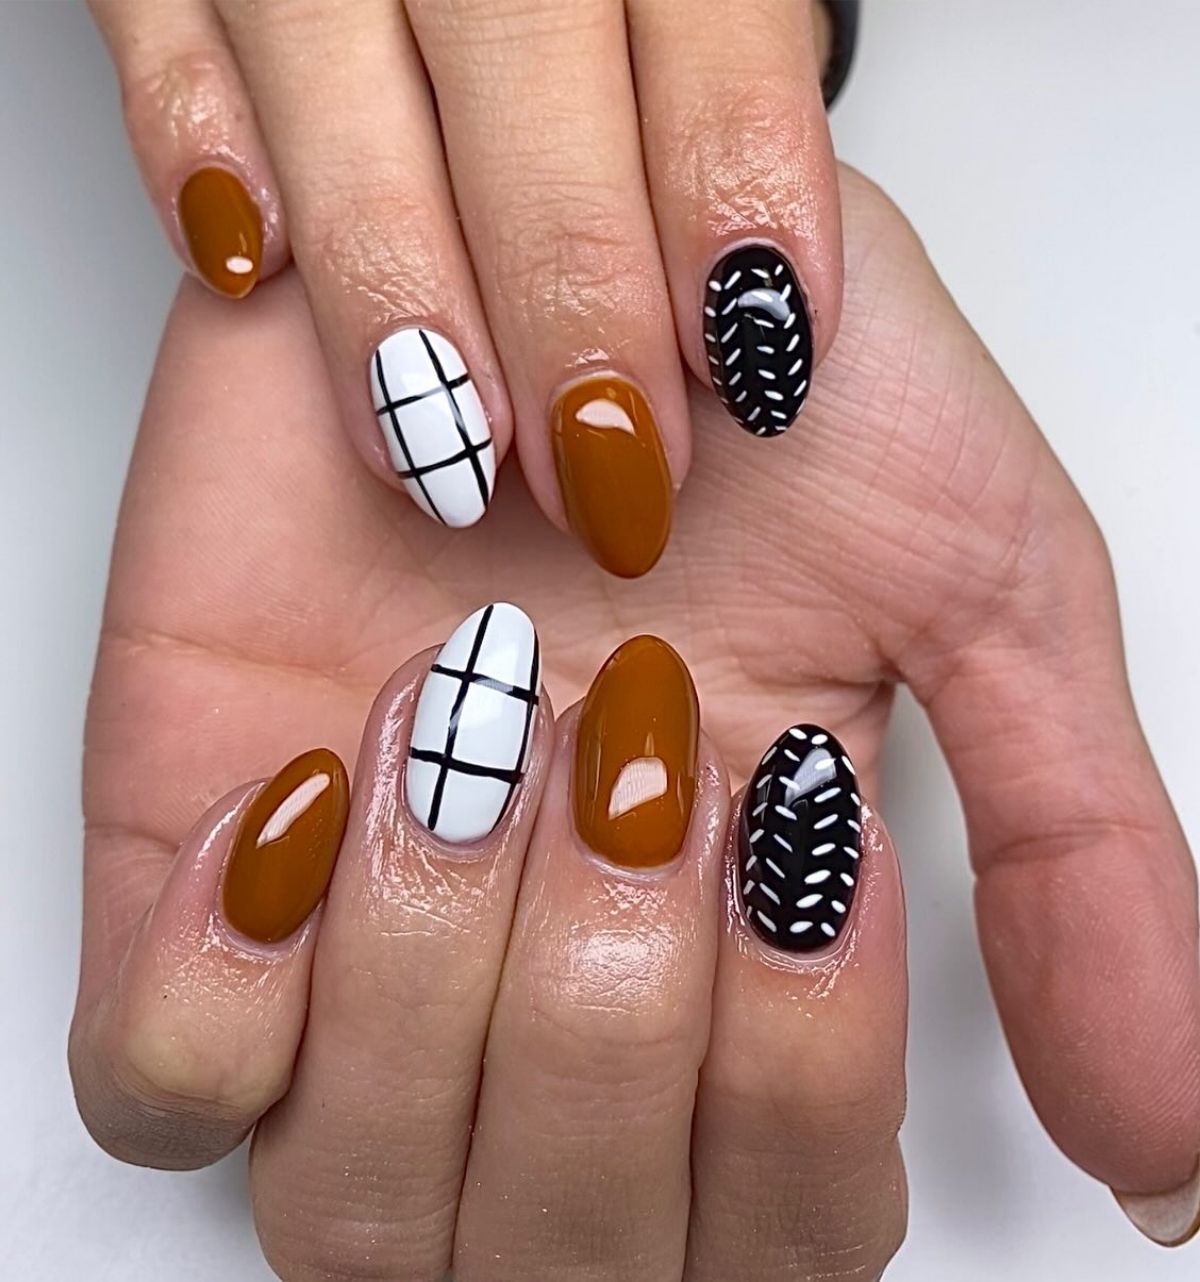
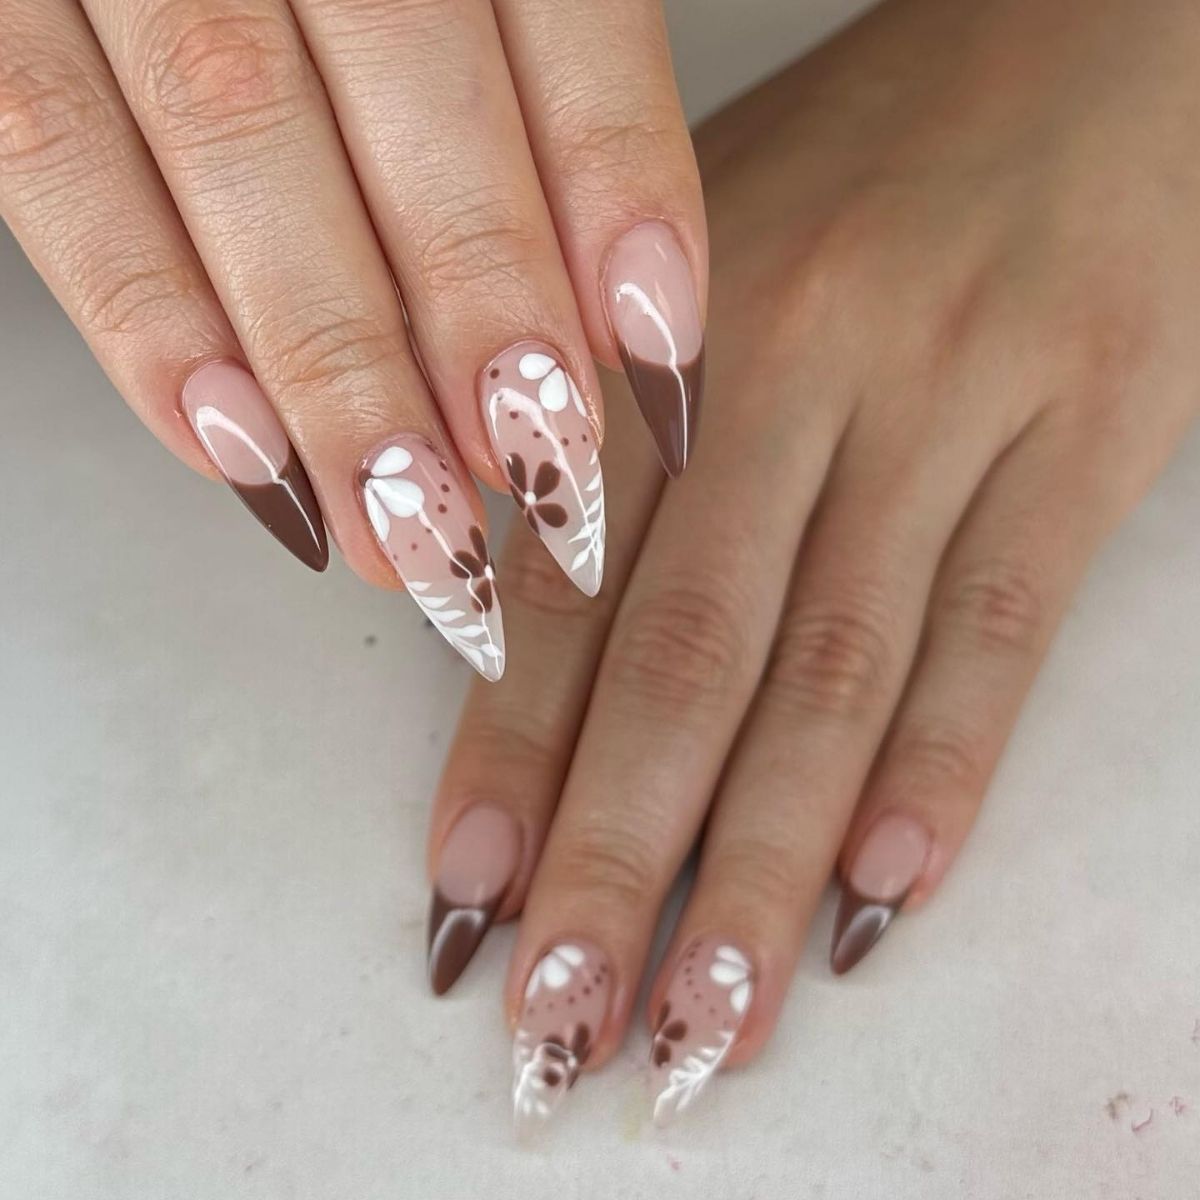
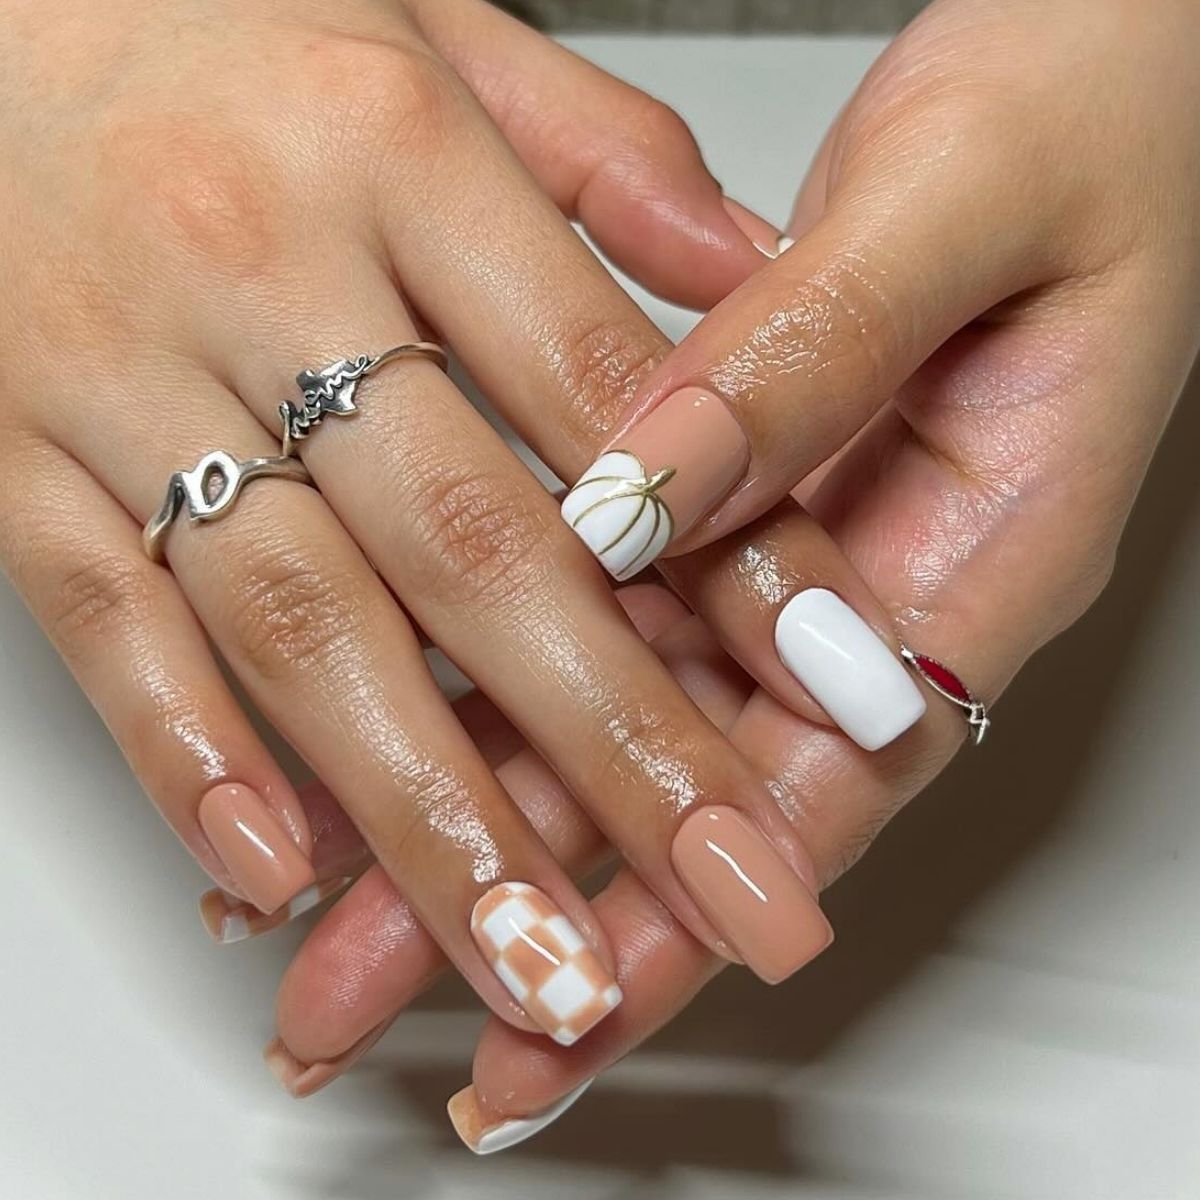
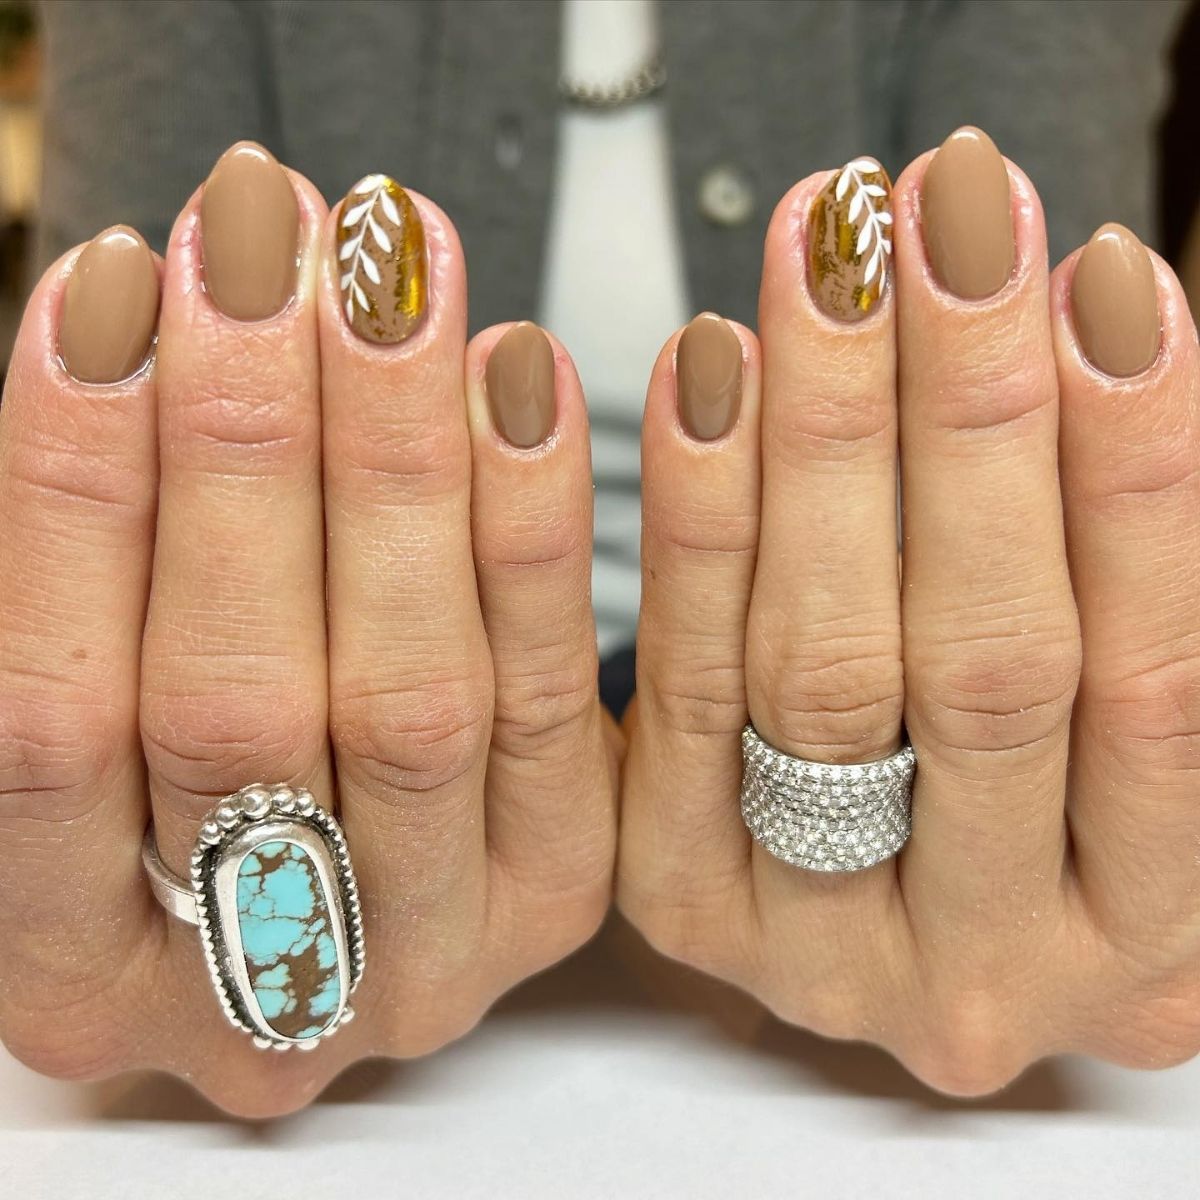
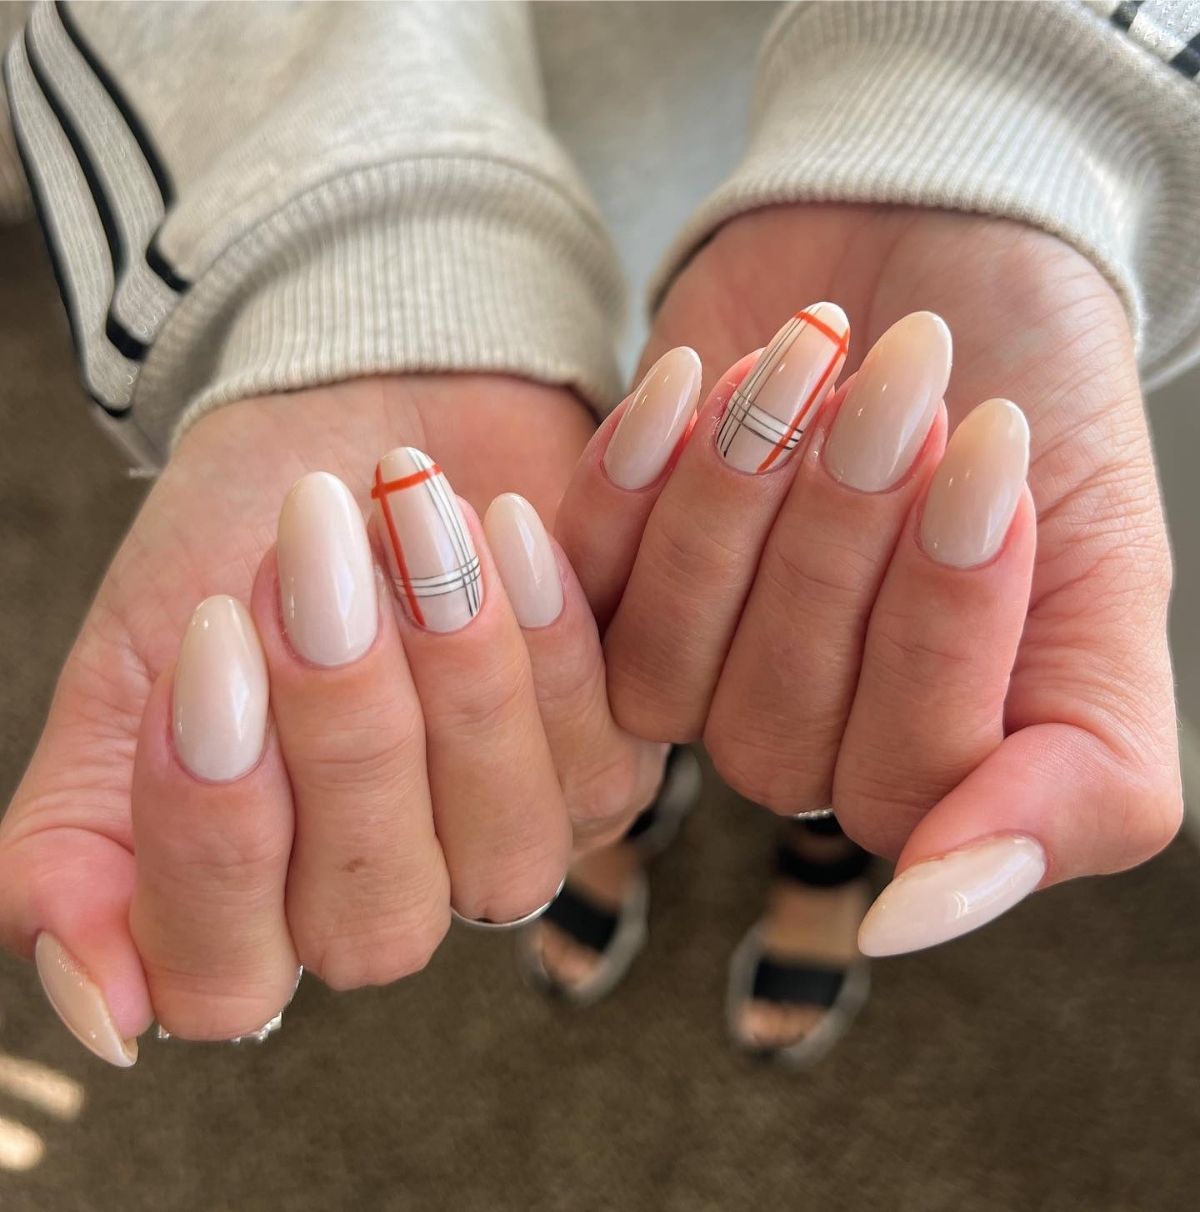
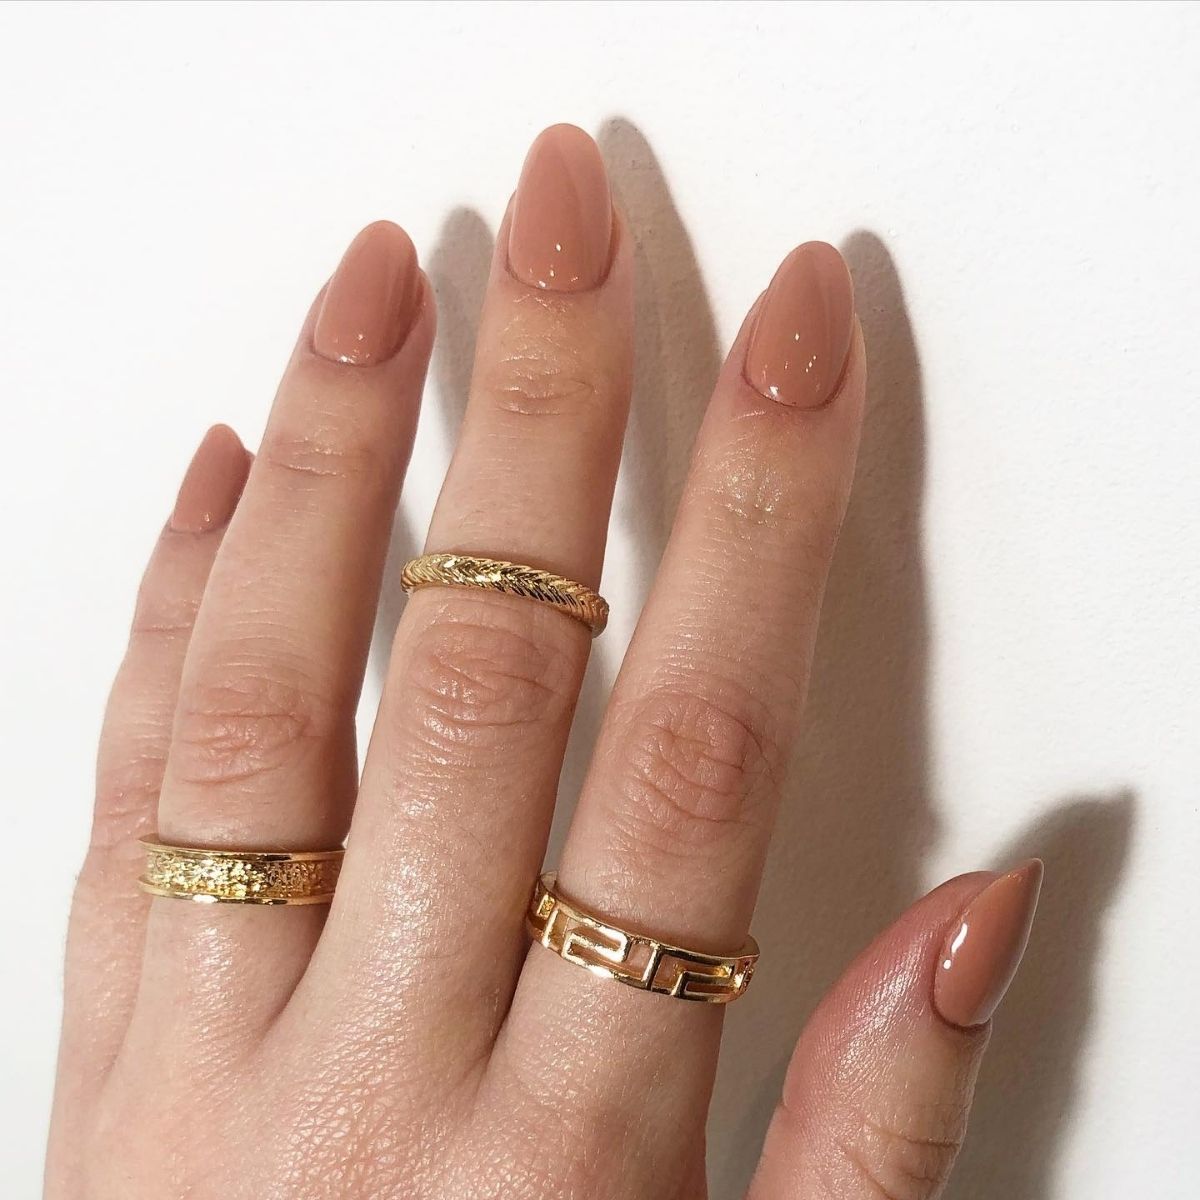
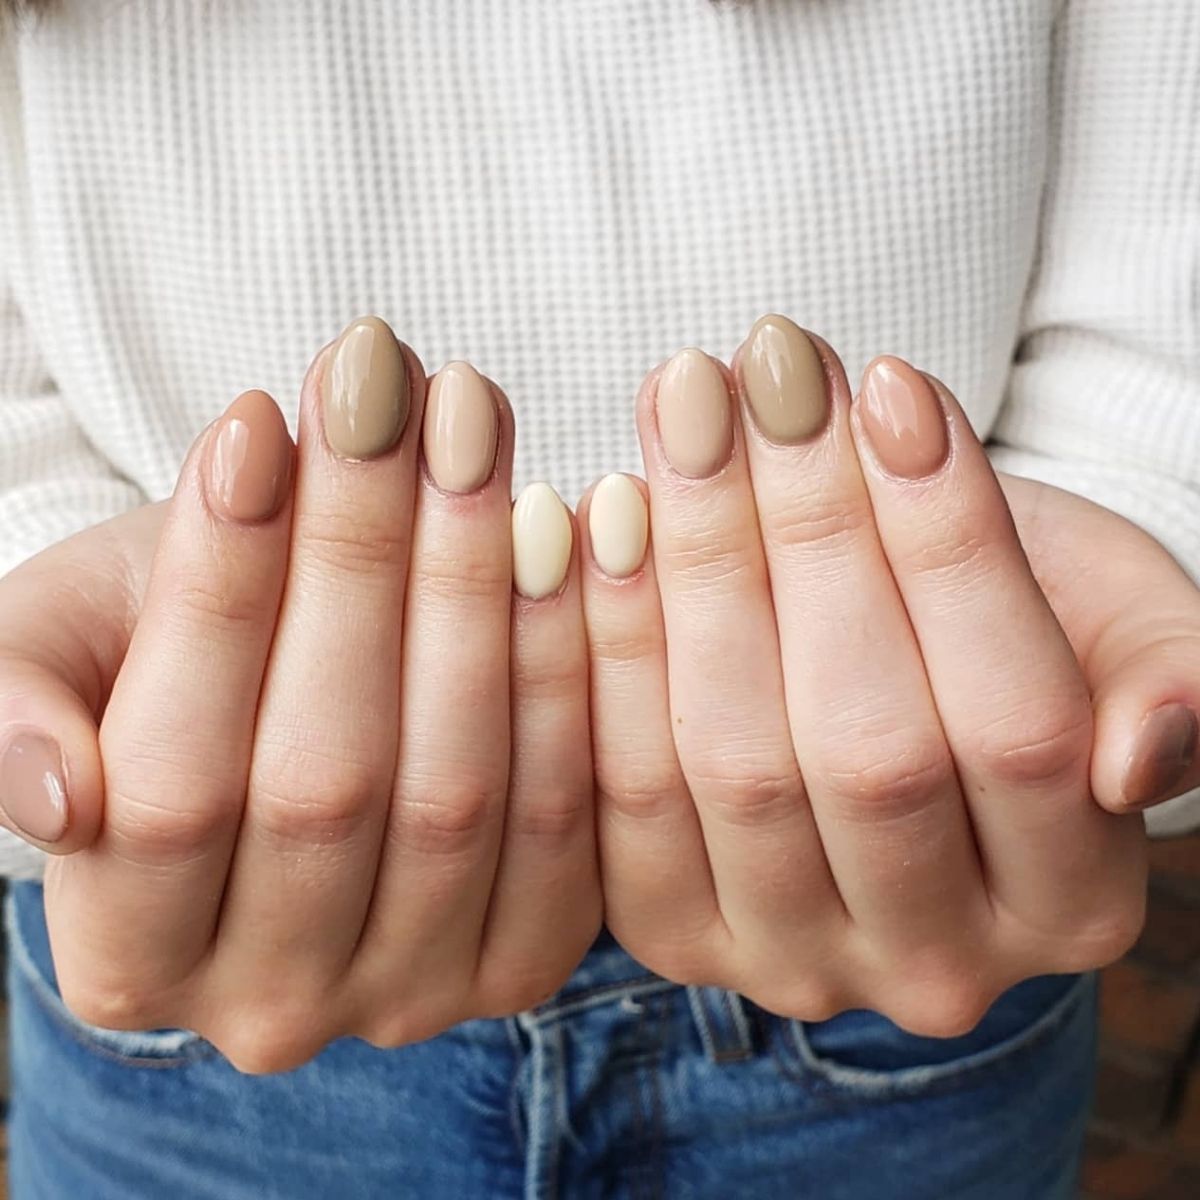
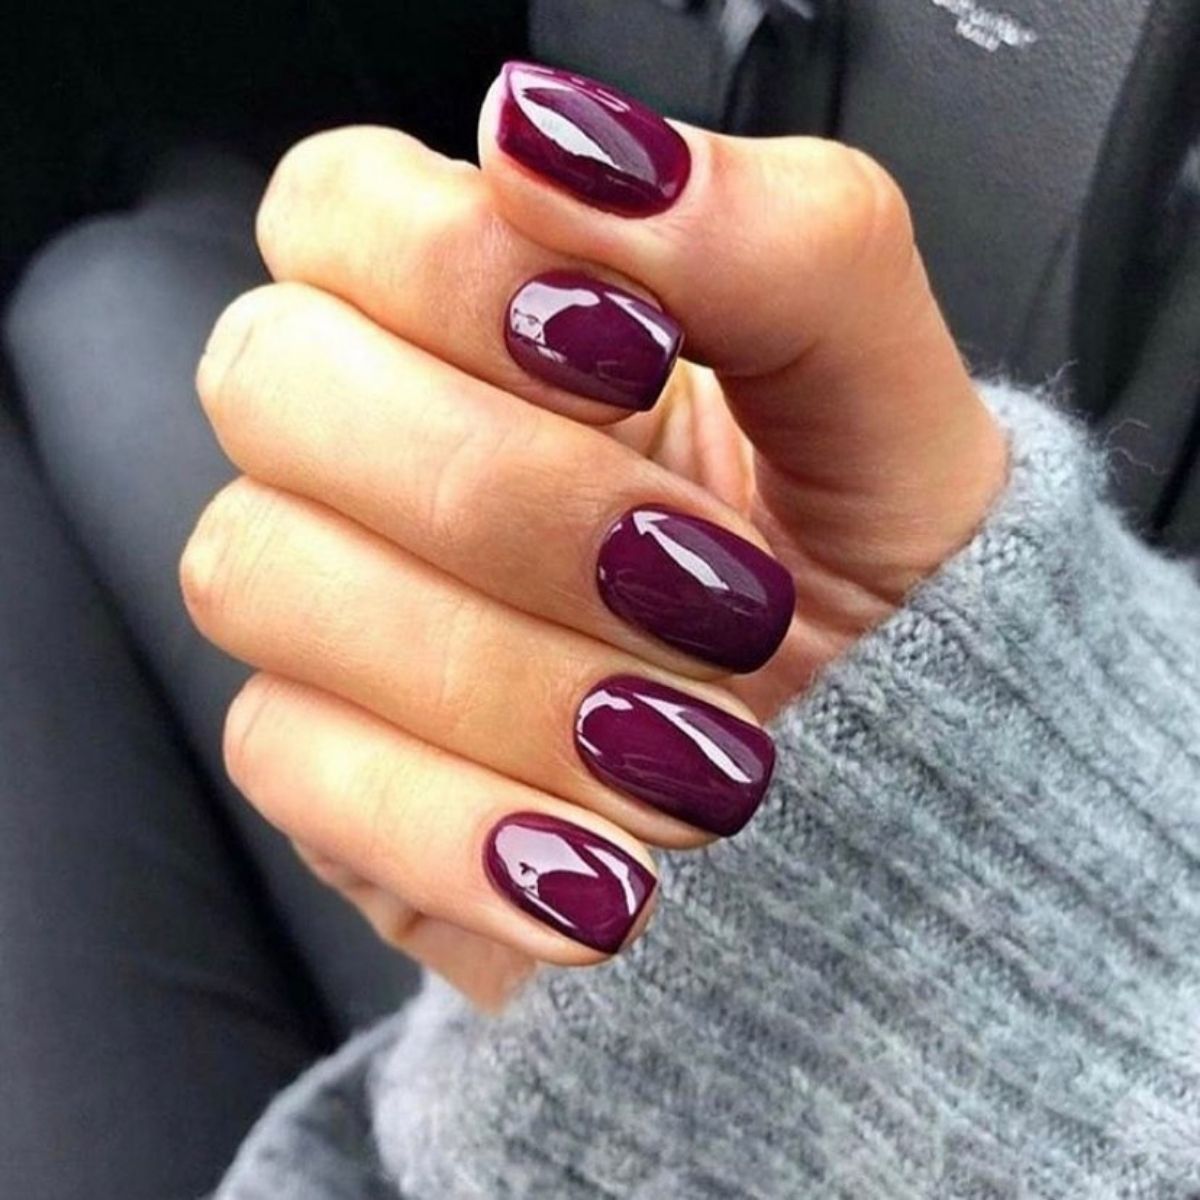
  • 75 Fall Nail Ideas You’ll Love

    Disclosure: Some of the links below are affiliate links. At no cost to you, I will earn a commission if you click through and make a purchase. 

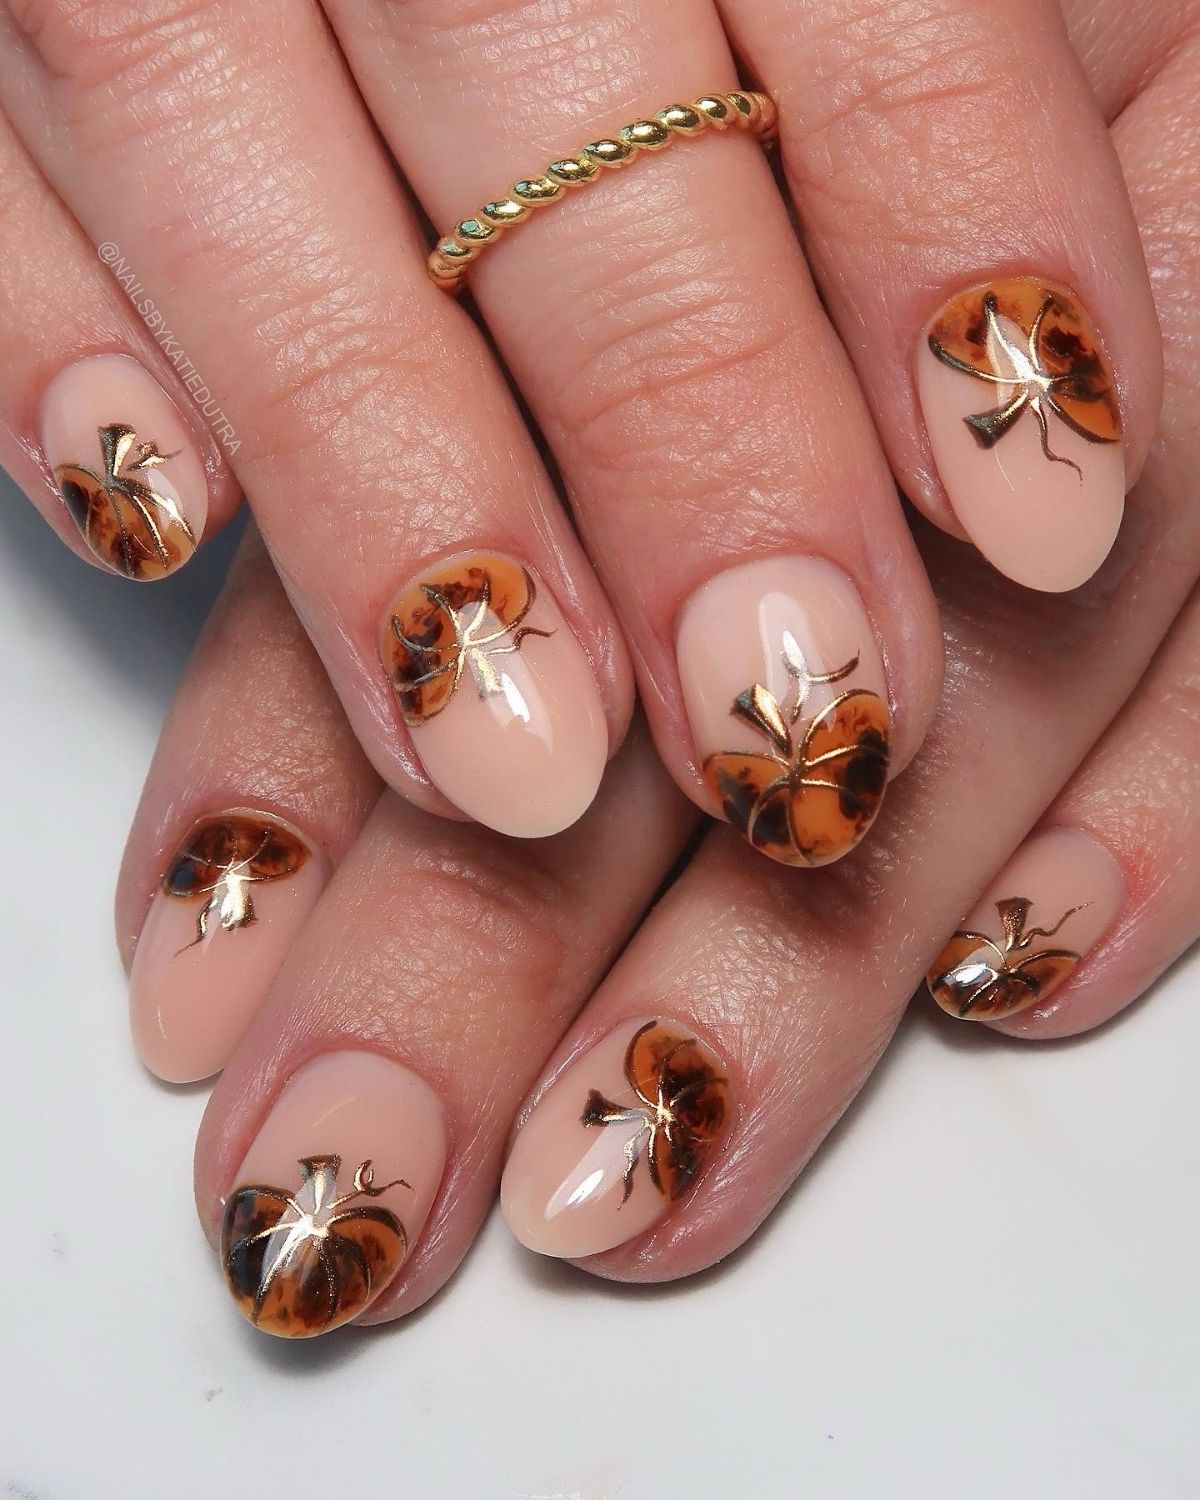
    These are some fall nail ideas you’ll love. They are simple, pretty, and the best colors and themes for fall.

    There are nails that are long, short, pointy, round, square, and more. You are sure to find some nail inspo for this fall that you’ll want to copy for your nails.

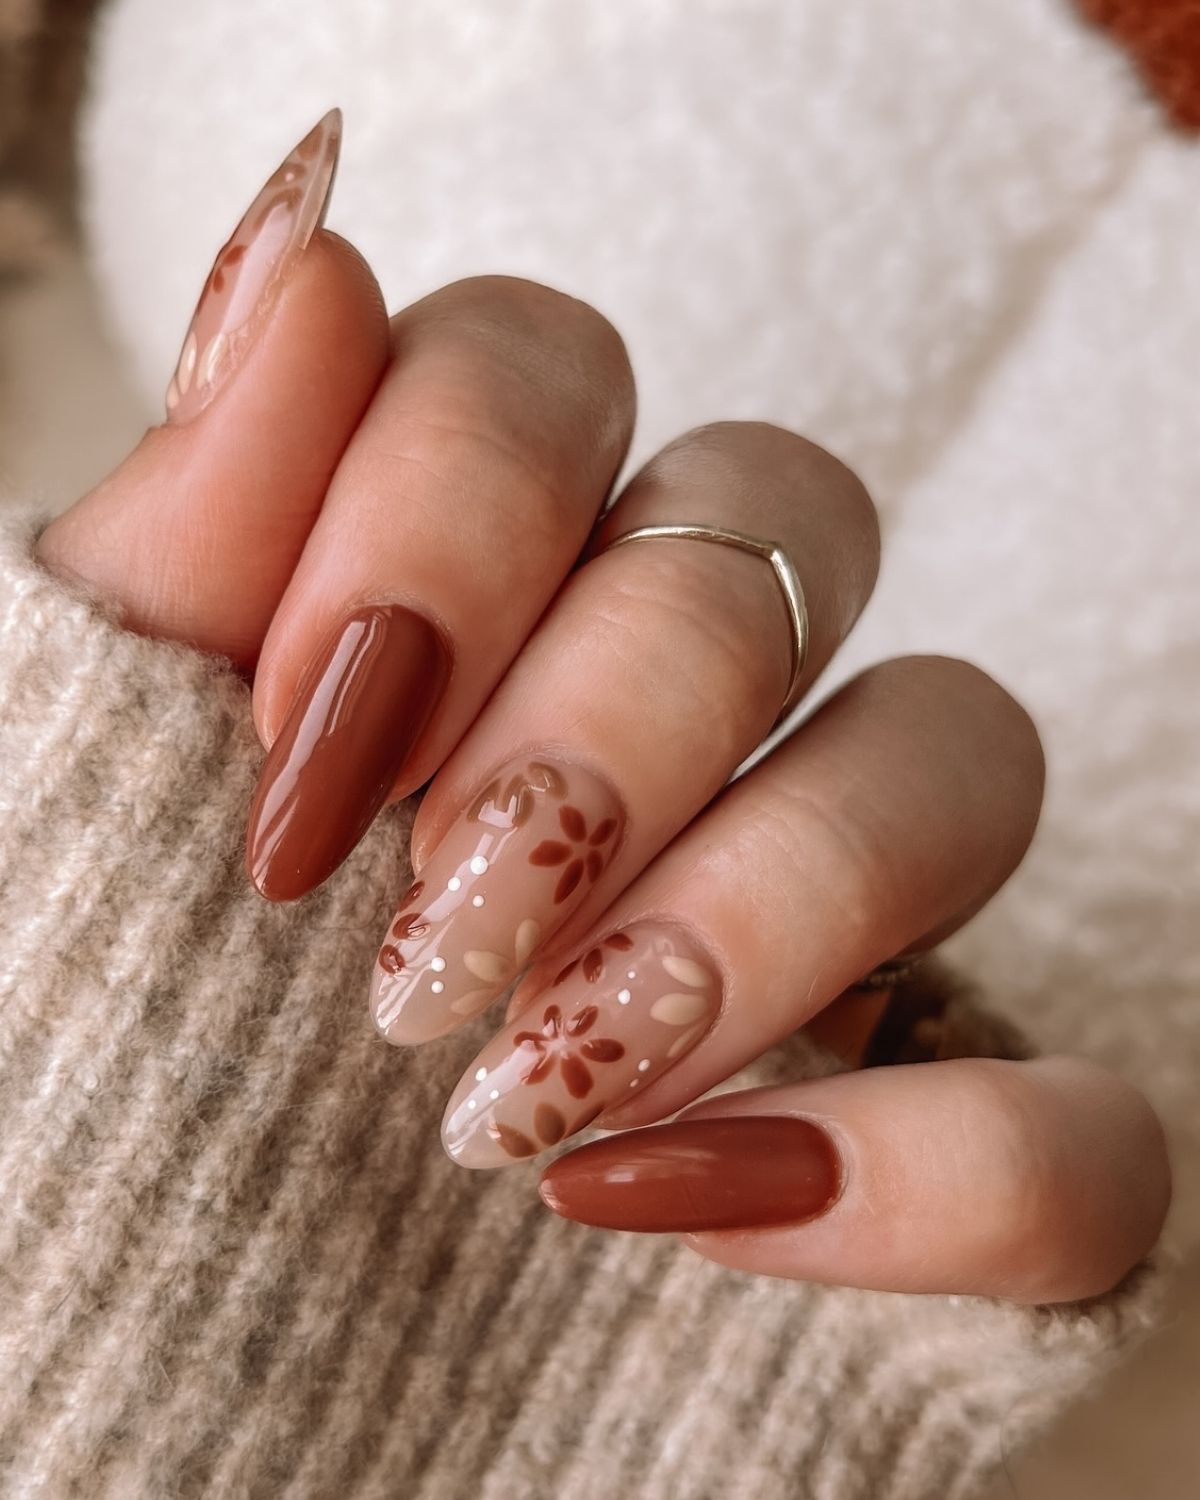
    1. Fall Floral Nails

    Fall Floral Nails

    image credit

    These fall nails are a reddish brown color and have a floral design on them. They are long and round shaped.

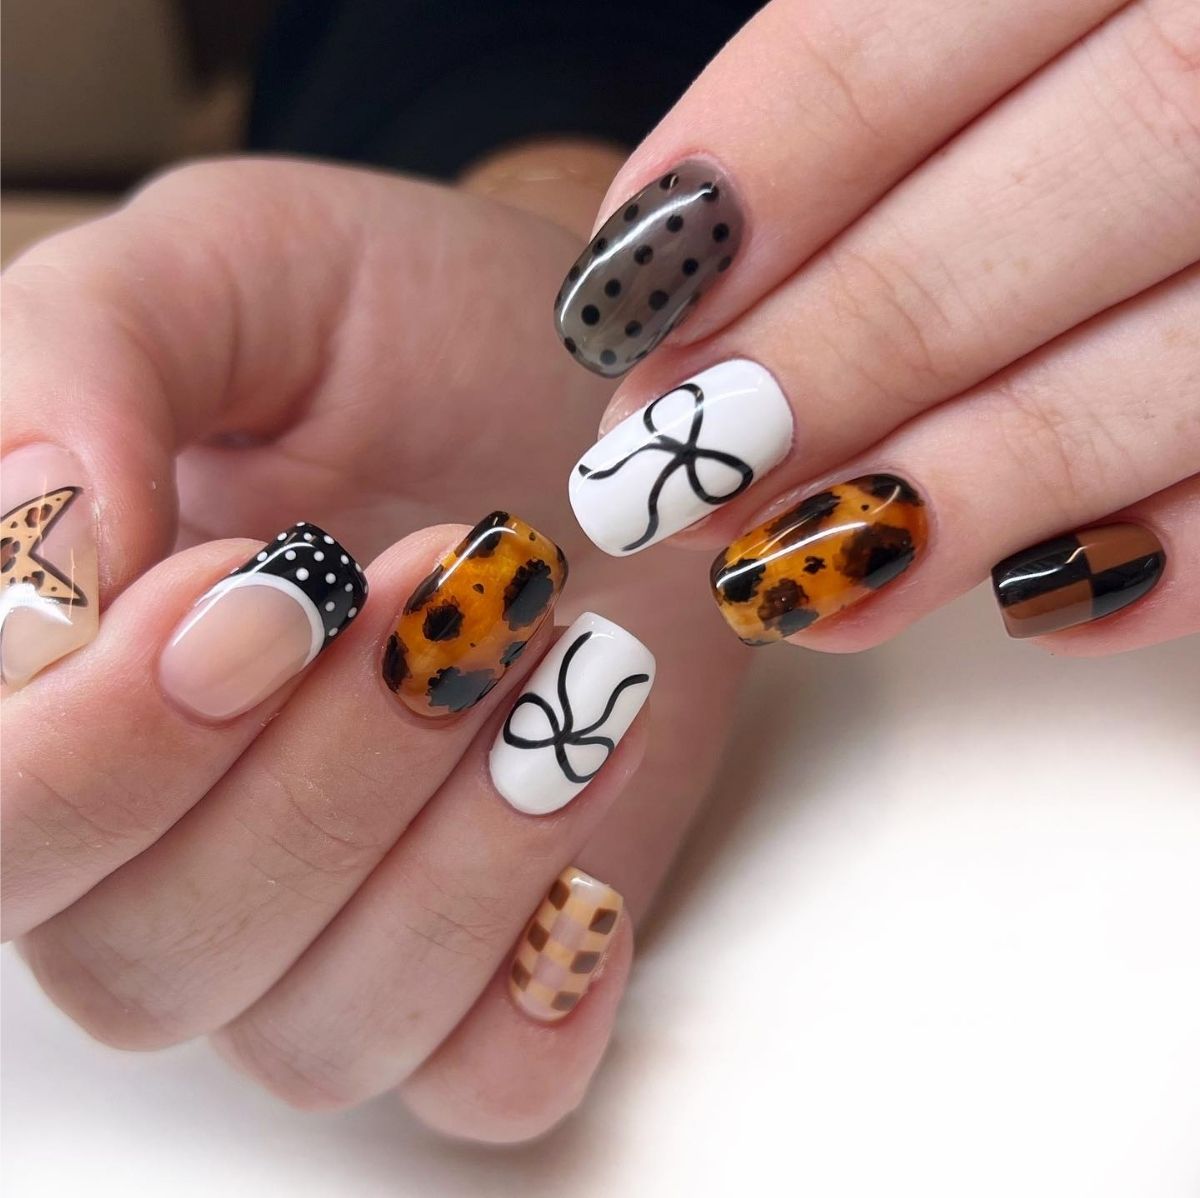
    2. Nails With A Bow

    Nails With A Bow

    image credit

    These nails are square shaped and medium length. The designs are bows, checker print, animal print, and polka dots.

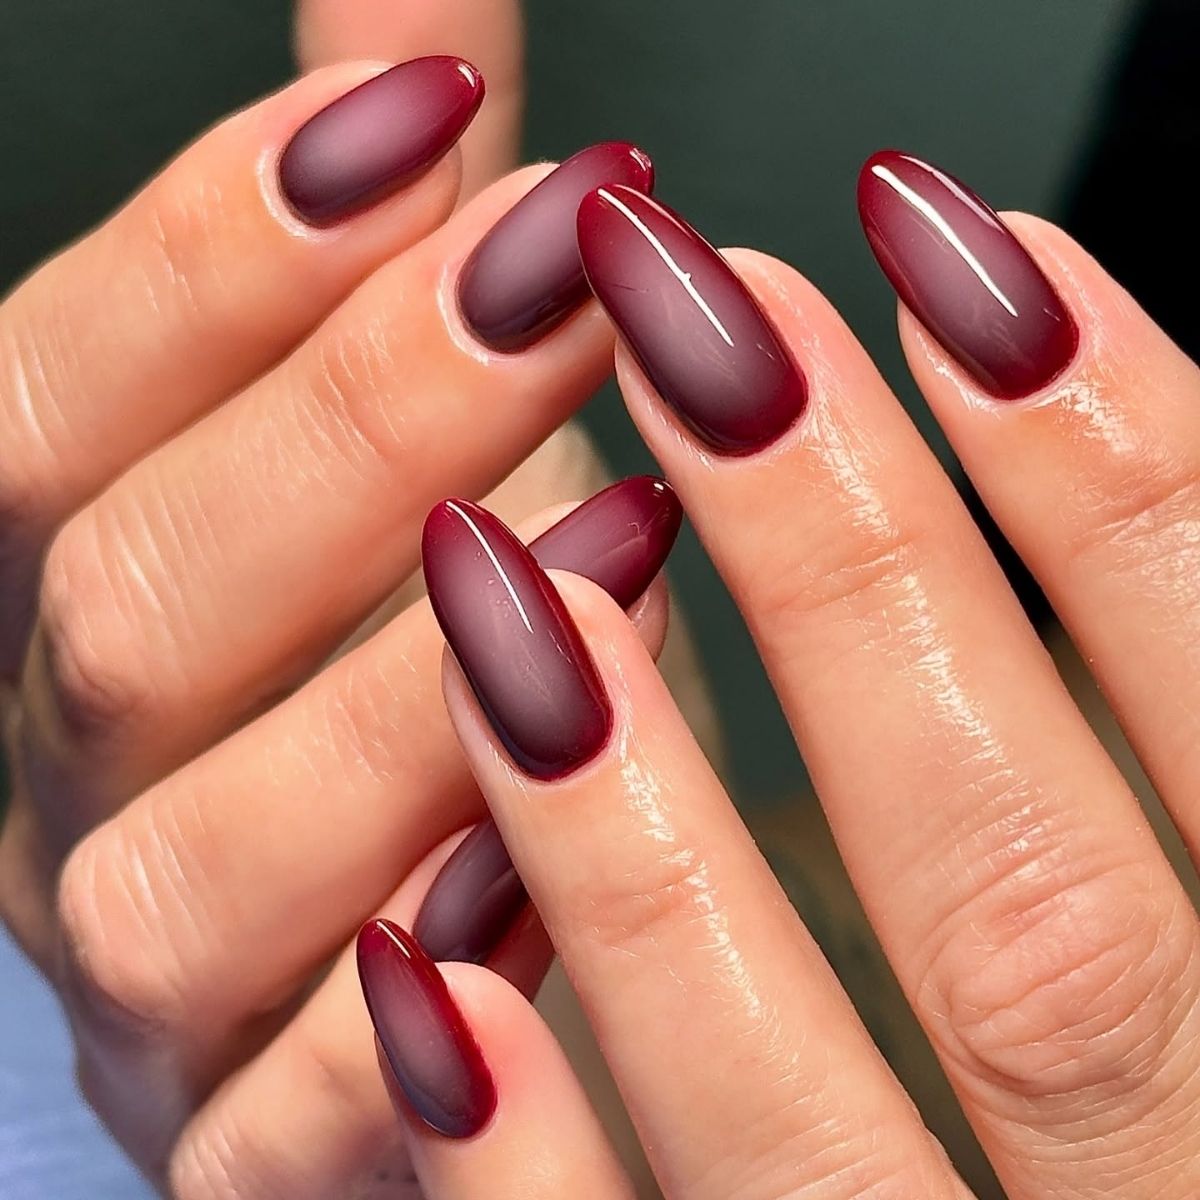
    3. Long Burgundy Nails

    Long Burgundy Nails

    image credit

    These nails are beautiful for fall. They are long, round, and solid burgundy colored.

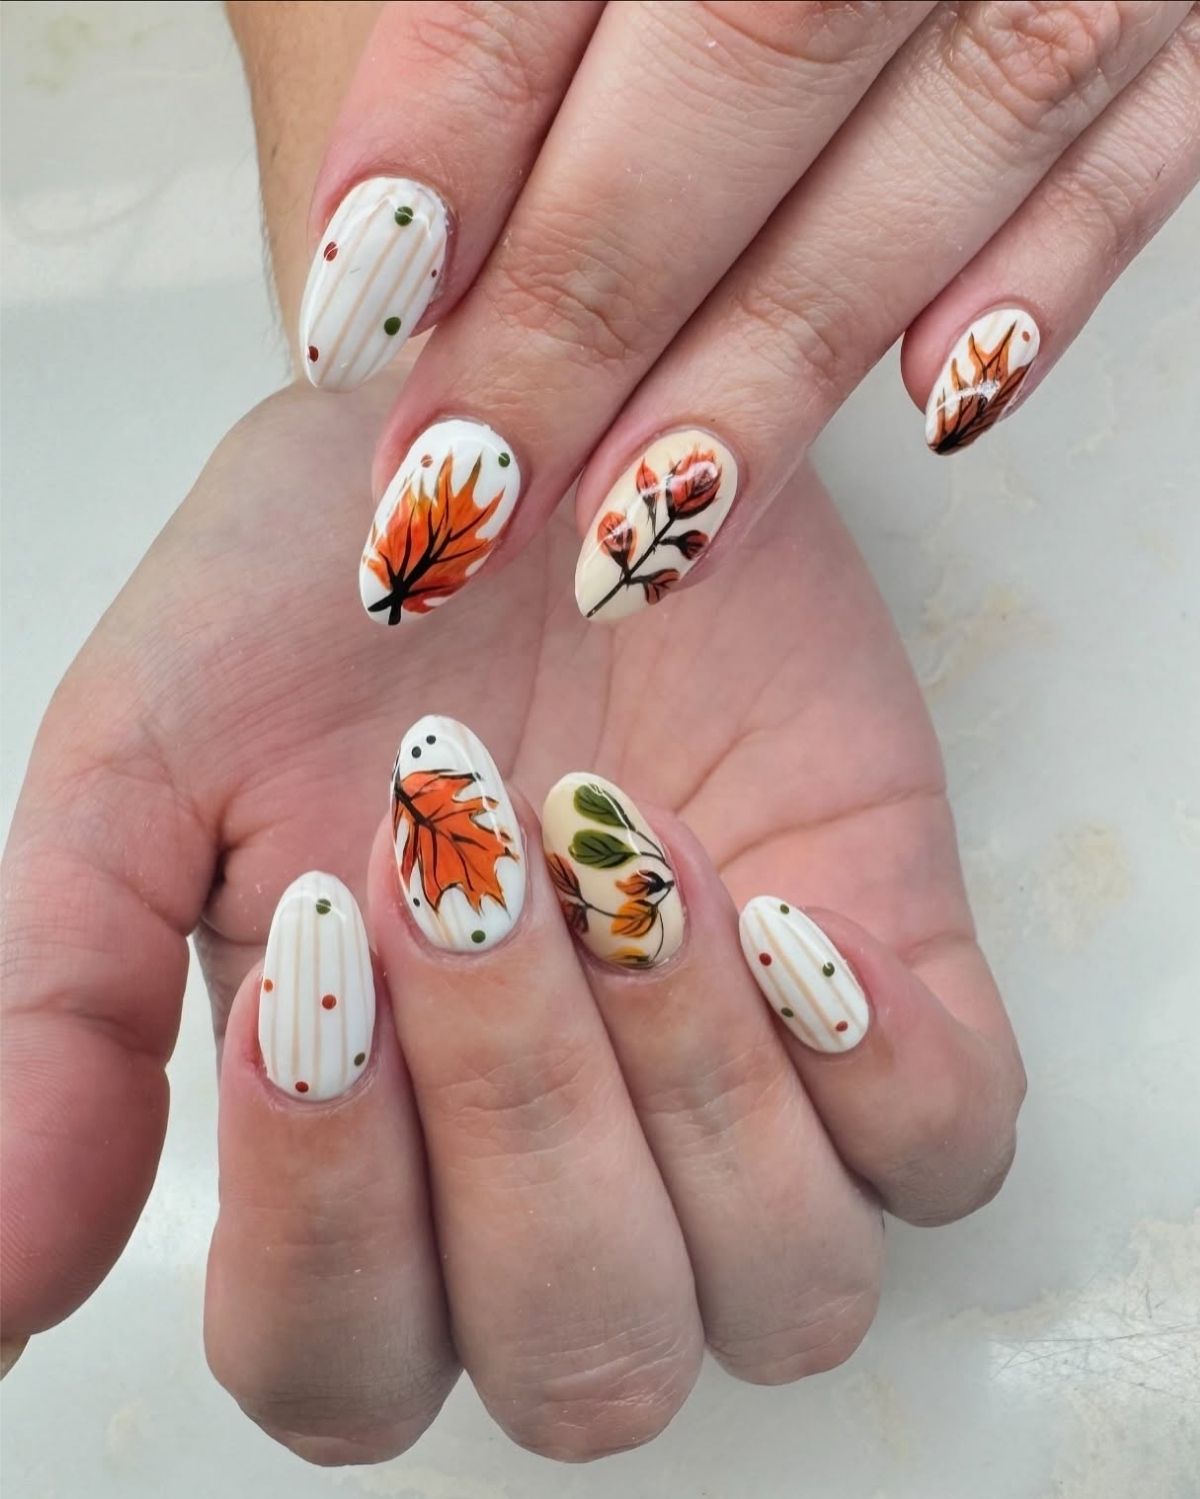
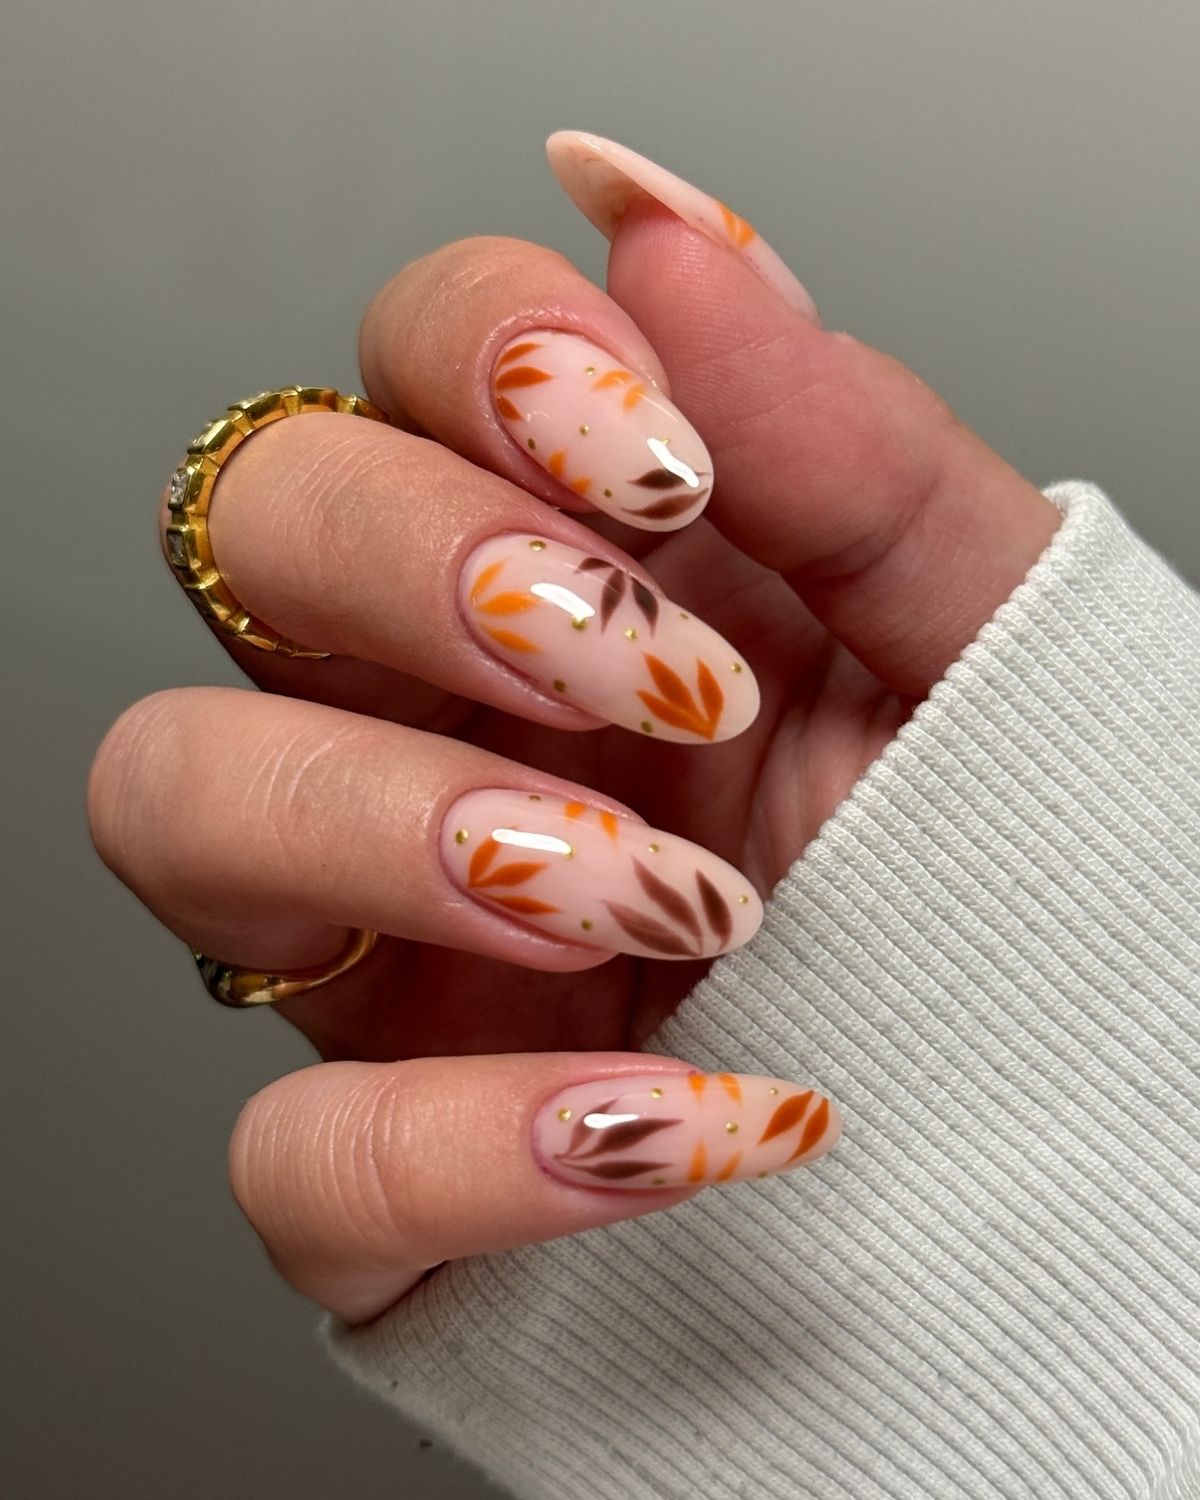
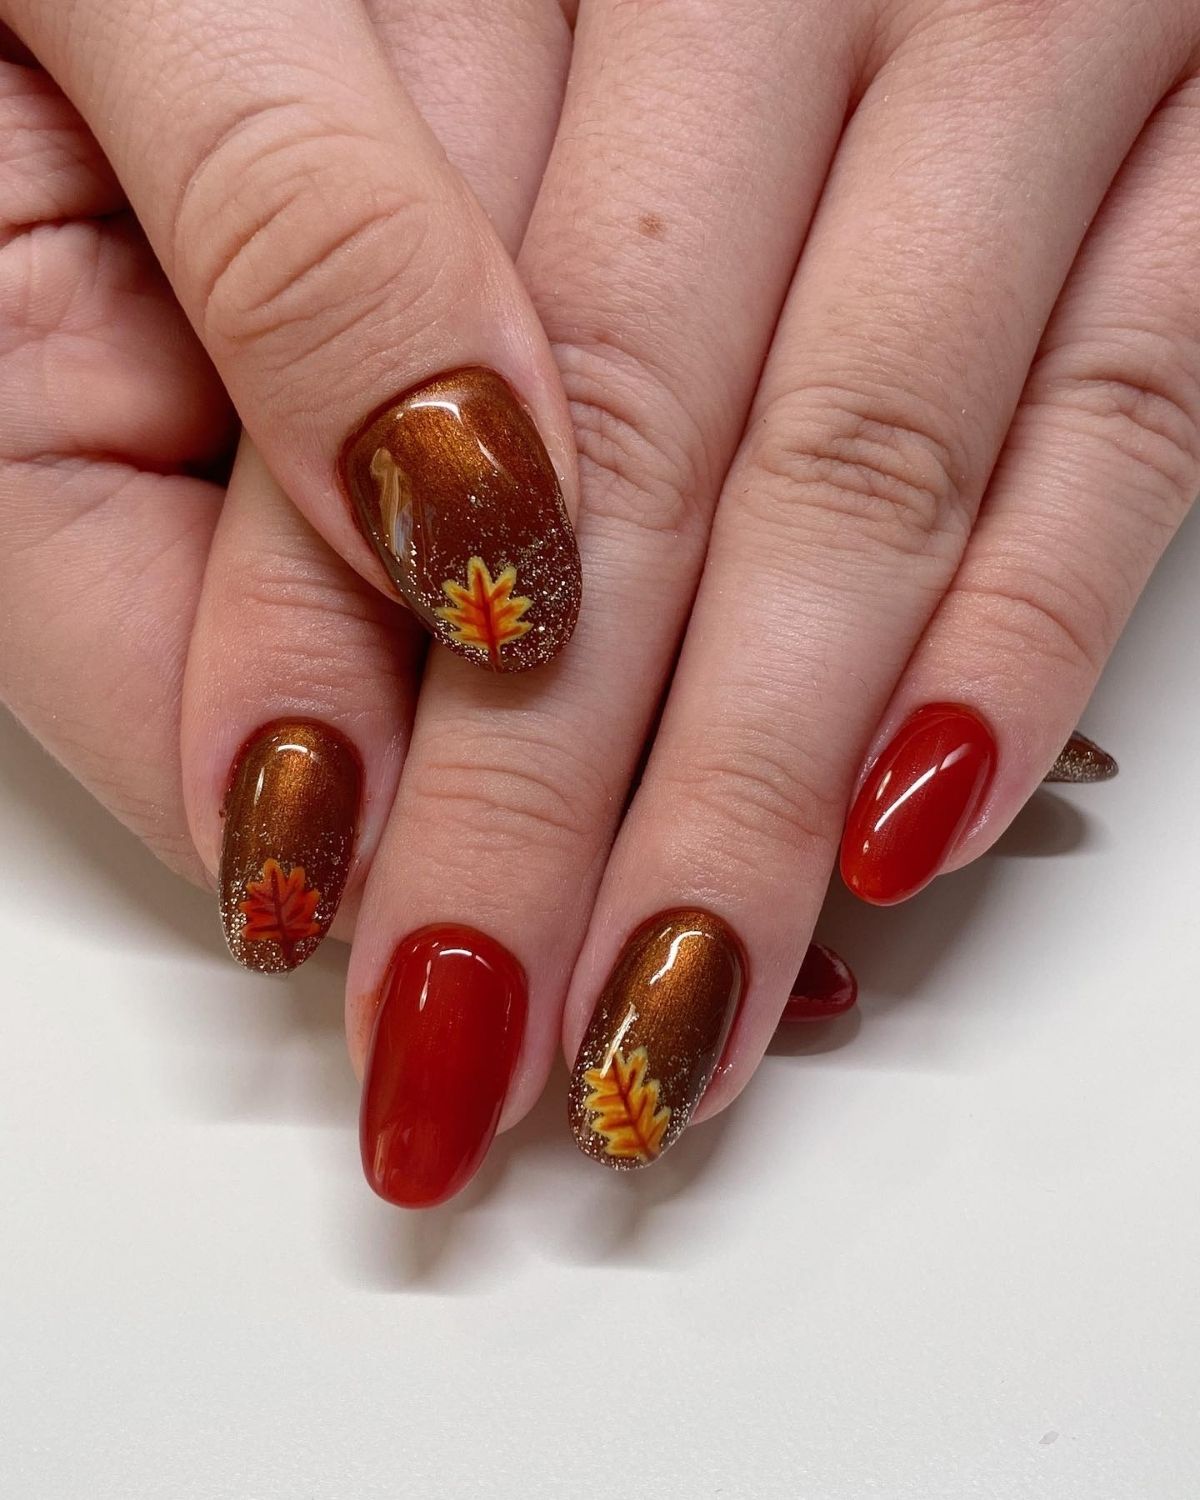
    4. Fall Leaves Nails

    Fall Leaves Nails

    image credit

    If you’re someone who can’t get enough of the leaves in the fall, then these are the nails for you. They are round and medium length with fall colored leaves painted on them.

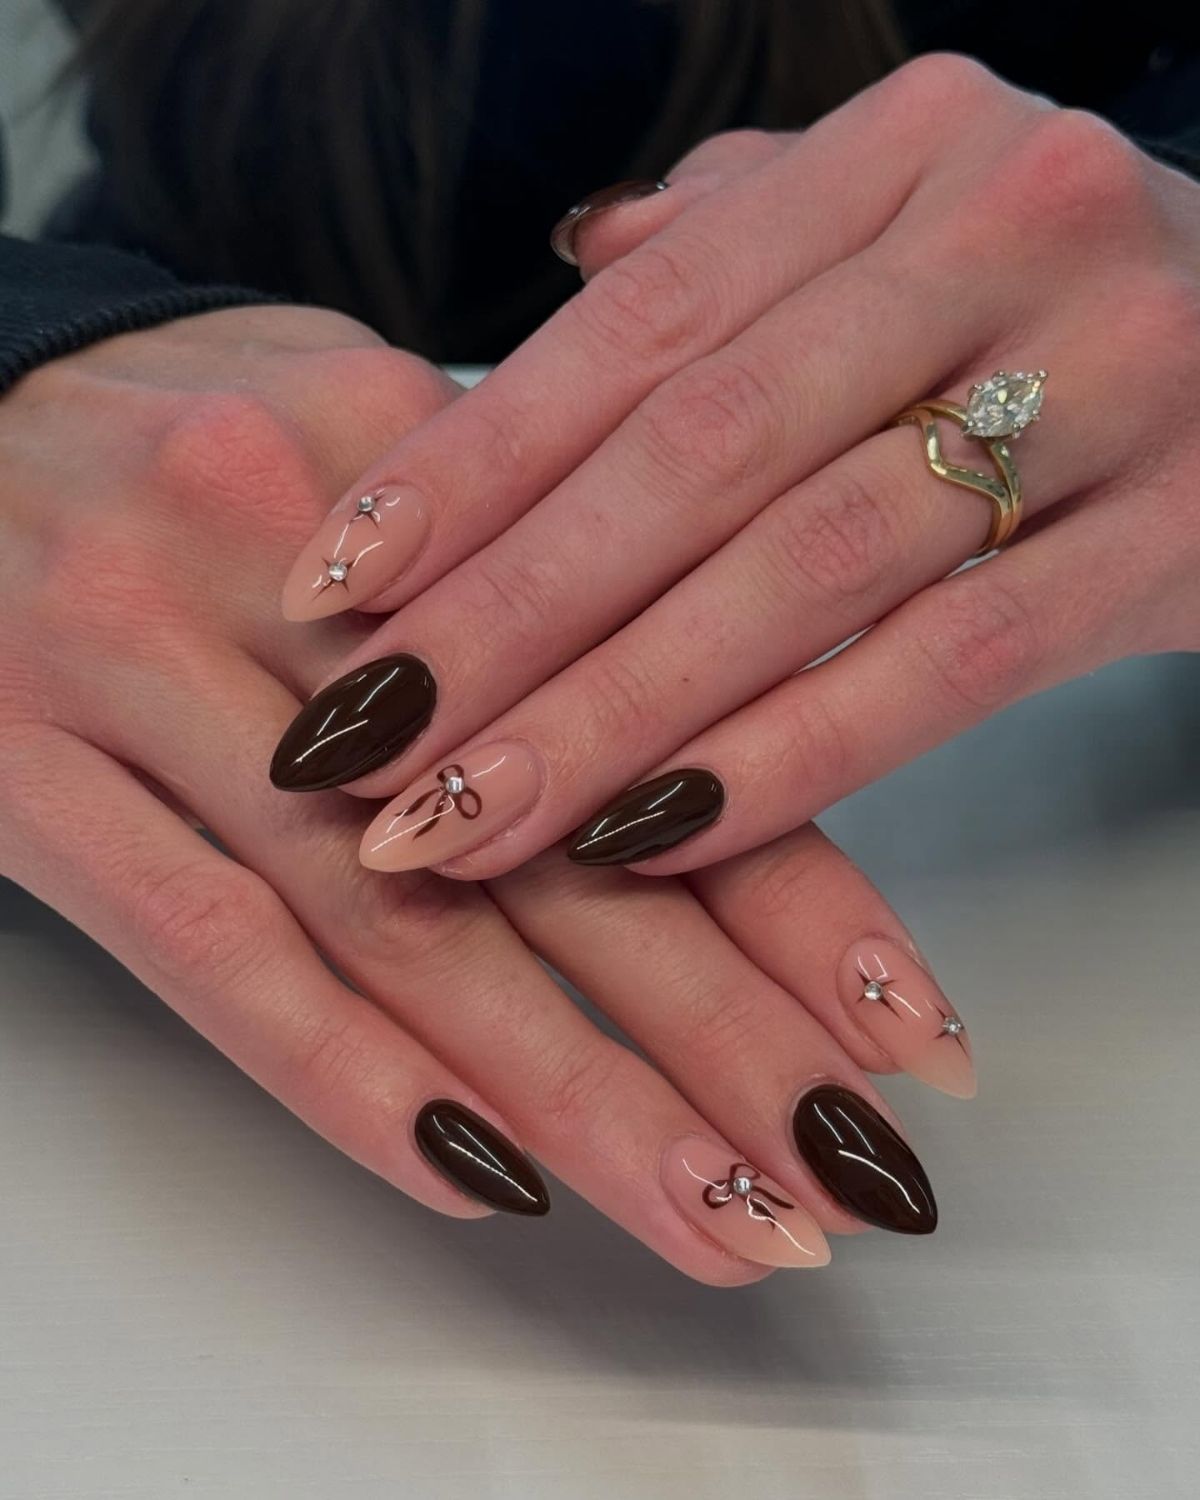
    5. Tan and Brown Nails

    Tan and Brown Nails

    image credit

    These nails are almond shaped and medium length. Some nails are brown and others are tan with bows and jewels on them.

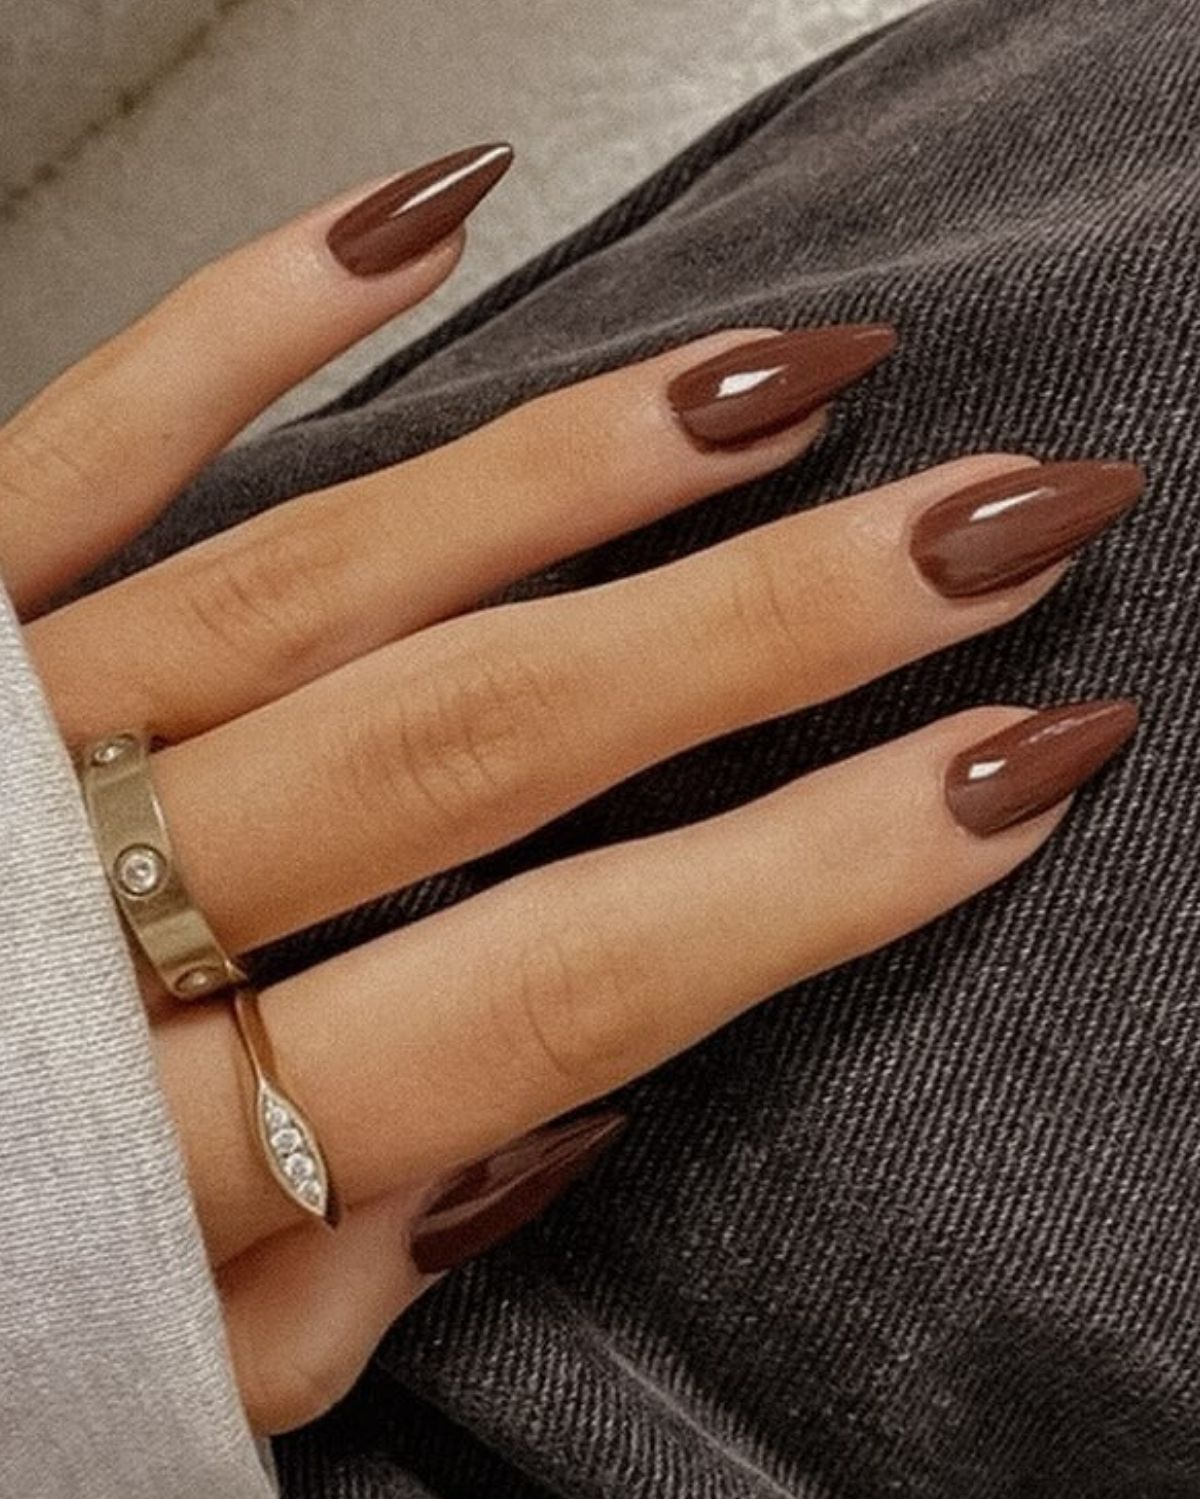
    6. Long Brown Nails

    Long Brown Nails

    image credit

    These nails are great if you are not into bright colors since they are solid brown. They are long and somewhat pointy.

    7. Autumn Leaves Nails

    Autumn Leaves Nails

    image credit

    These autumn leaves nails are beautiful and have gold accents on them. They are longer in length and round shaped.

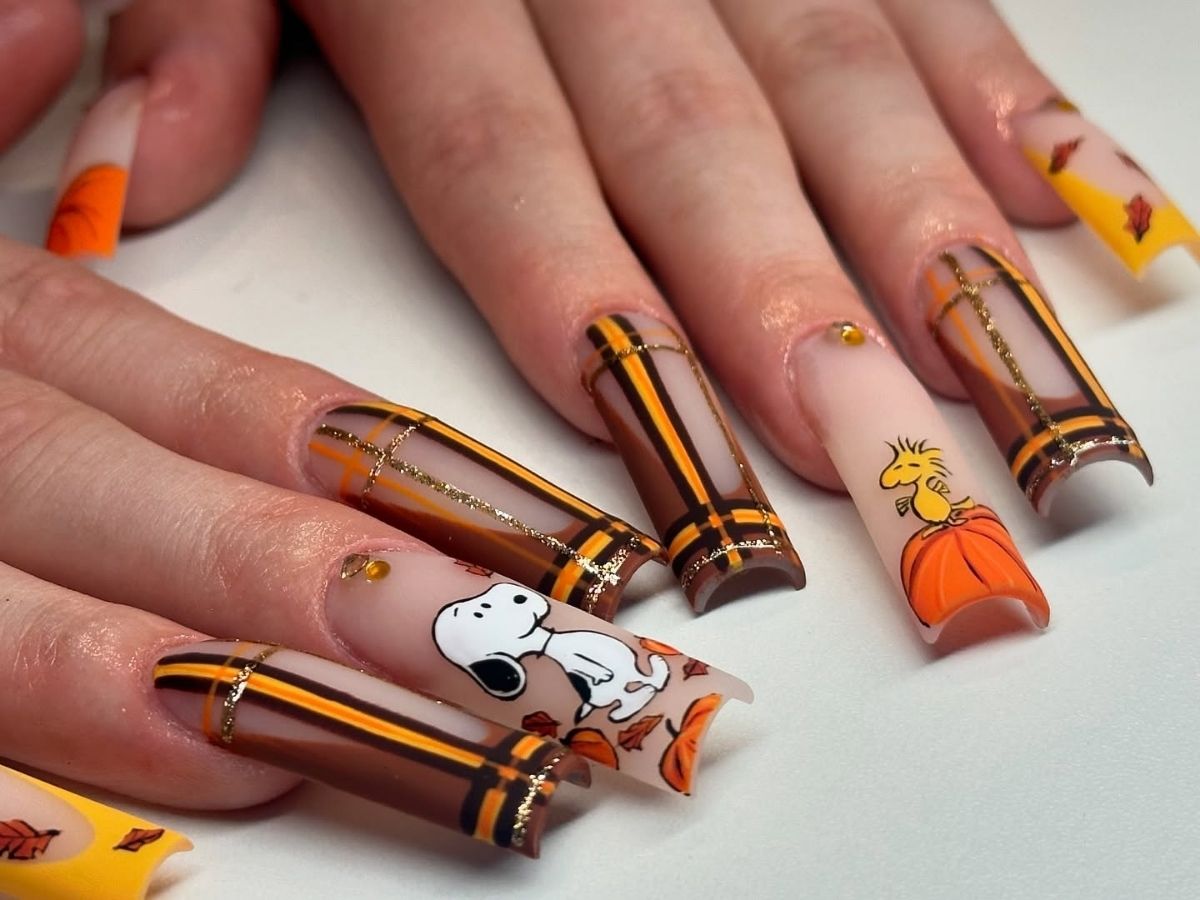
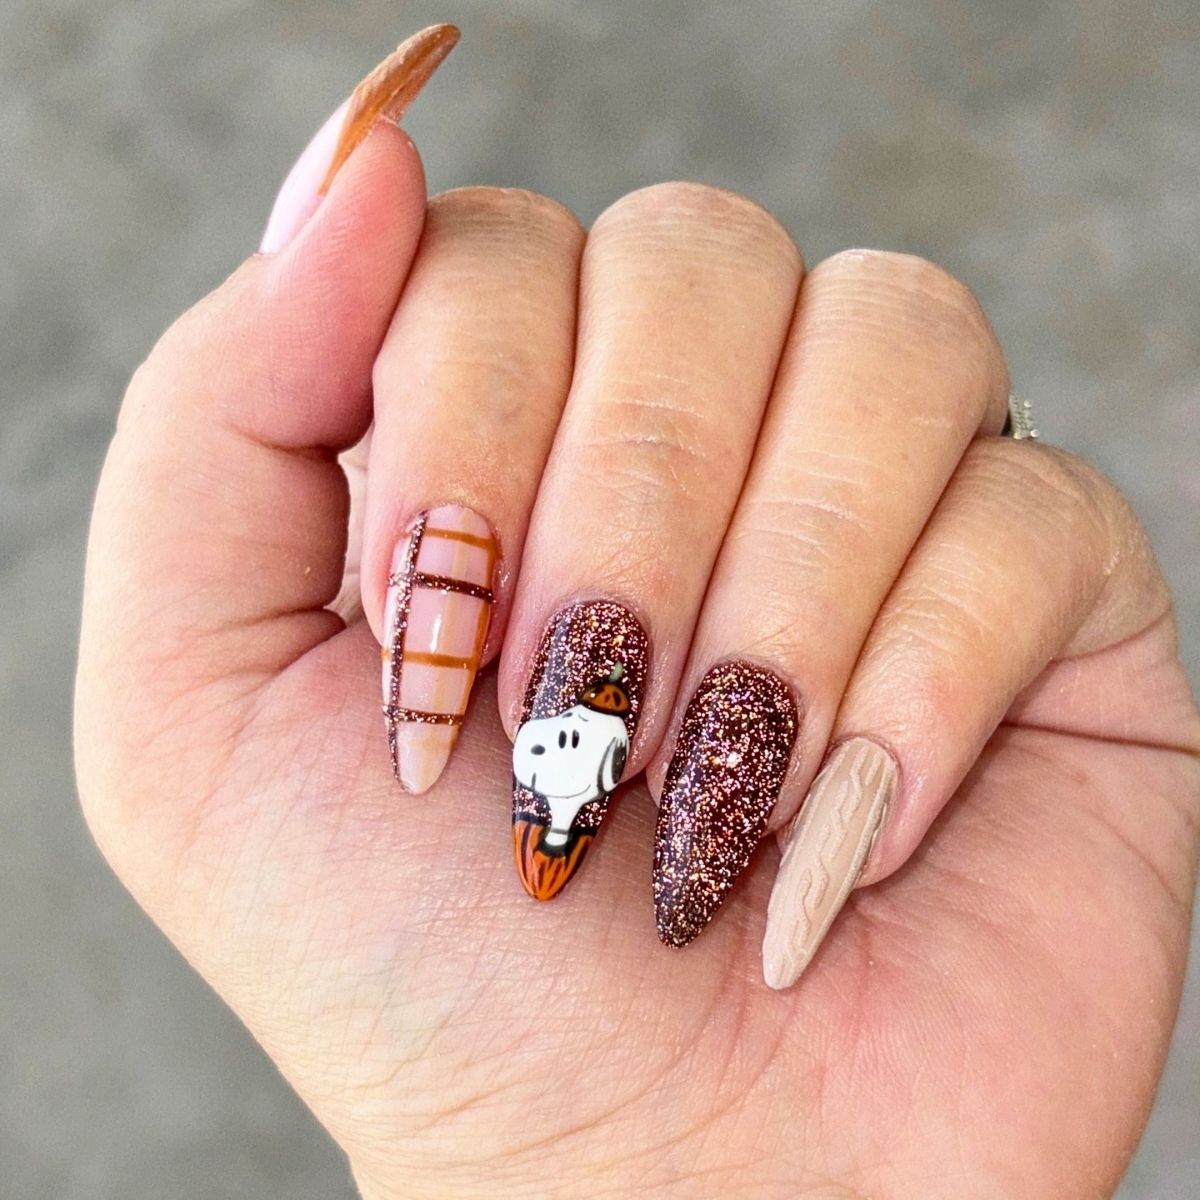
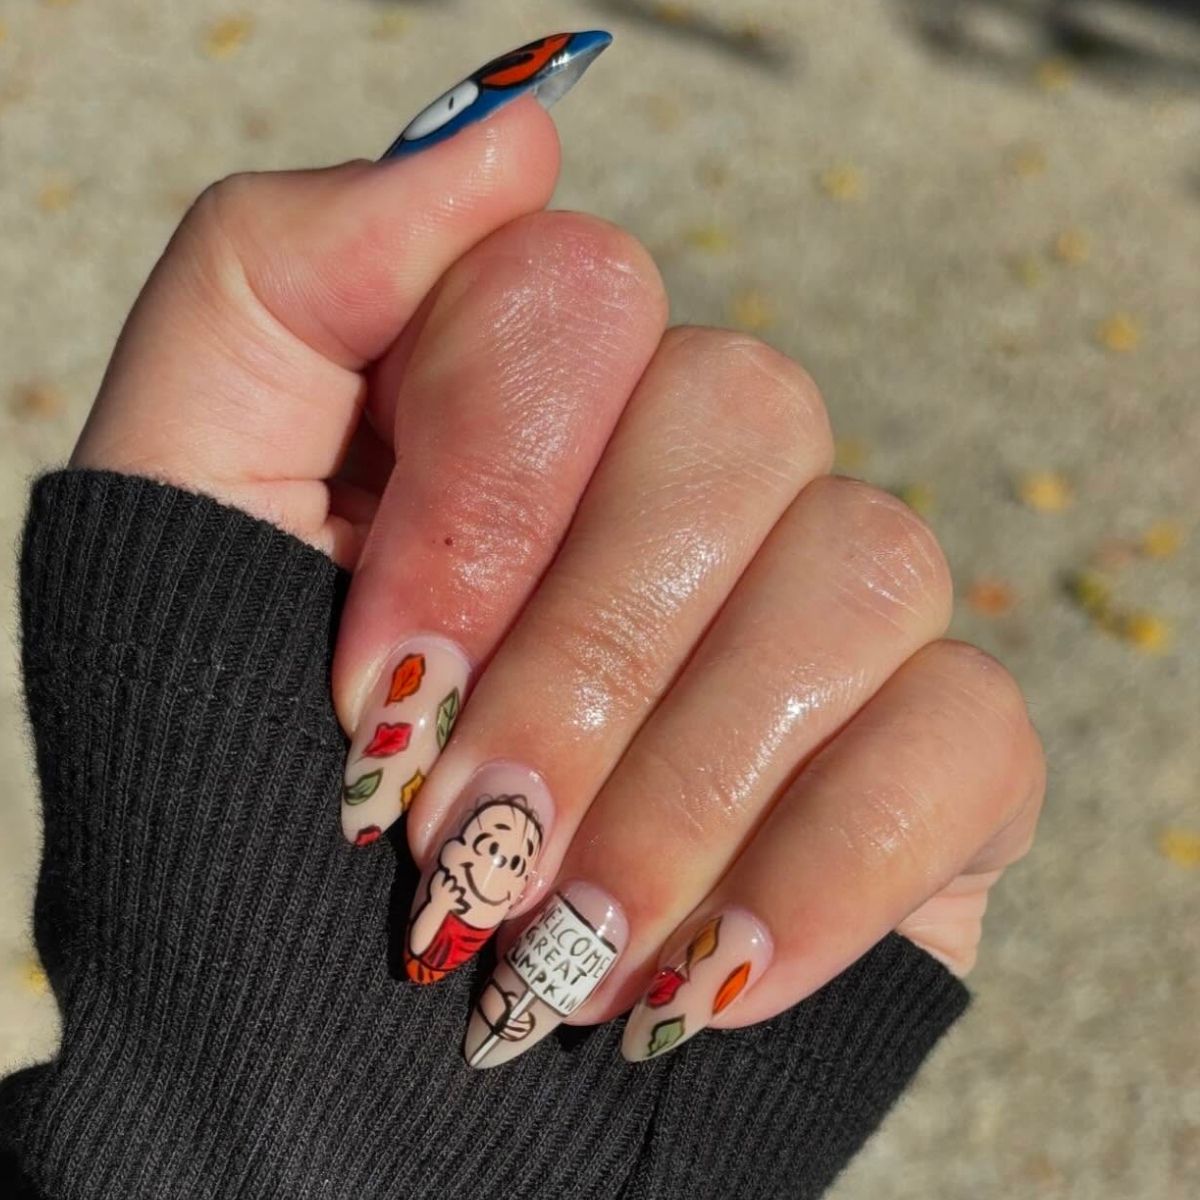
    8. Snoopy Nails

    Snoopy Nails

    image credit

    If you’re a fan of It’s The Great Pumpkin Charlie Brown, then you can draw inspiration from these nails.

    They are very long and square shaped. They have Snoopy, Woodstock, and more designs on them.

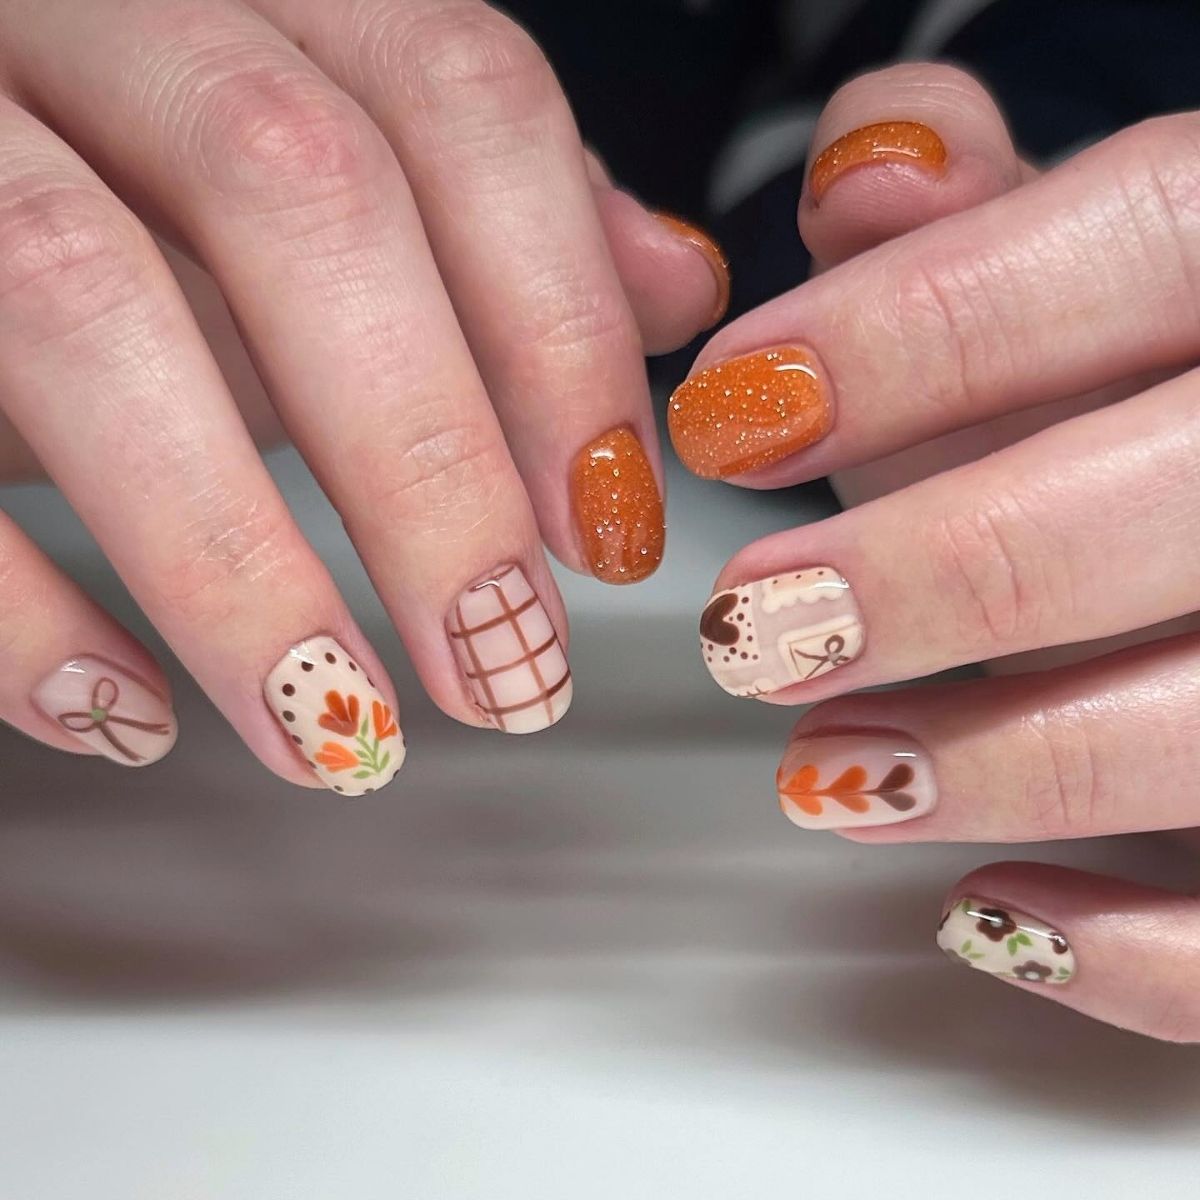
    9. Short Fall Nails

    Short Fall Nails

    image credit

    These fall nails are short and round shaped. They have orange glitter, leaves, bows, and more on them.

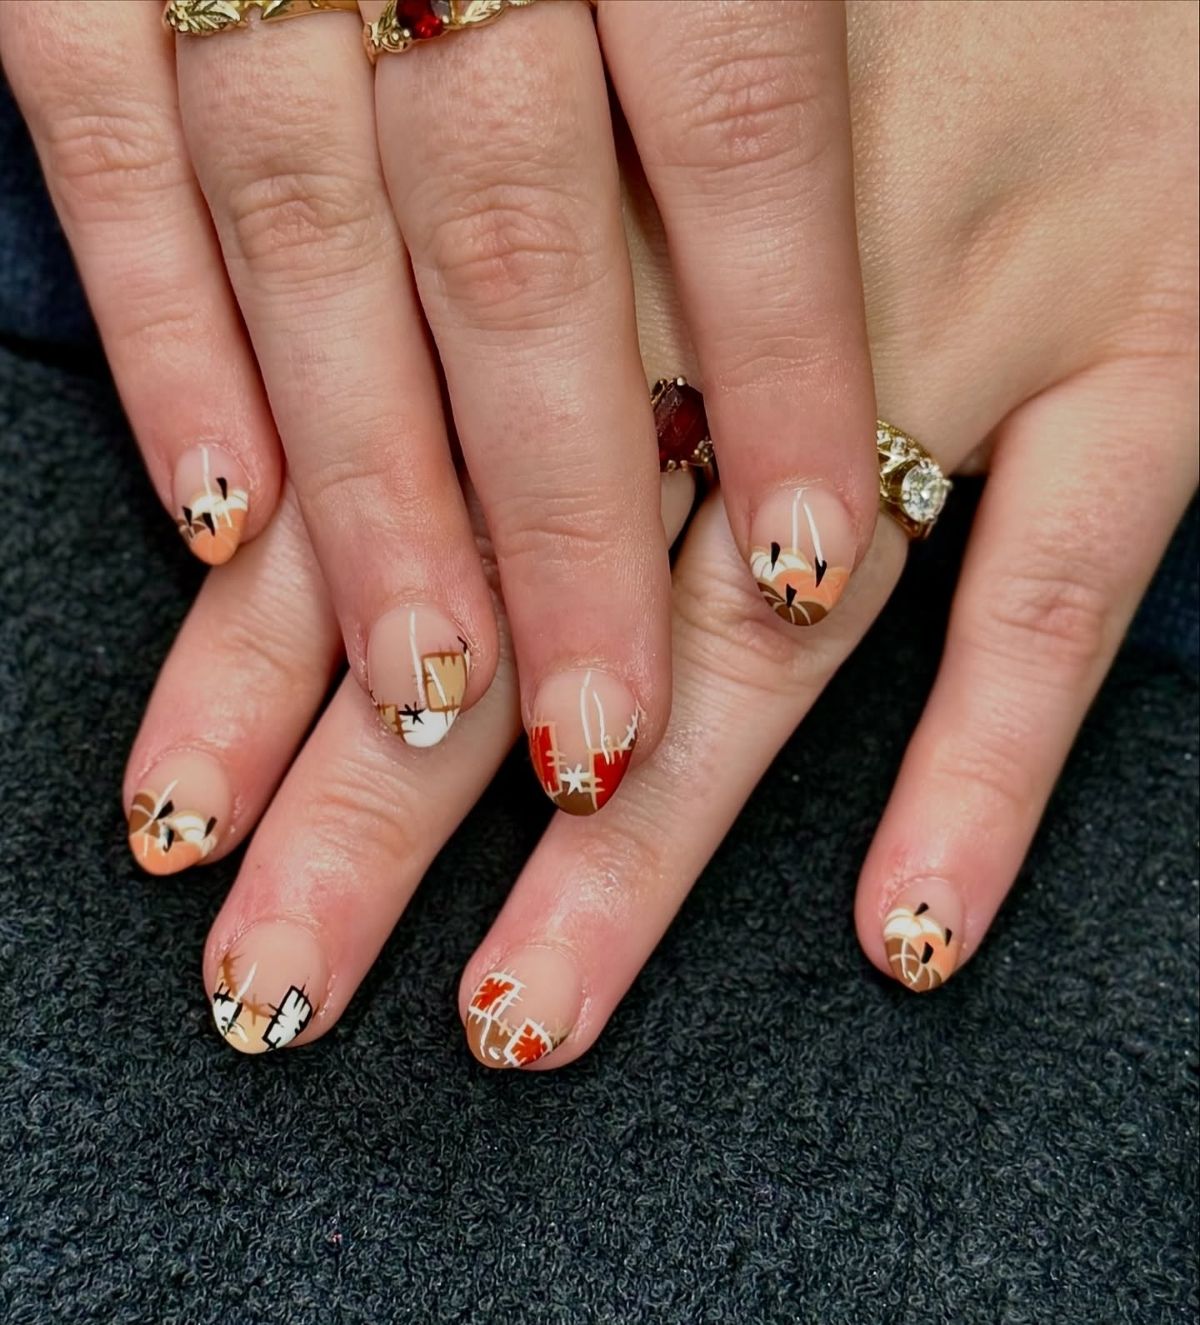
    10. Scarecrow Nails

    Scarecrow Nails

    image credit

    These fall nails are short and round shaped. The tips have scarecrow patchwork and pumpkins on them.

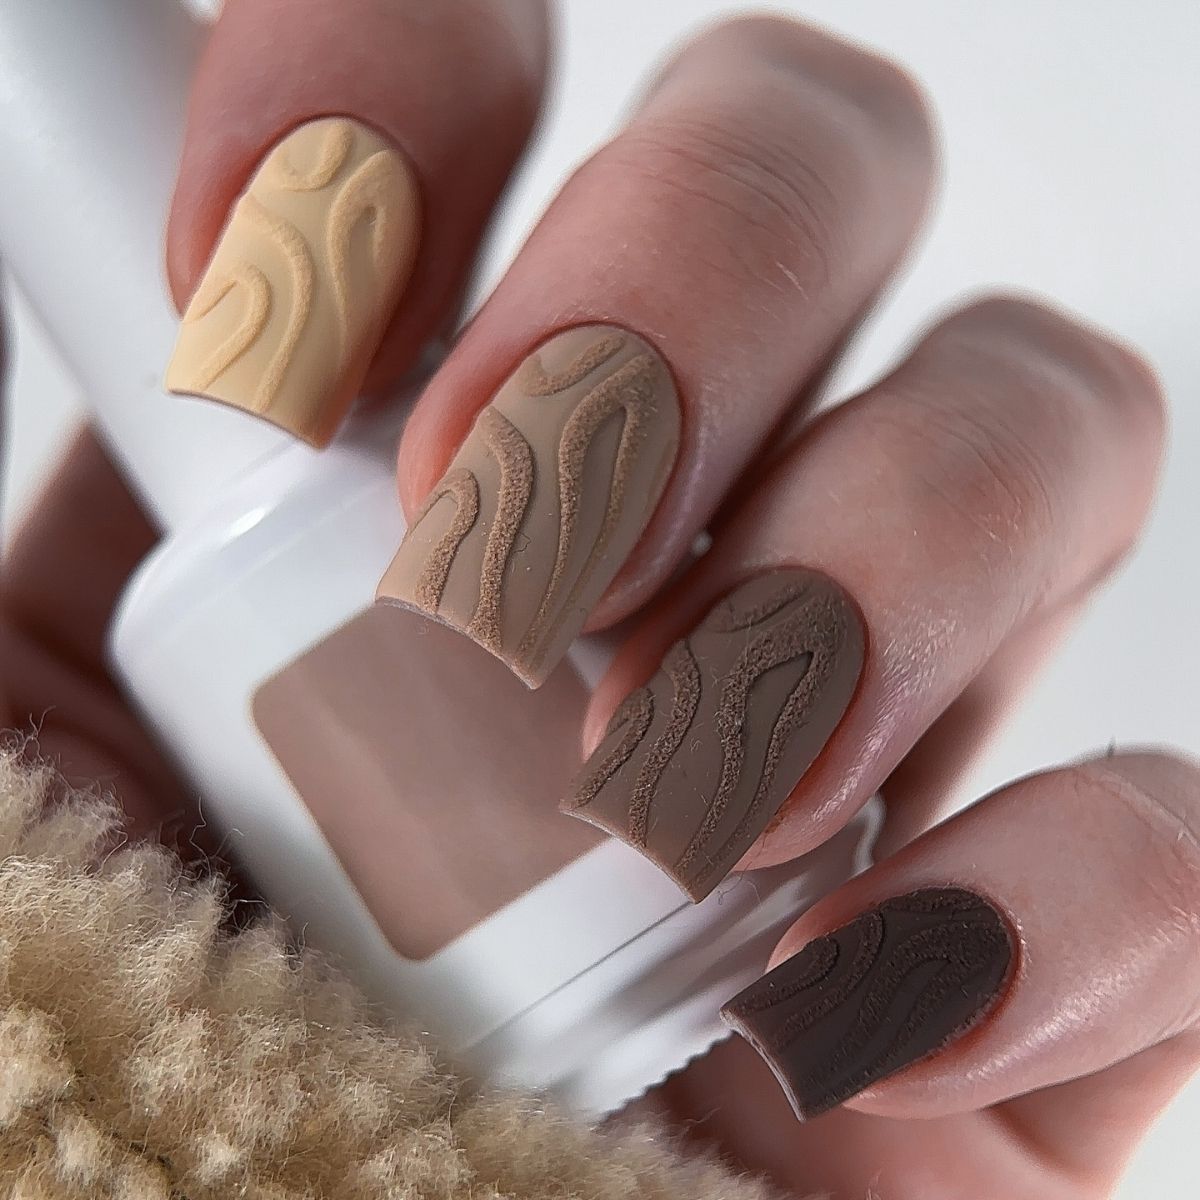
    11. Textured Nails

    Textured Nails

    image credit

    These nails are different shades of tan and brown.

    They are square shaped and have texture on them.

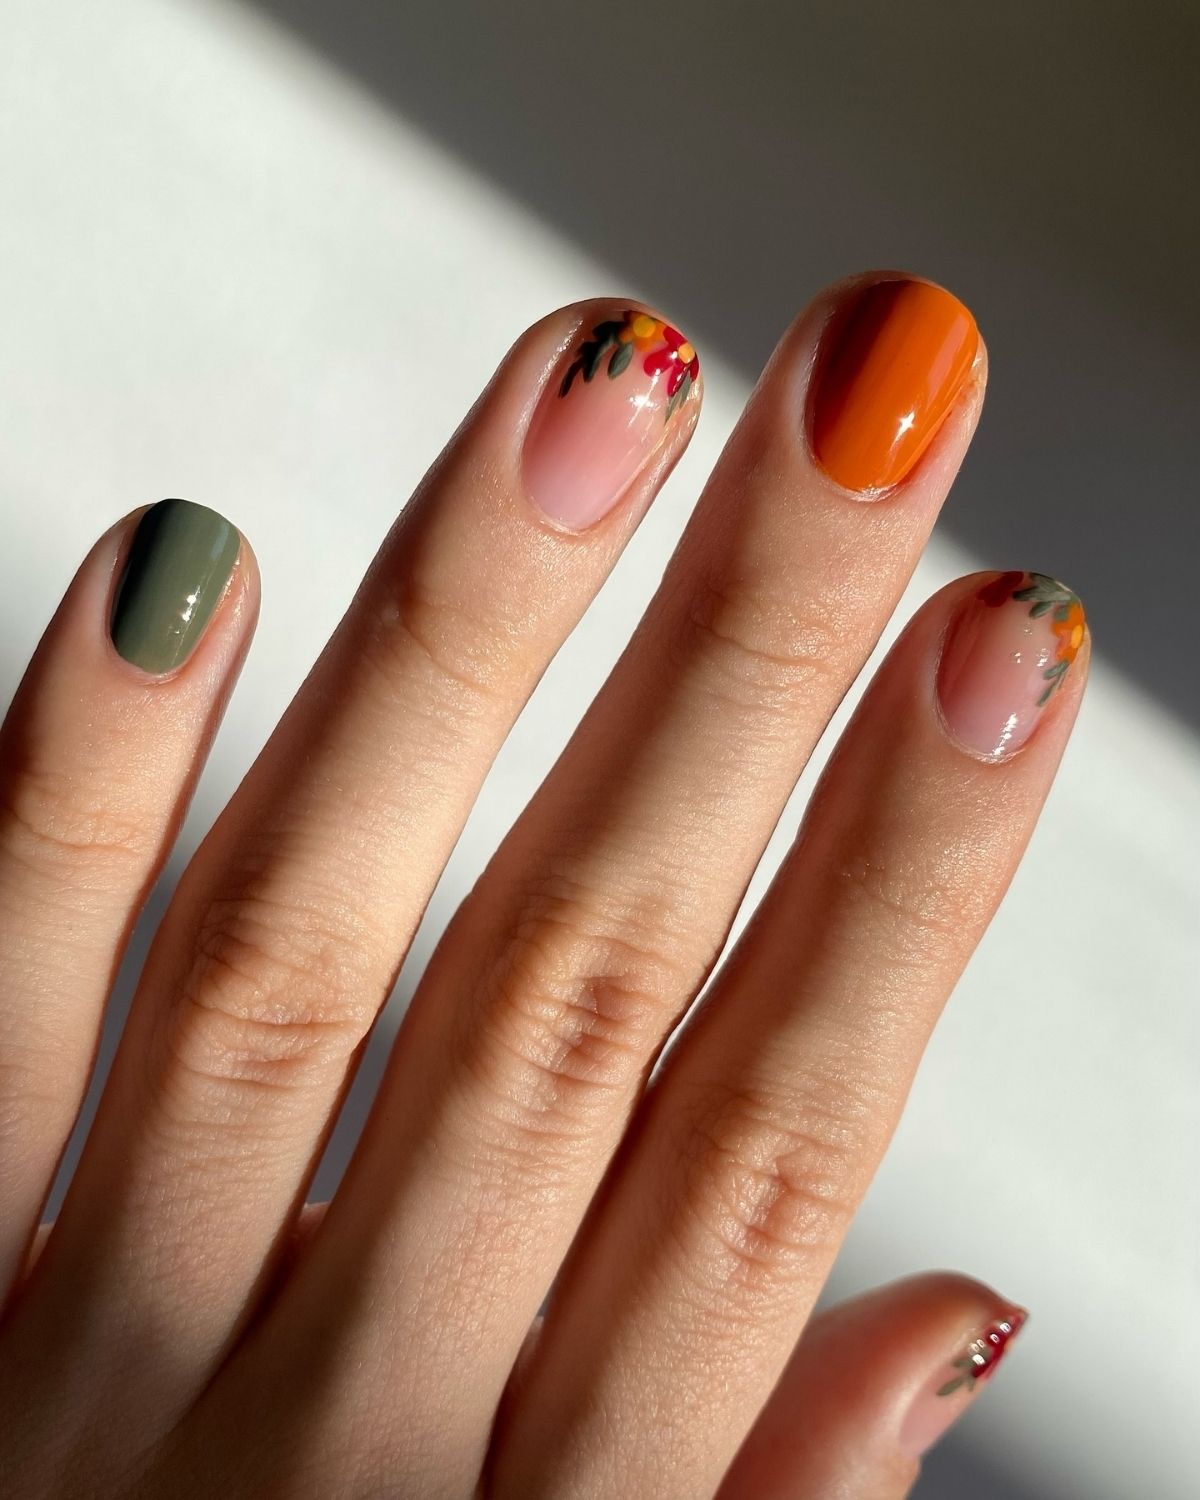
    12. Short Fall Nails

    Short Fall Nails

    image credit

    These are great nails if you want some short fall nails.

    They have green, orange, and flowers on them.

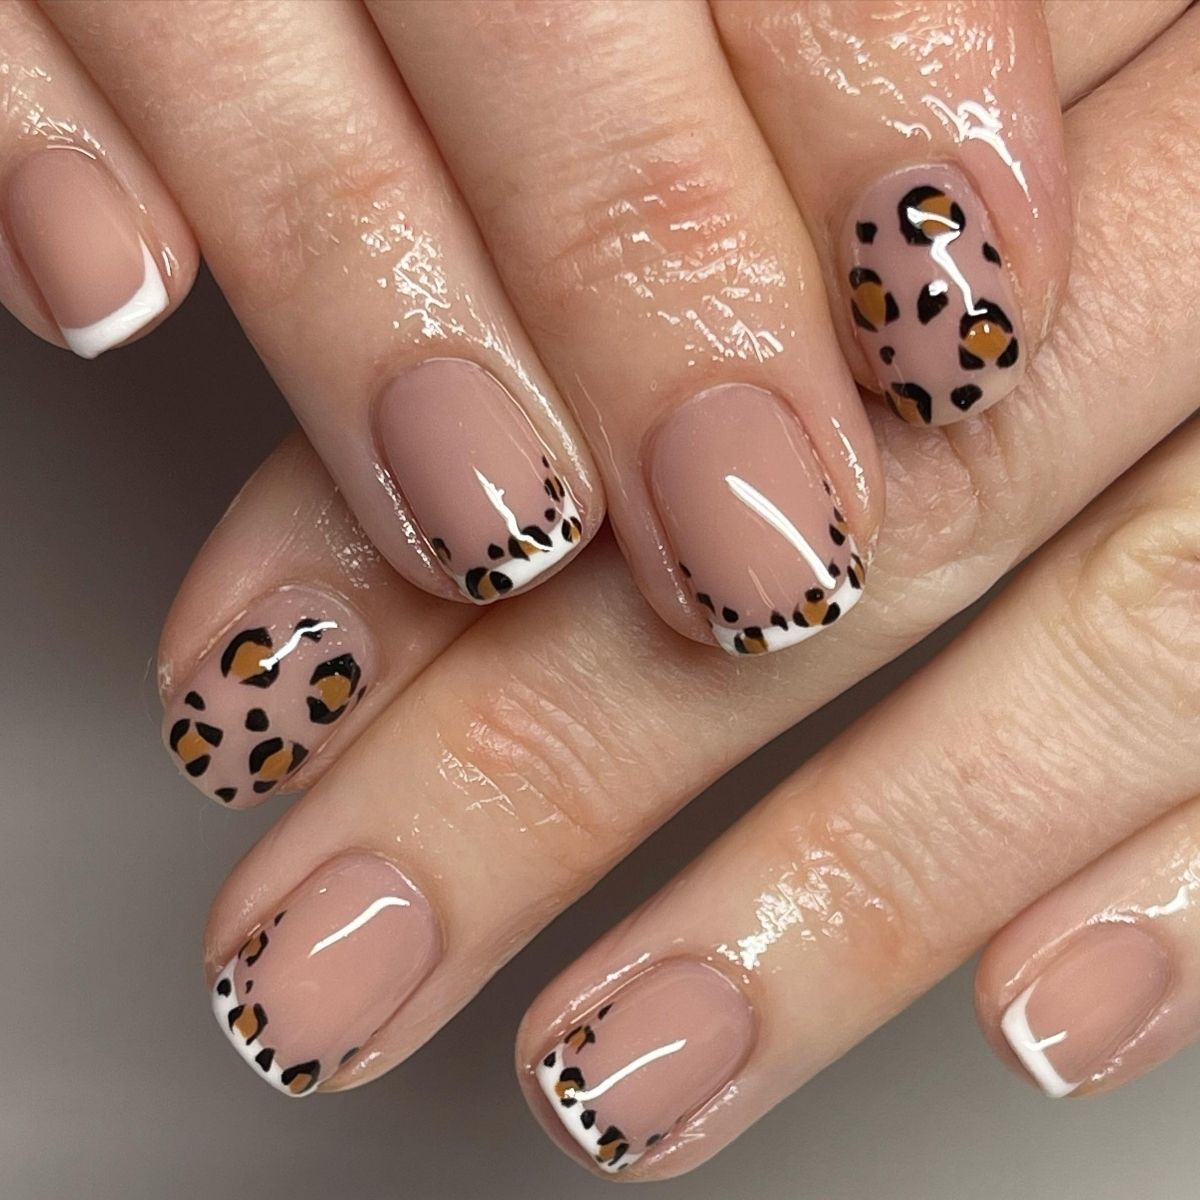
    13. Leopard Tips Nails

    Leopard Tips Nails

    image credit

    Leopard print has great colors for fall.

    These nails are short and have leopard print on the whole nail and on the tips.

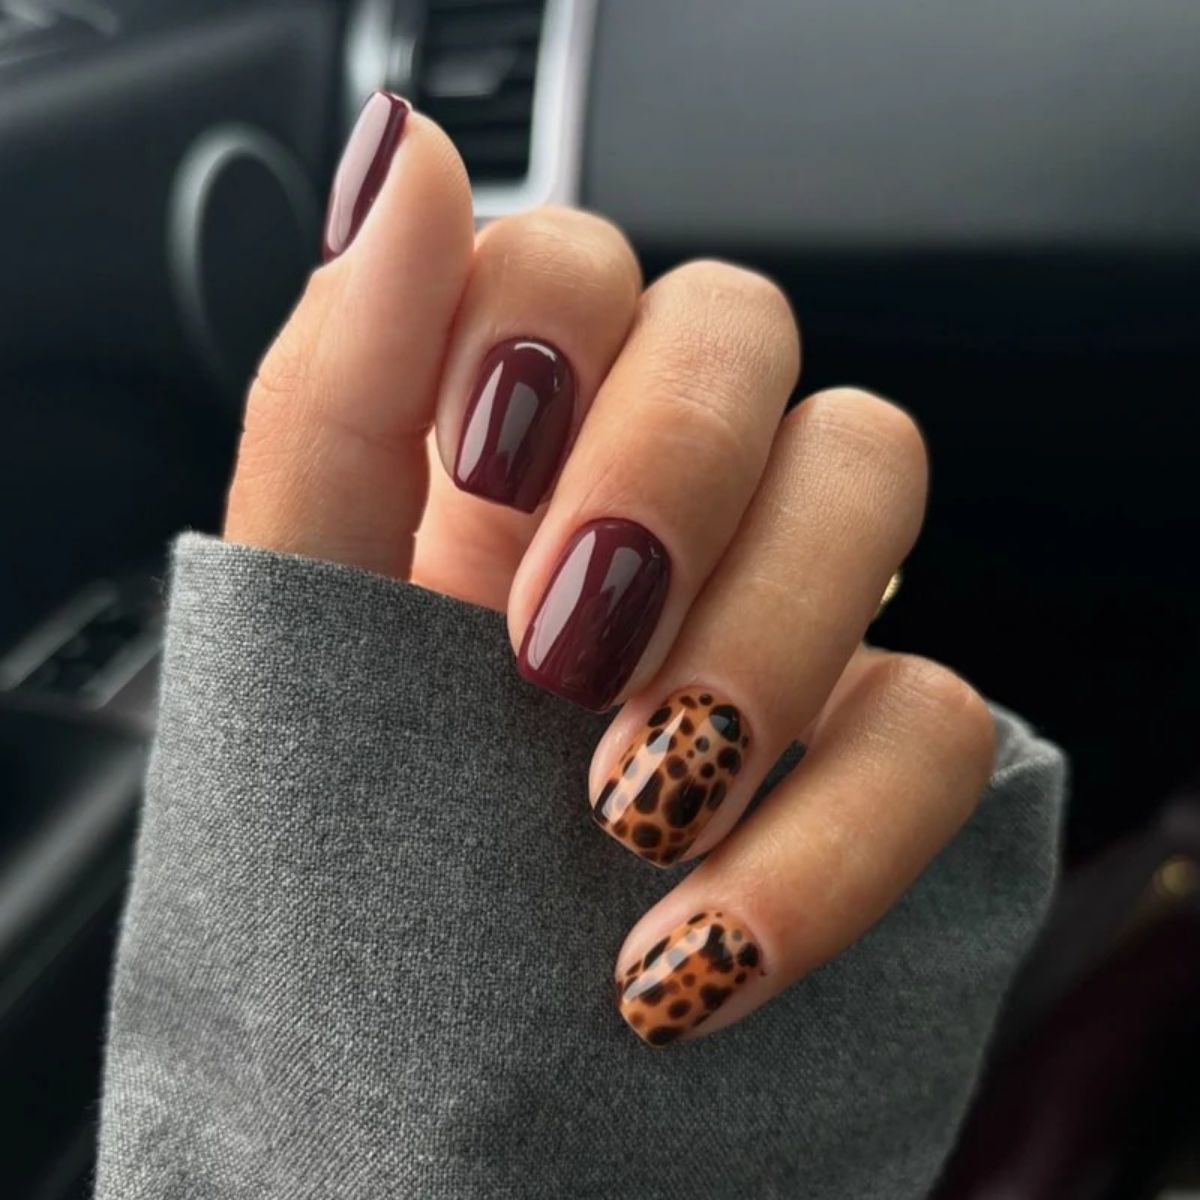
    14. Burgundy and Leopard Nails

    Burgundy and Leopard Nails

    image credit

    These nails are short and square shaped.

    Some nails are burgundy and others are leopard print.

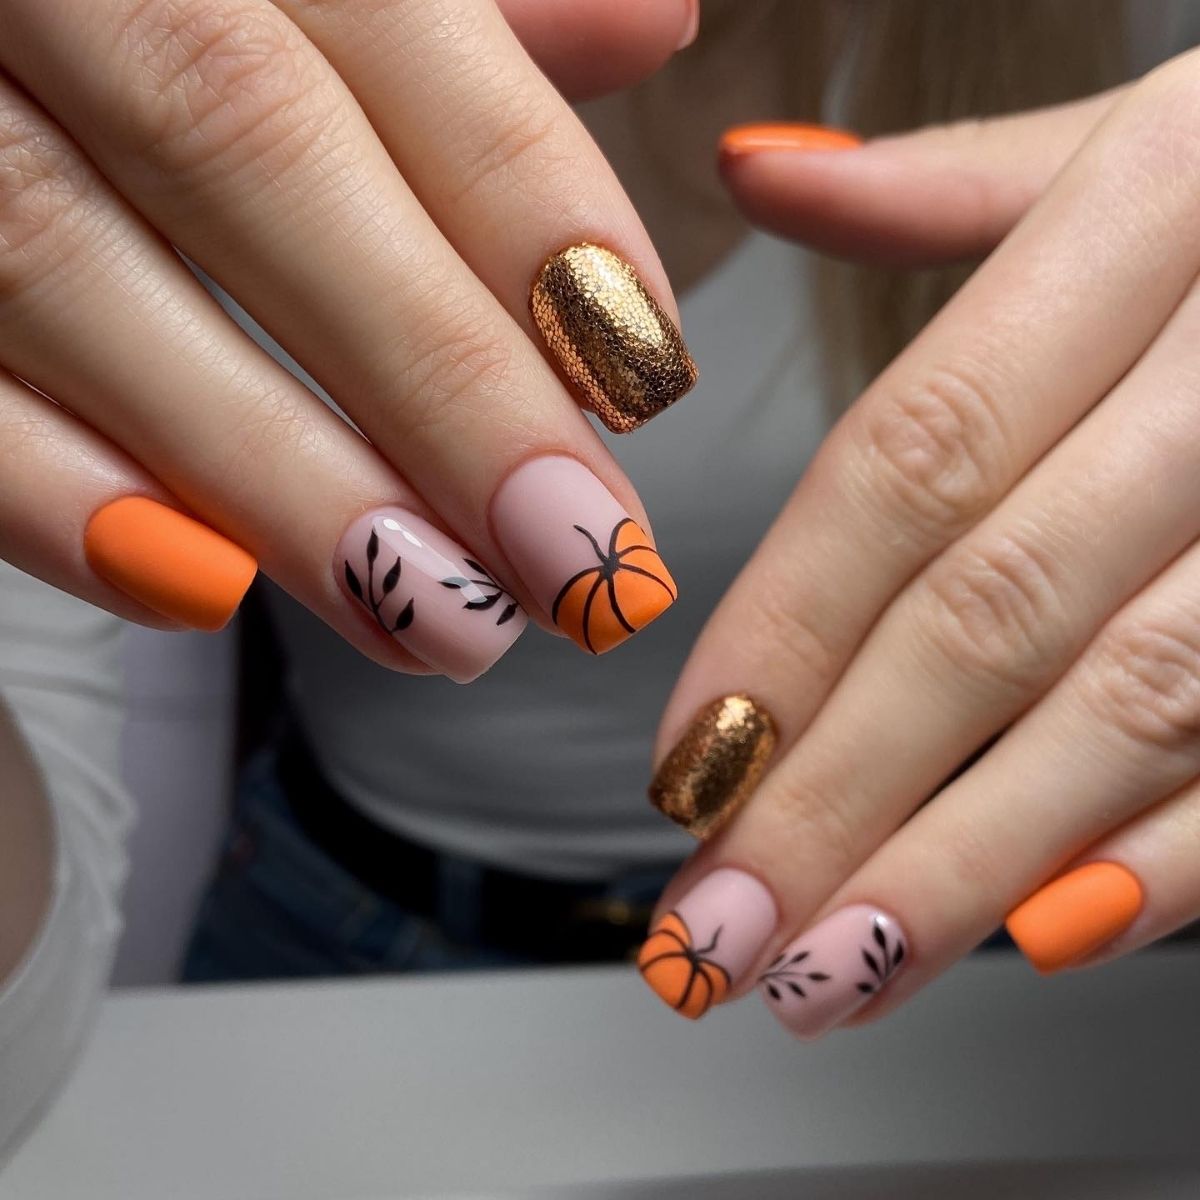
    15. Pumpkin Tips Nails

    Pumpkin Tips Nails

    image credit

    These nails are short and round shaped.

    They have orange and gold pumpkins on them.

    16. Cute Fall Pumpkin Nails 

    Cute Fall Pumpkin Nails

    image credit

    These fall nails are bright and pretty.

    They have gold, orange, and pumpkins on them and are medium length.

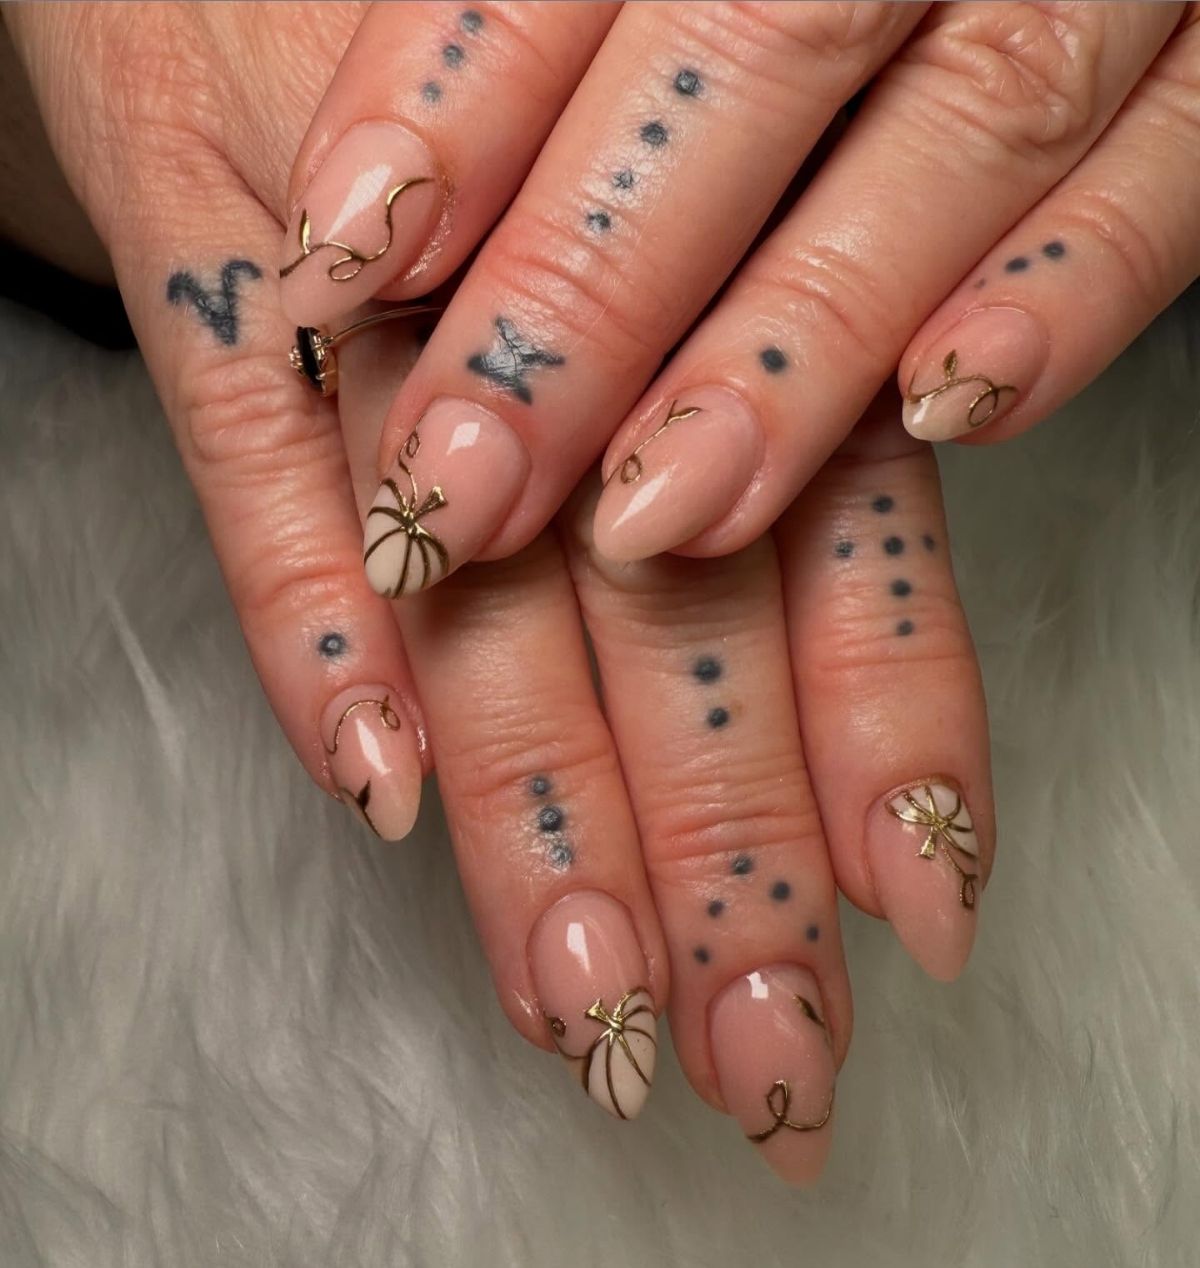
    17. Gold Pumpkin Nails

    Gold Pumpkin Nails

    image credit

    These nails are almond shaped and medium length.

    They have white and gold pumpkins with other designs too.

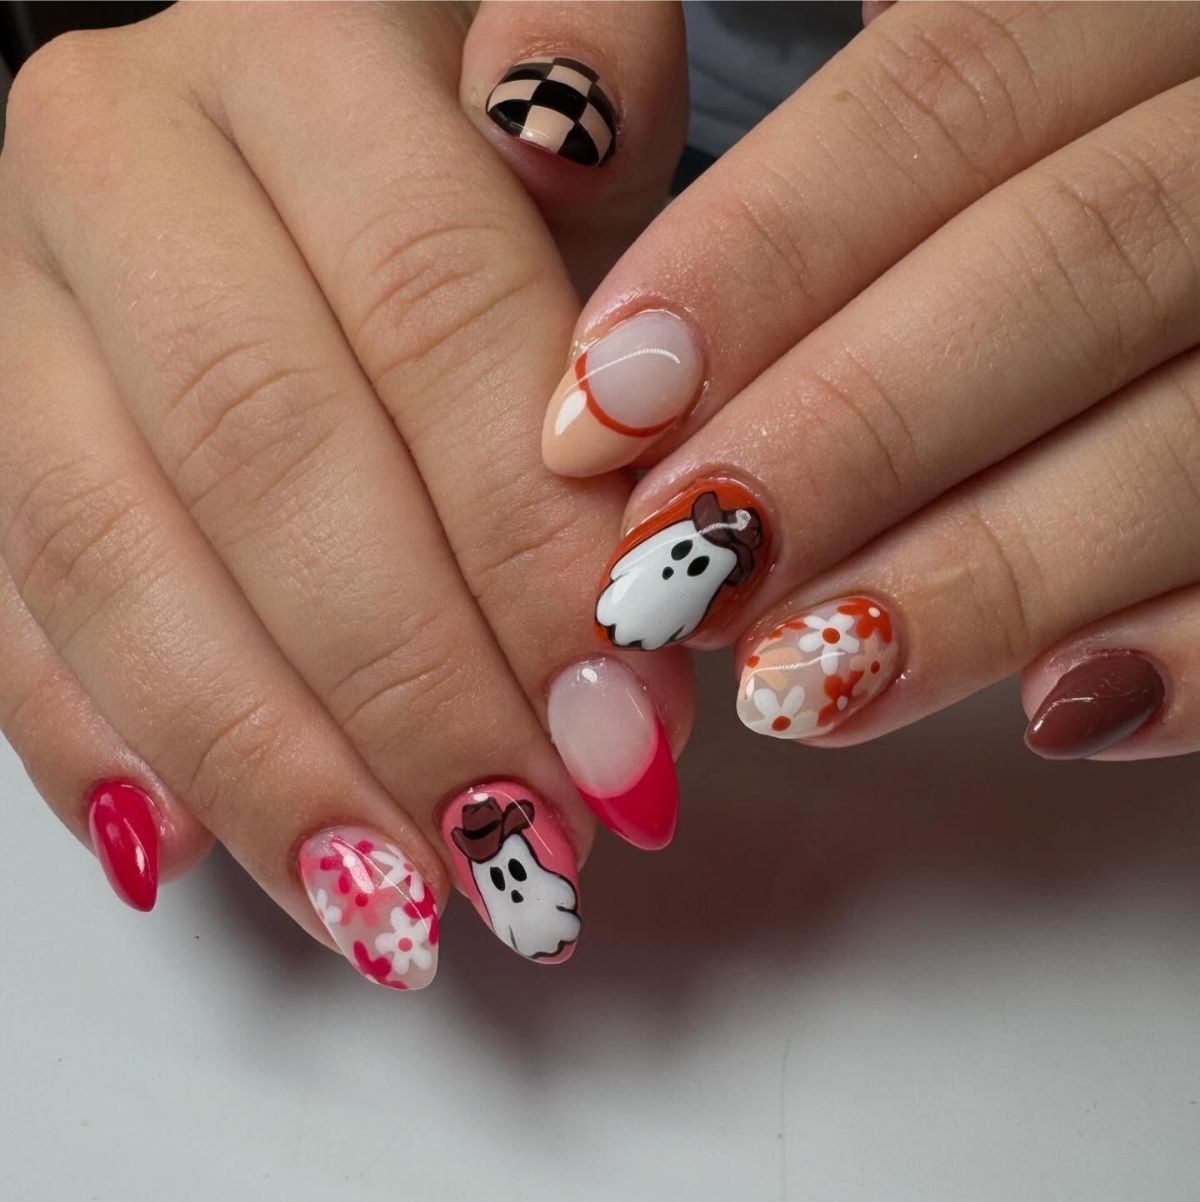
    18. Ghost Cowboy Nails

    Ghost Cowboy Nails

    image credit

    These nails are retro and unique.

    They have ghosts with cowboy hats, flowers, checkers, and more.

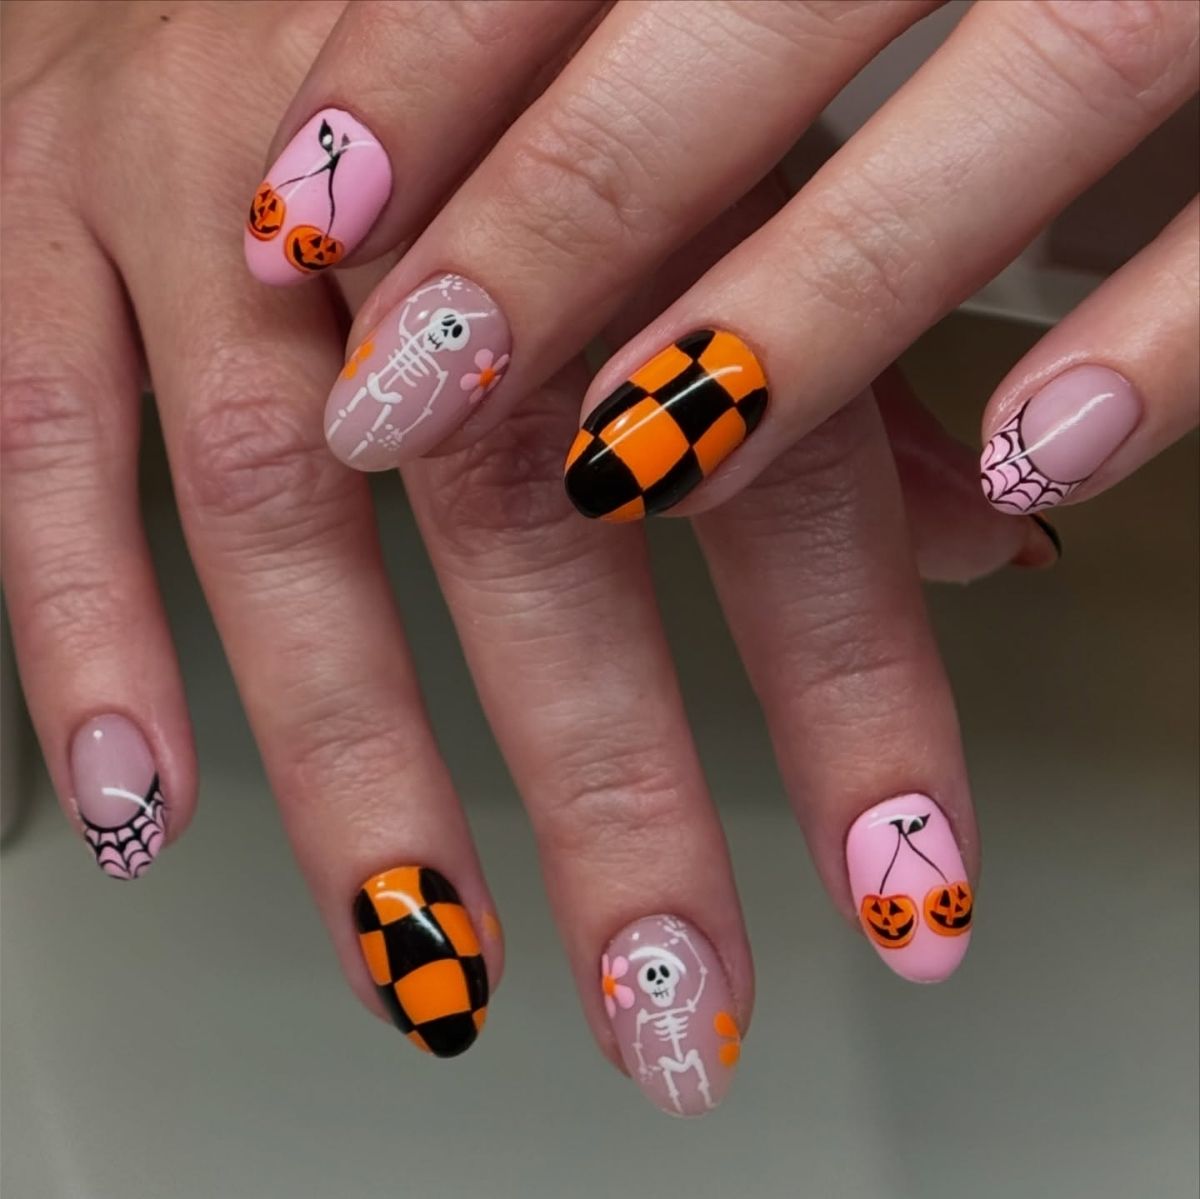
    19. Pink and Orange Halloween Nails

    Pink and Orange Halloween Nails

    image credit

    These Halloween nails are colorful and round shaped.

    They have pink, orange, skeletons, pumpkins, checkered print, and more.

    20. Short Pumpkin Nails

    Short Pumpkin Nails

    image credit

    If you love short nails, then take a look at these cool ones.

    They have pumpkins, orange, and checkered print.

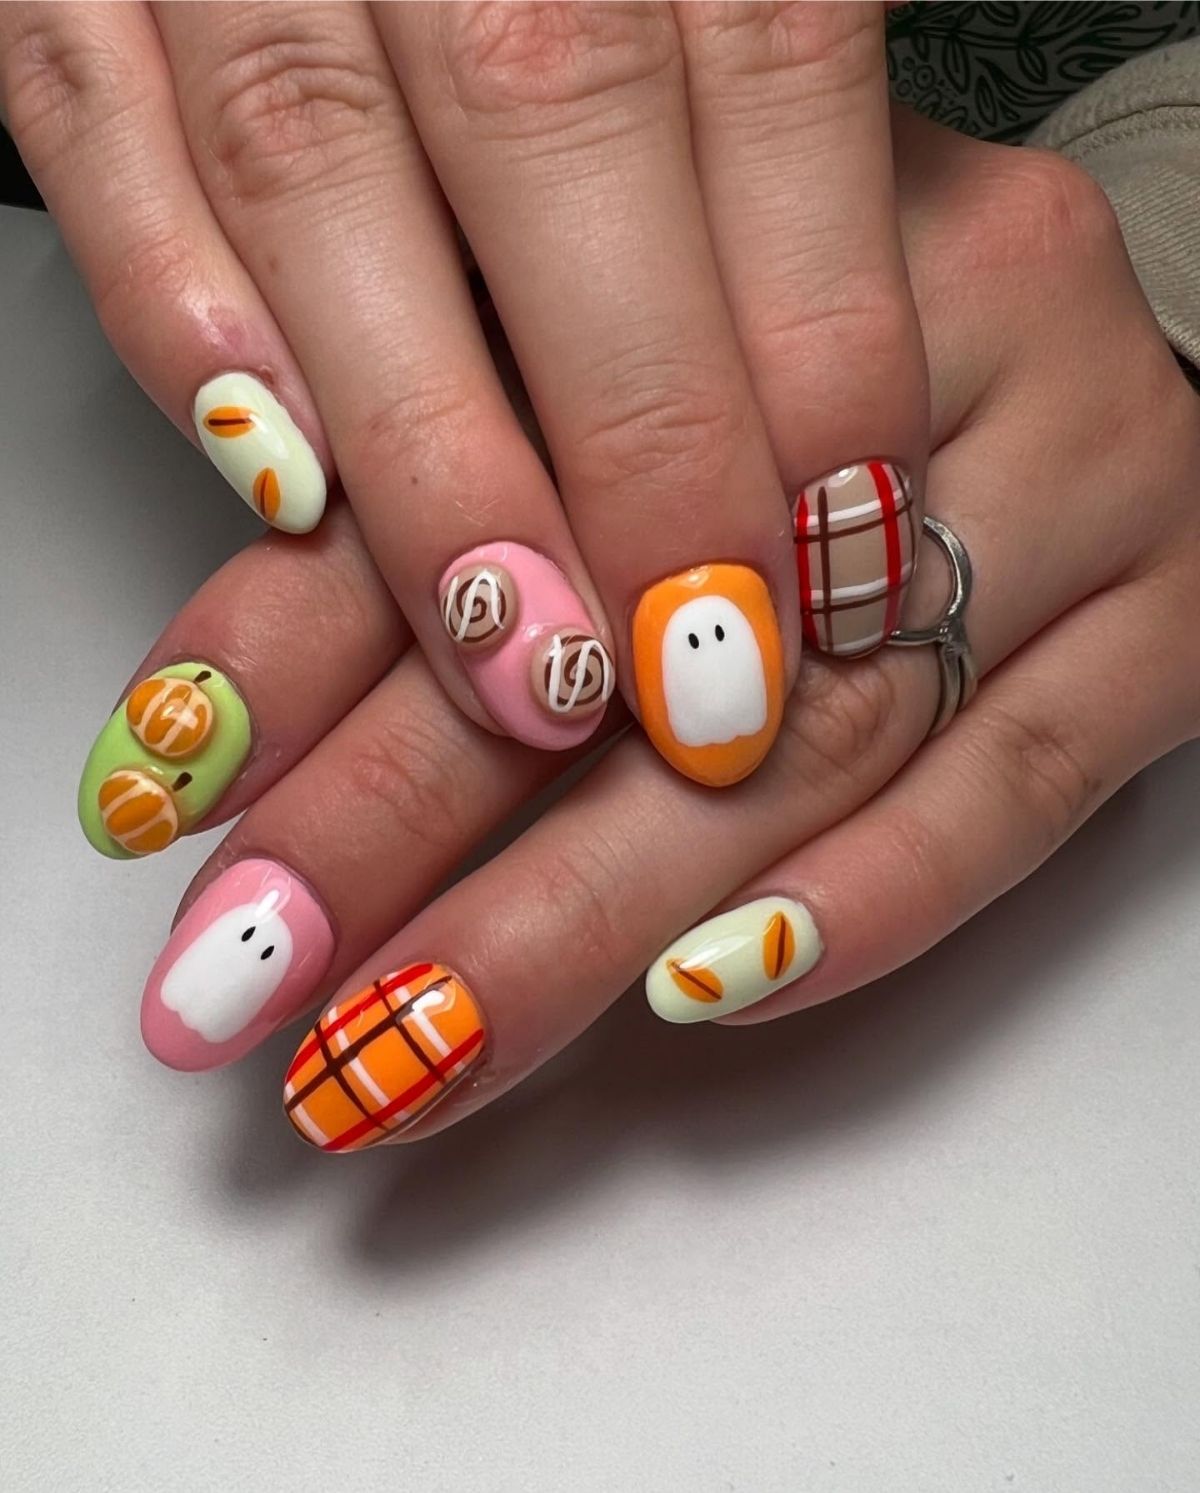
    21. Cute 3D Fall Nails

    Cute 3D Fall Nails

    image credit

    These nails are short, round, and 3D.

    They have ghosts, pumpkins, plaid, and more on them.

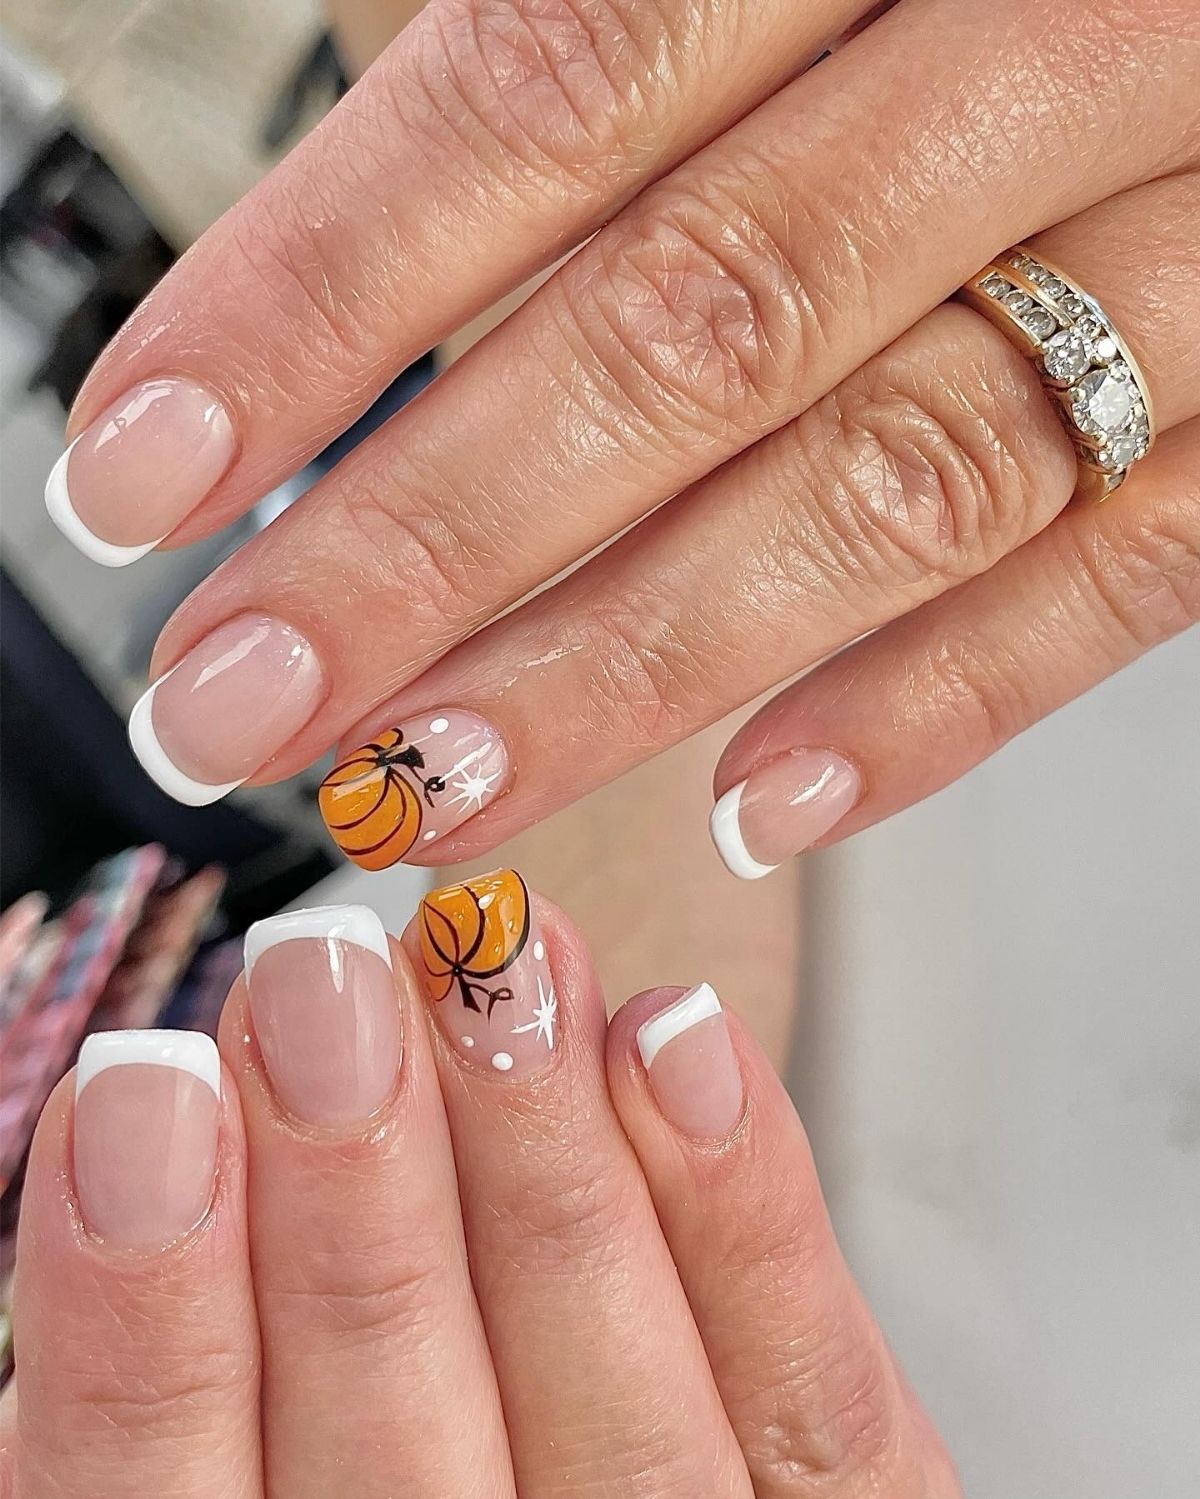
    22. French Tips With Pumpkins Nails

    French Tips With Pumpkins Nails

    image credit

    These nails are short, simple, and beautiful.

    They have white tips and the ring finger has a pumpkin on it.

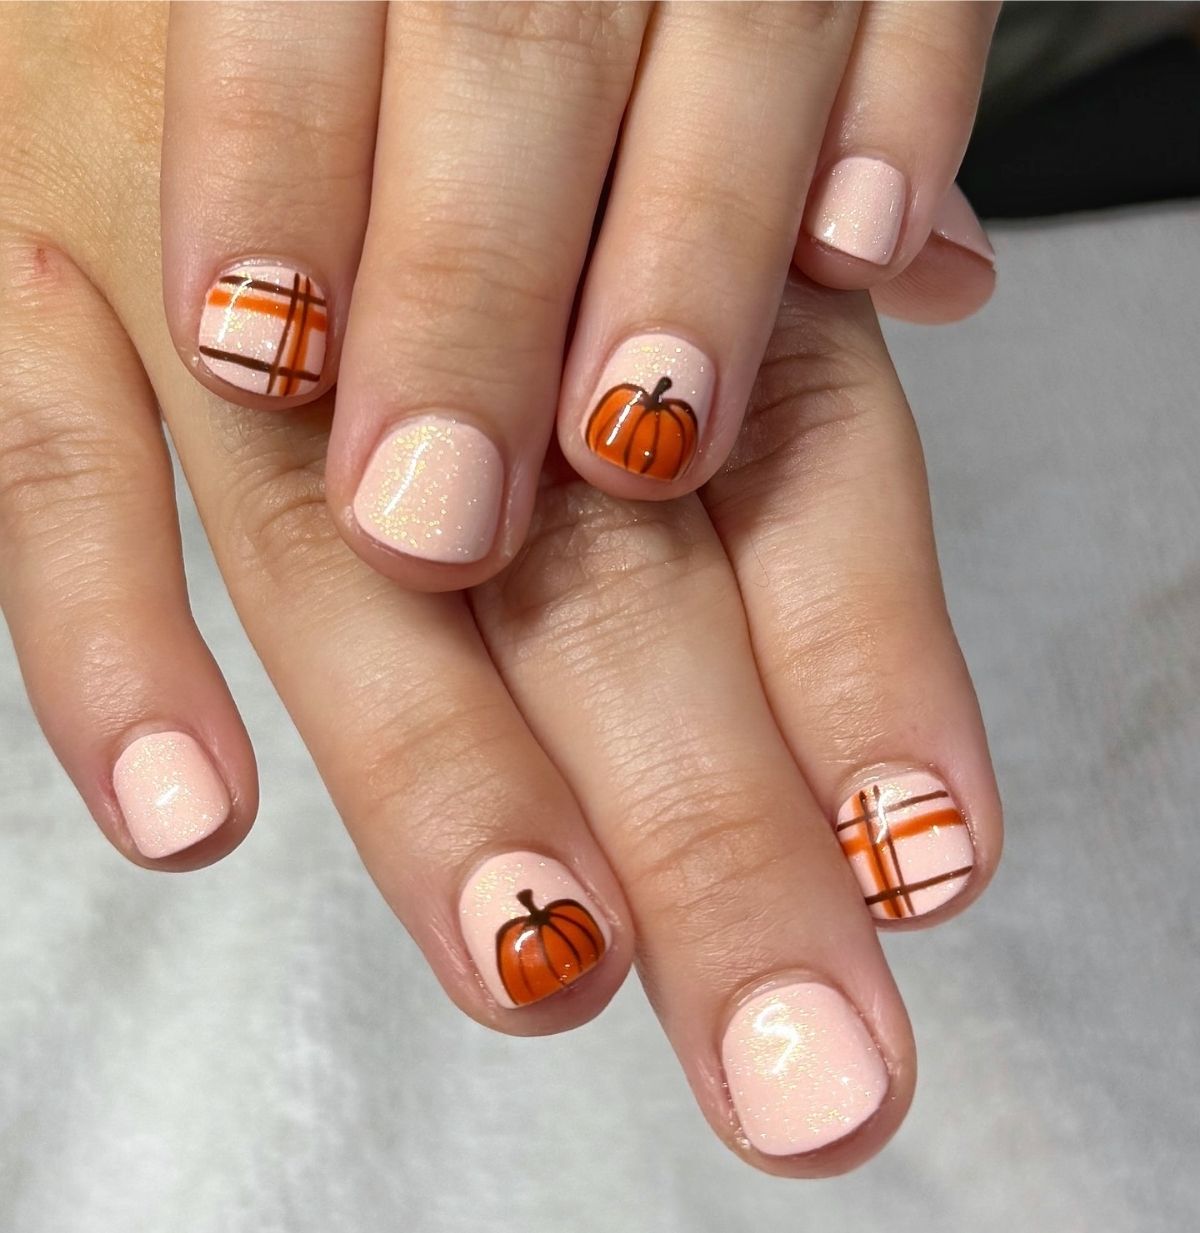
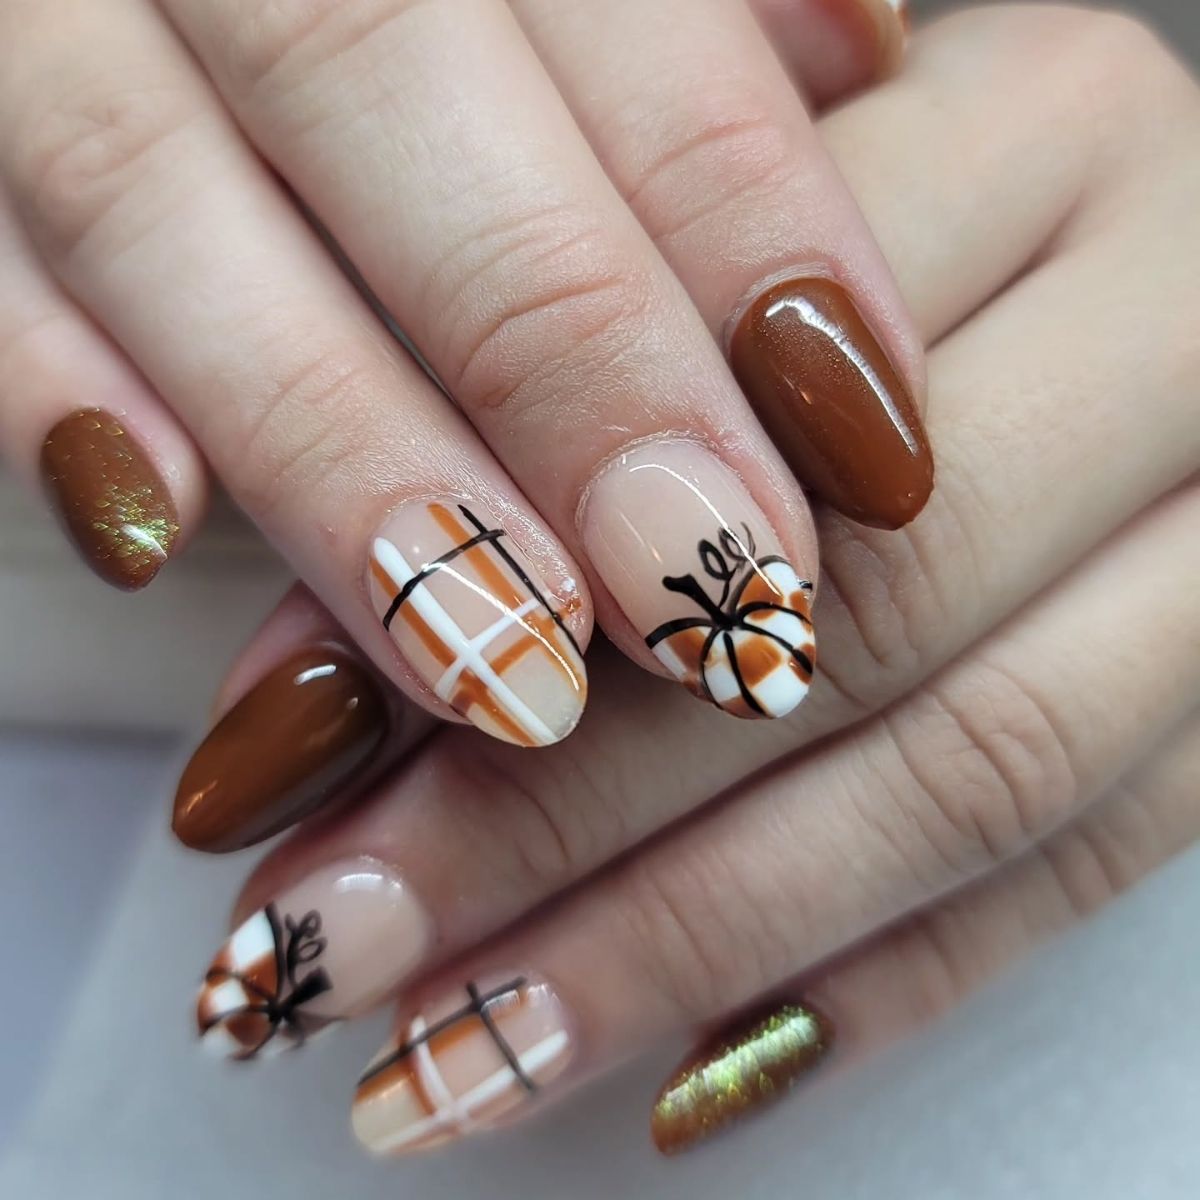
    23. Plaid and Pumpkin Nails

    Plaid and Pumpkin Nails

    image credit

    These nails are short, round, and sparkly.

    One finger on each hand has a pumpkin and another has plaid print.

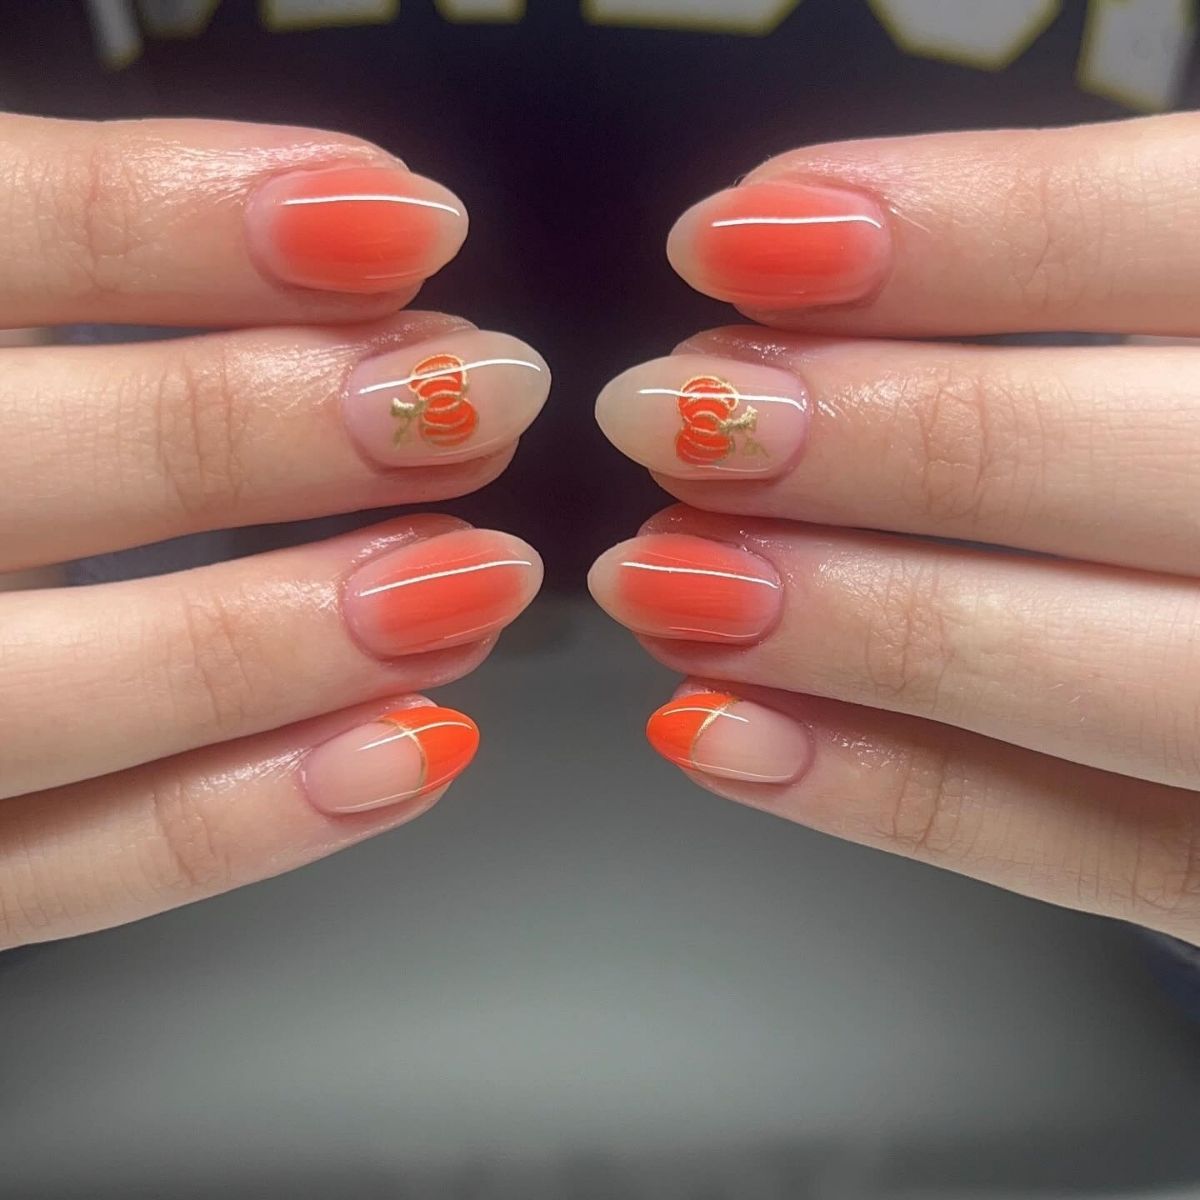
    24. Ombre Pumpkin Nails

    Ombre Pumpkin Nails

    image credit

    Ombre nails are really pretty and cool.

    These have pumpkins on some nails that are the same color as the ombre on other nails.

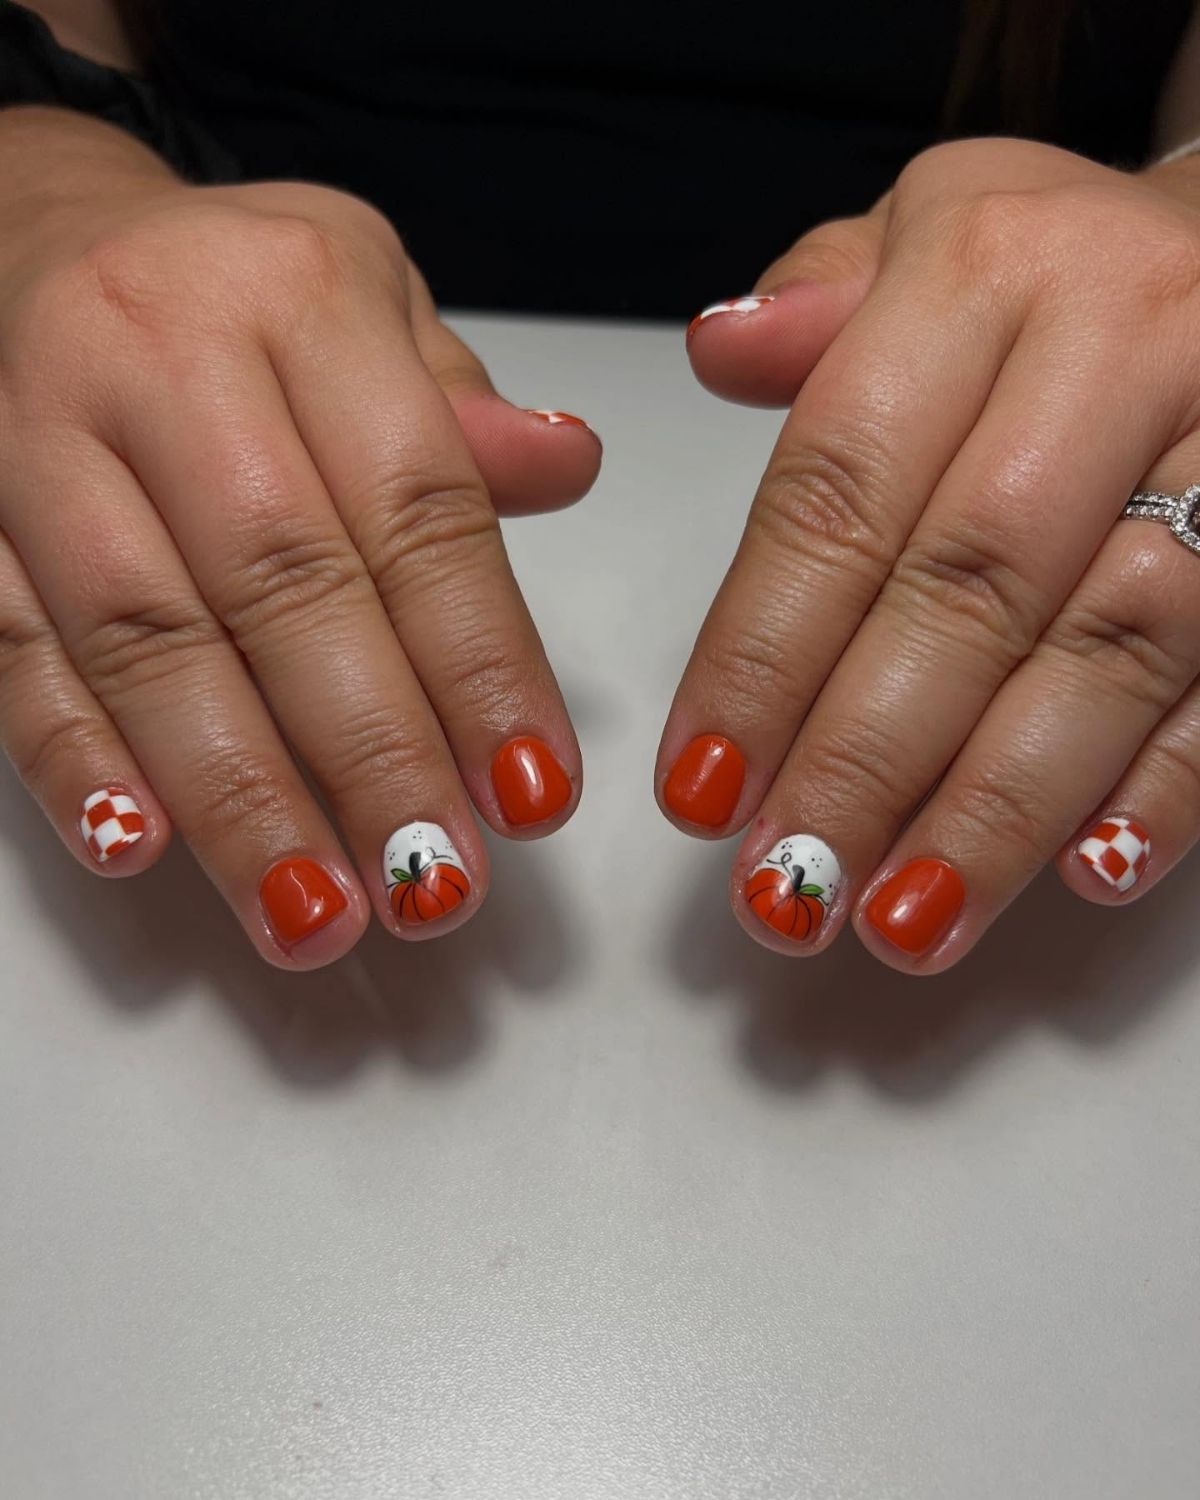
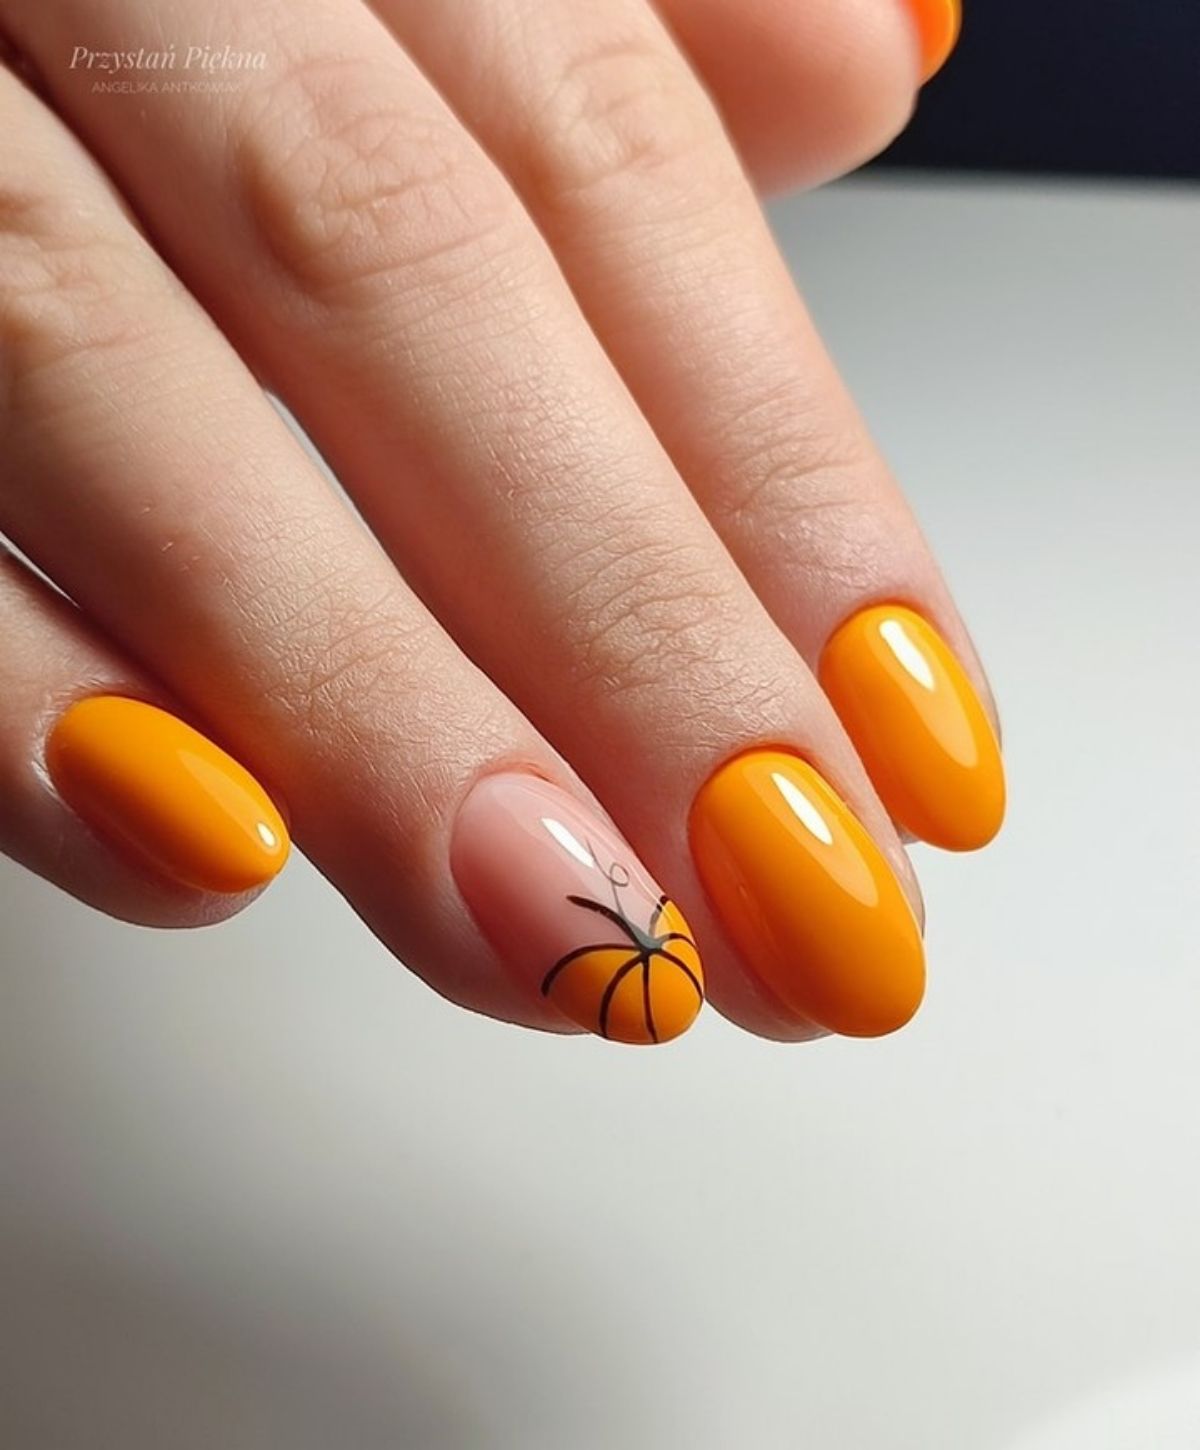
    25. Simple Orange Nails

    Simple Orange Nails

    image credit

    These nails are simple and round.

    They are painted orange with one nail on each hand is painted with a pumpkin on the tip.

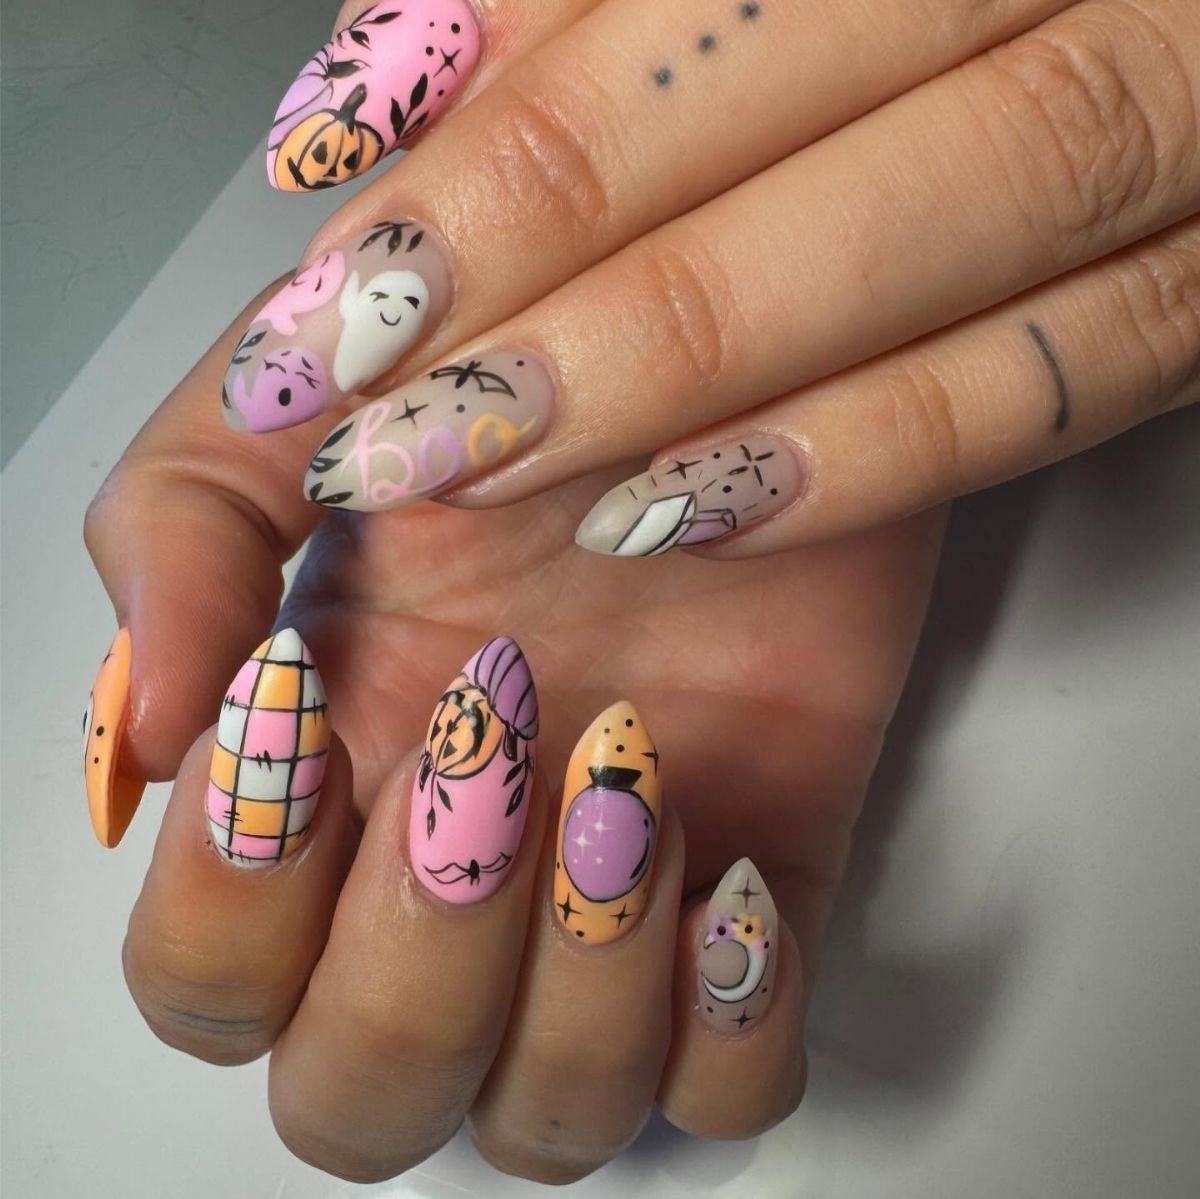
    26. Pastel Halloween Nails

    Pastel Halloween Nails

    image credit

    adad

    27. Glittery Pumpkin Nails

    Glittery Pumpkin Nails

    image credit

    adad

    28. Long Pumpkin Nails

    Long Pumpkin Nails

    image credit

    adad

    29. Matte Fall Nails

    Matte Fall Nails

    image credit

    adad

    30. Glittery Orange Pumpkin Nails

    Glittery Orange Pumpkin Nails

    image credit

    adad

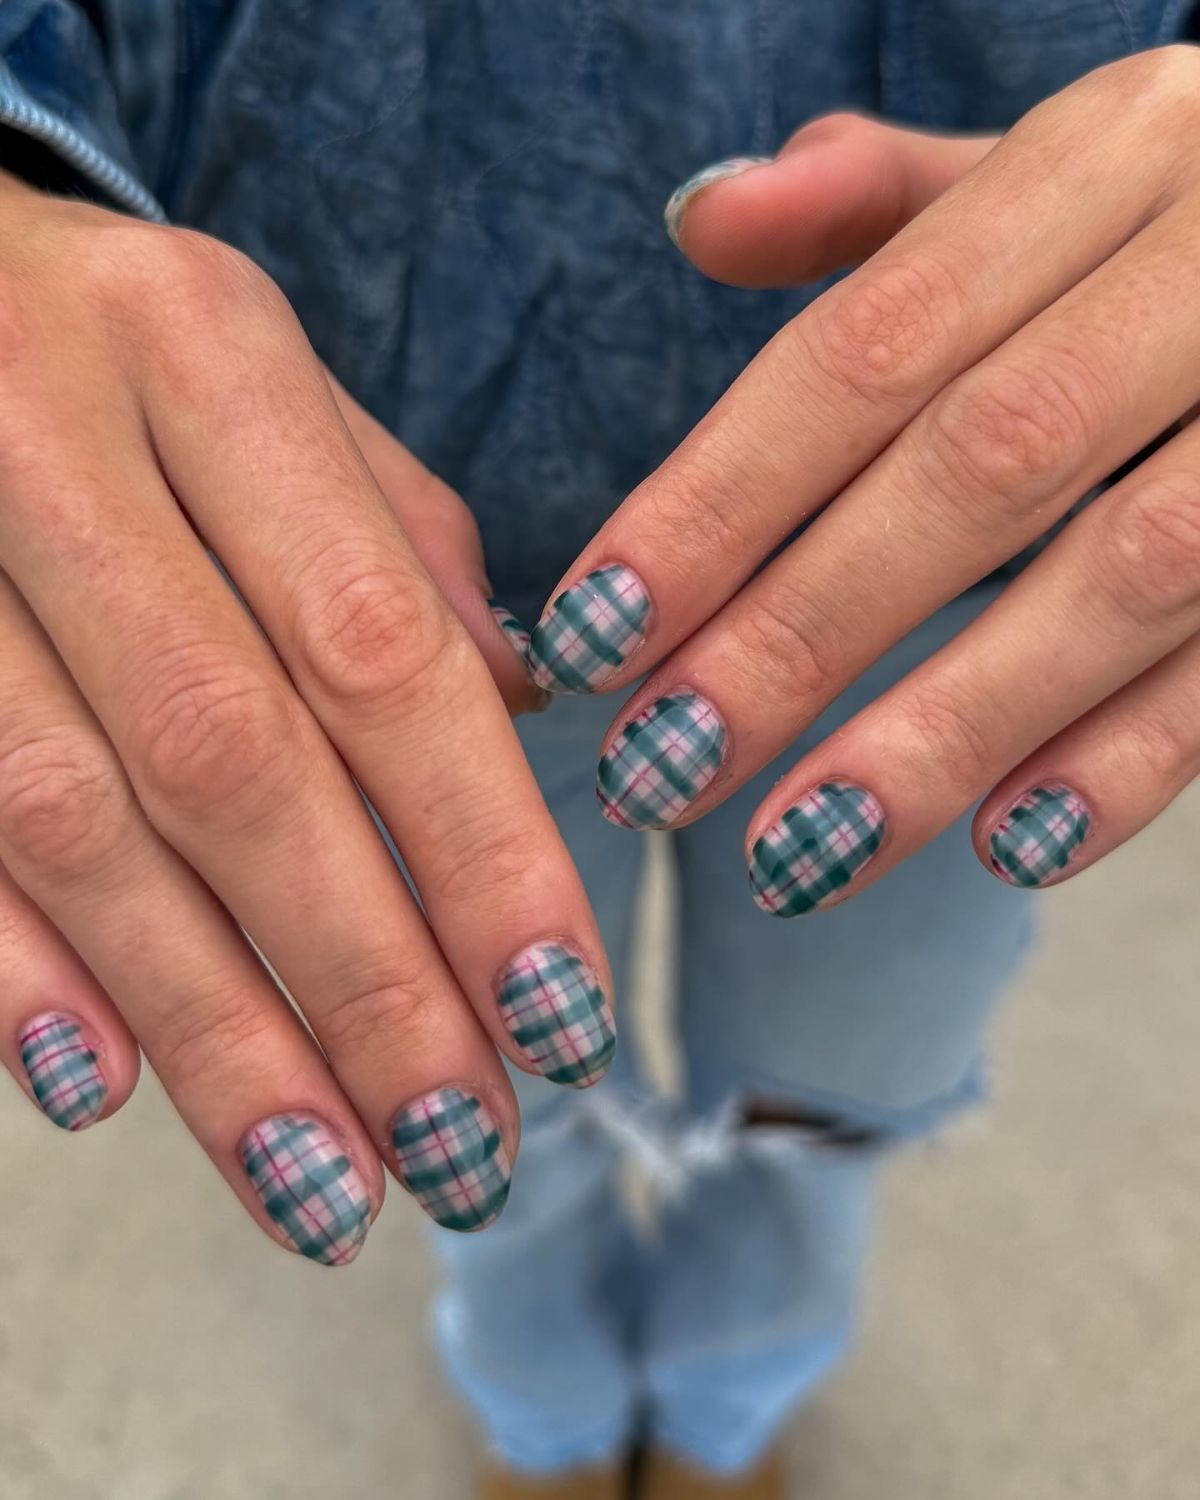
    31. Turquoise Plaid Nails

    Turquoise Plaid Nails

    image credit

    adad

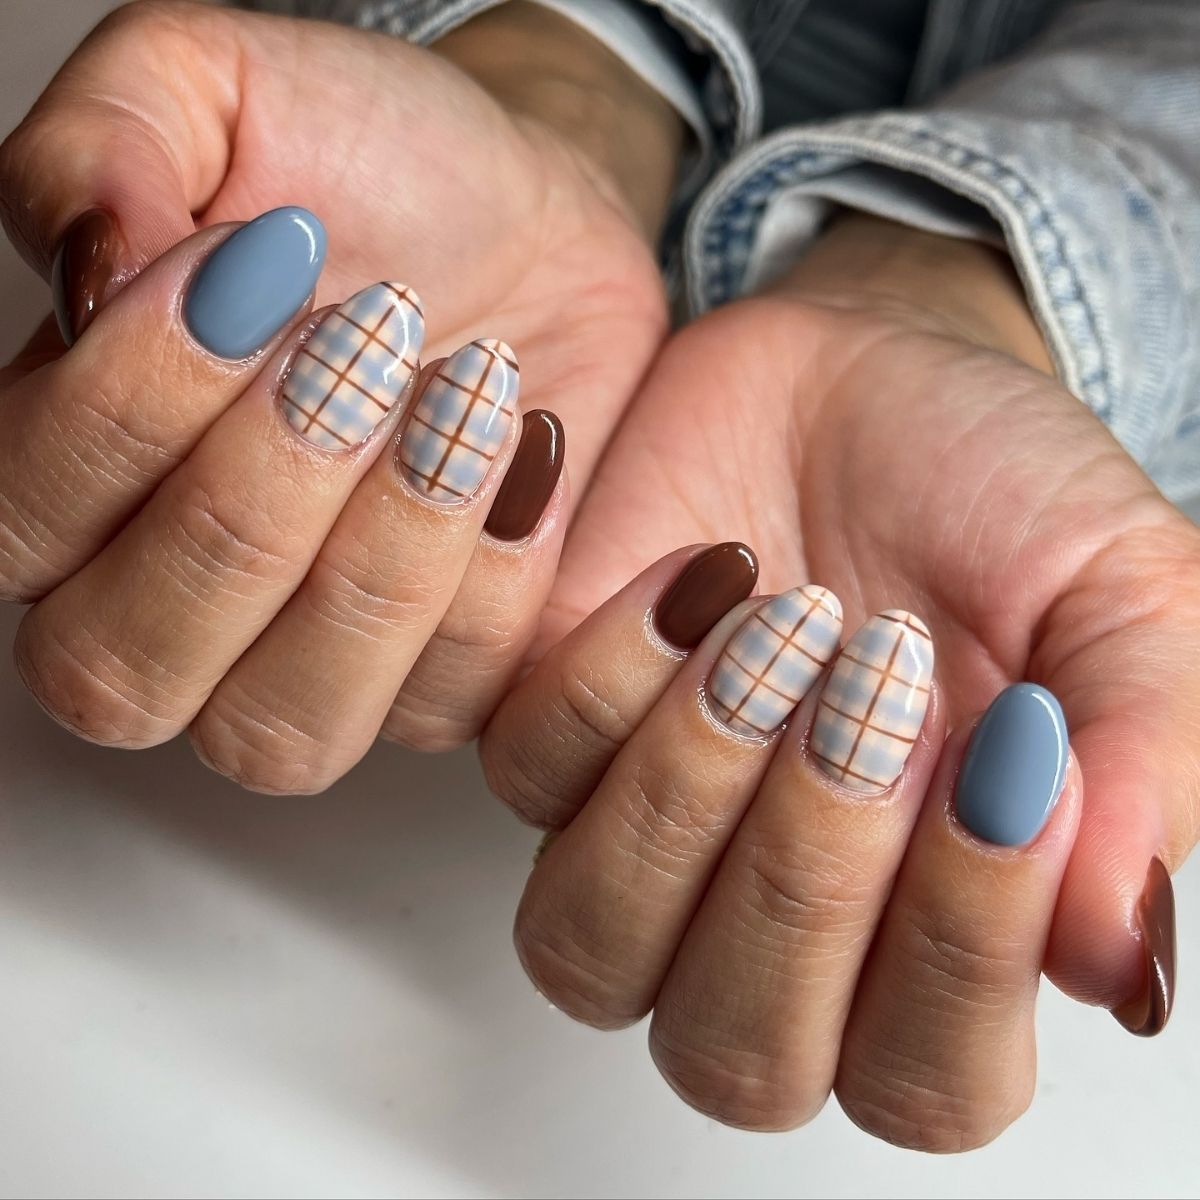
    32. Denim Blue Plaid Nails

    Denim Blue Plaid Nails

    image credit

    adad

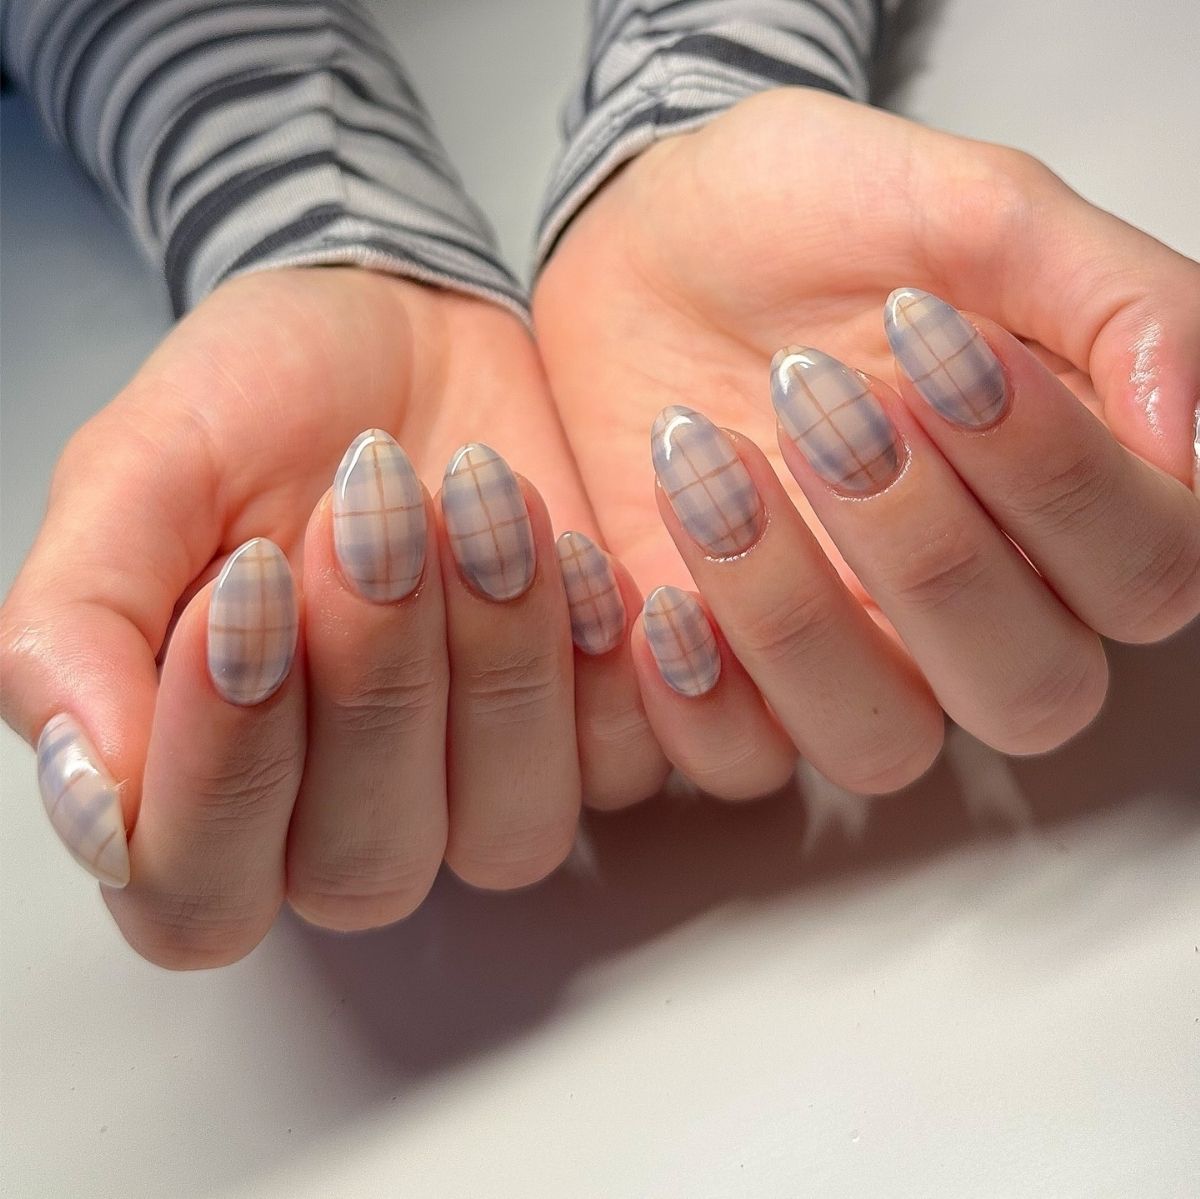
    33. Almond Shaped Plaid Nails

    Almond Shaped Plaid Nails

    image credit

    adad

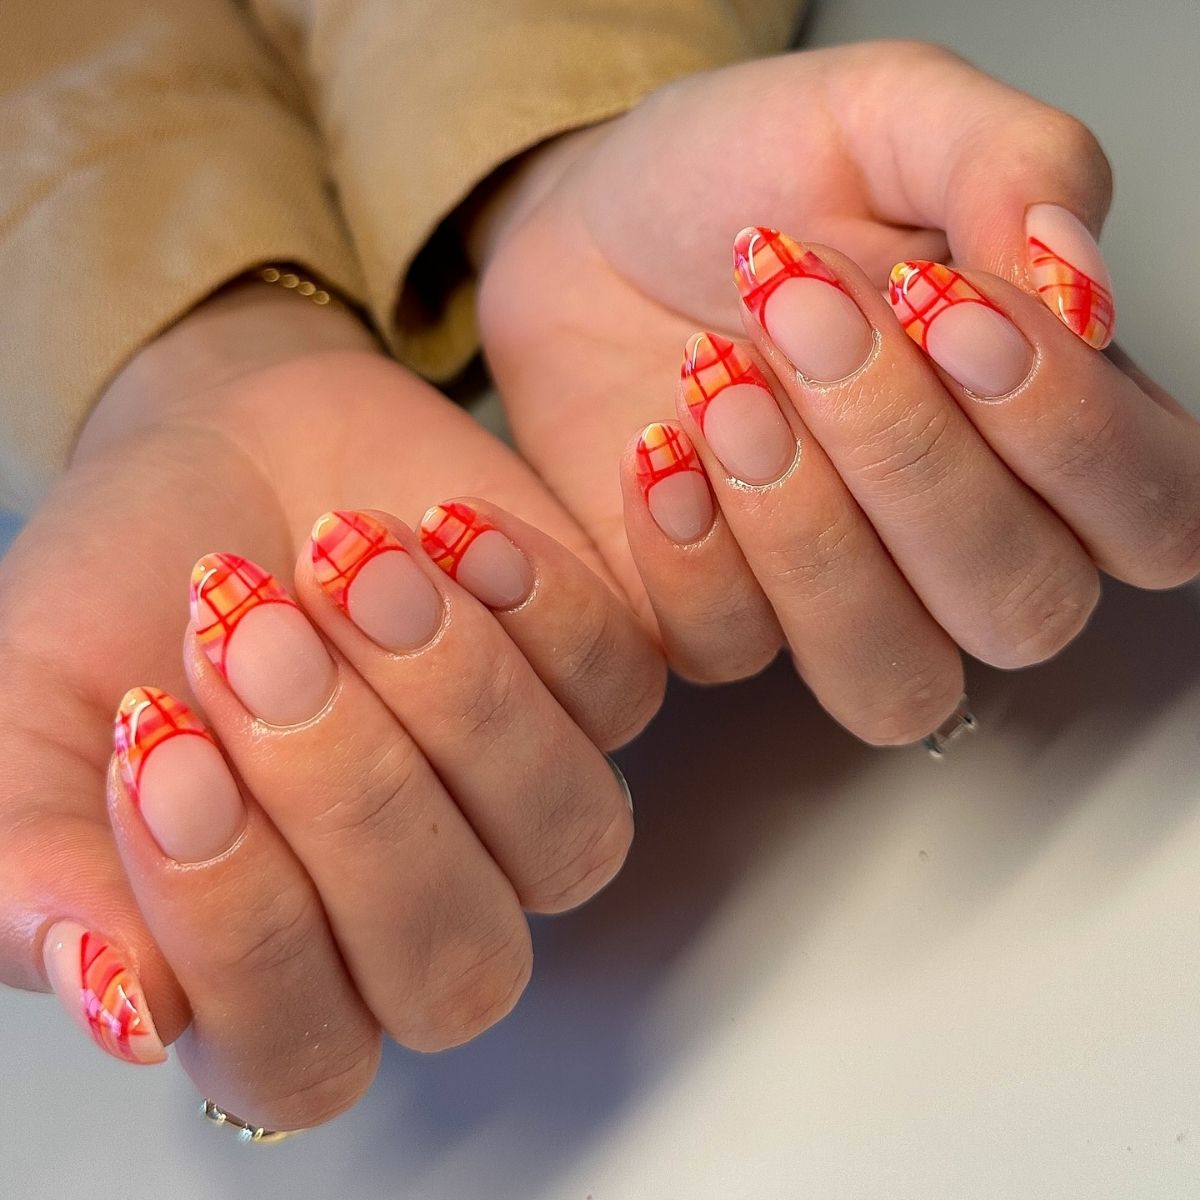
    34. Plaid Tips Nails

    Plaid Tips Nails

    image credit

    adad

    35. Round Fall Set

    Round Fall Set

    image credit

    adad

    36. Pointy Floral Nails

    Pointy Floral Nails

    image credit

    adad

    37. Neutral Fall Nails

    Neutral Fall Nails

    image credit

    adad

    38. Gold Leaf Nails

    Gold Leaf Nails

    image credit

    adad

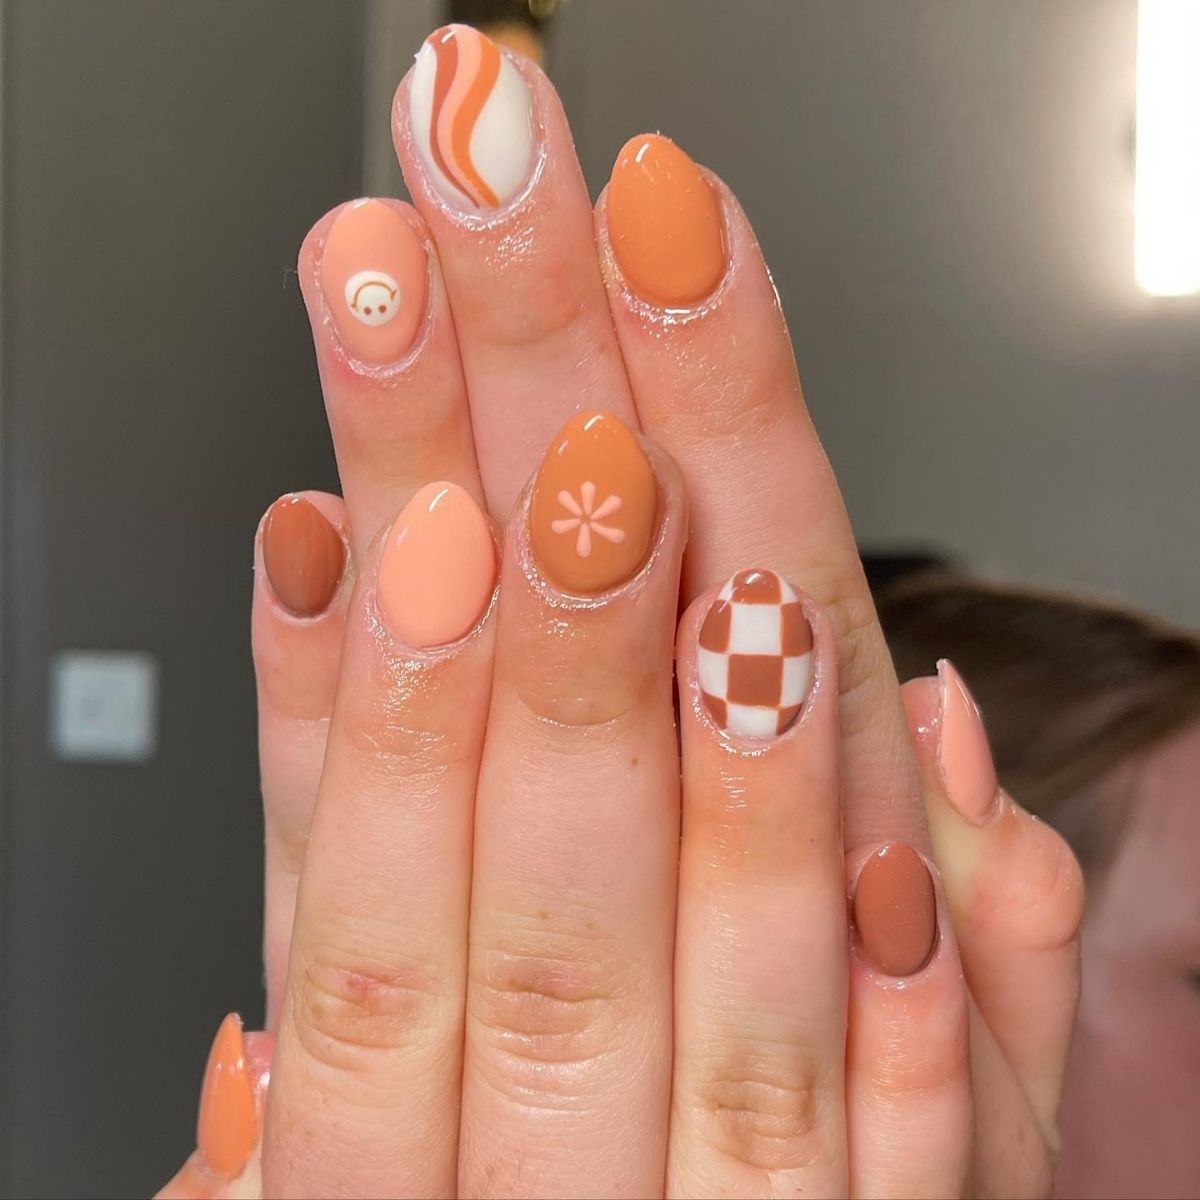
    39. Retro Orange Nails

    Retro Orange Nails

    image credit

    adad

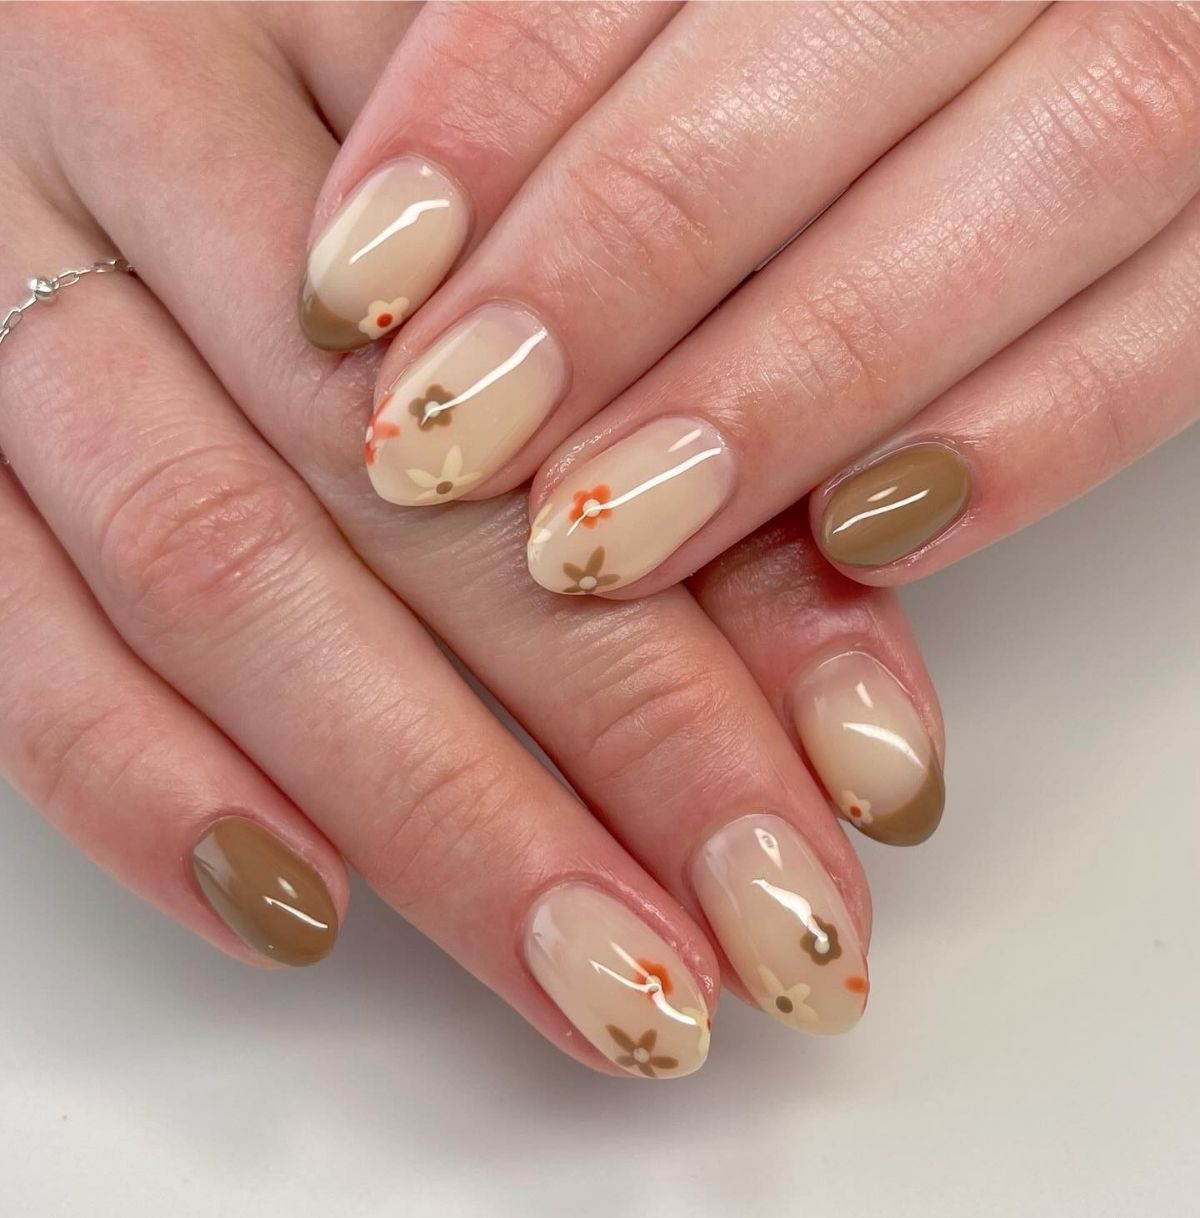
    40. Simple Fall Floral Set

    Simple Fall Floral Set

    image credit

    adad

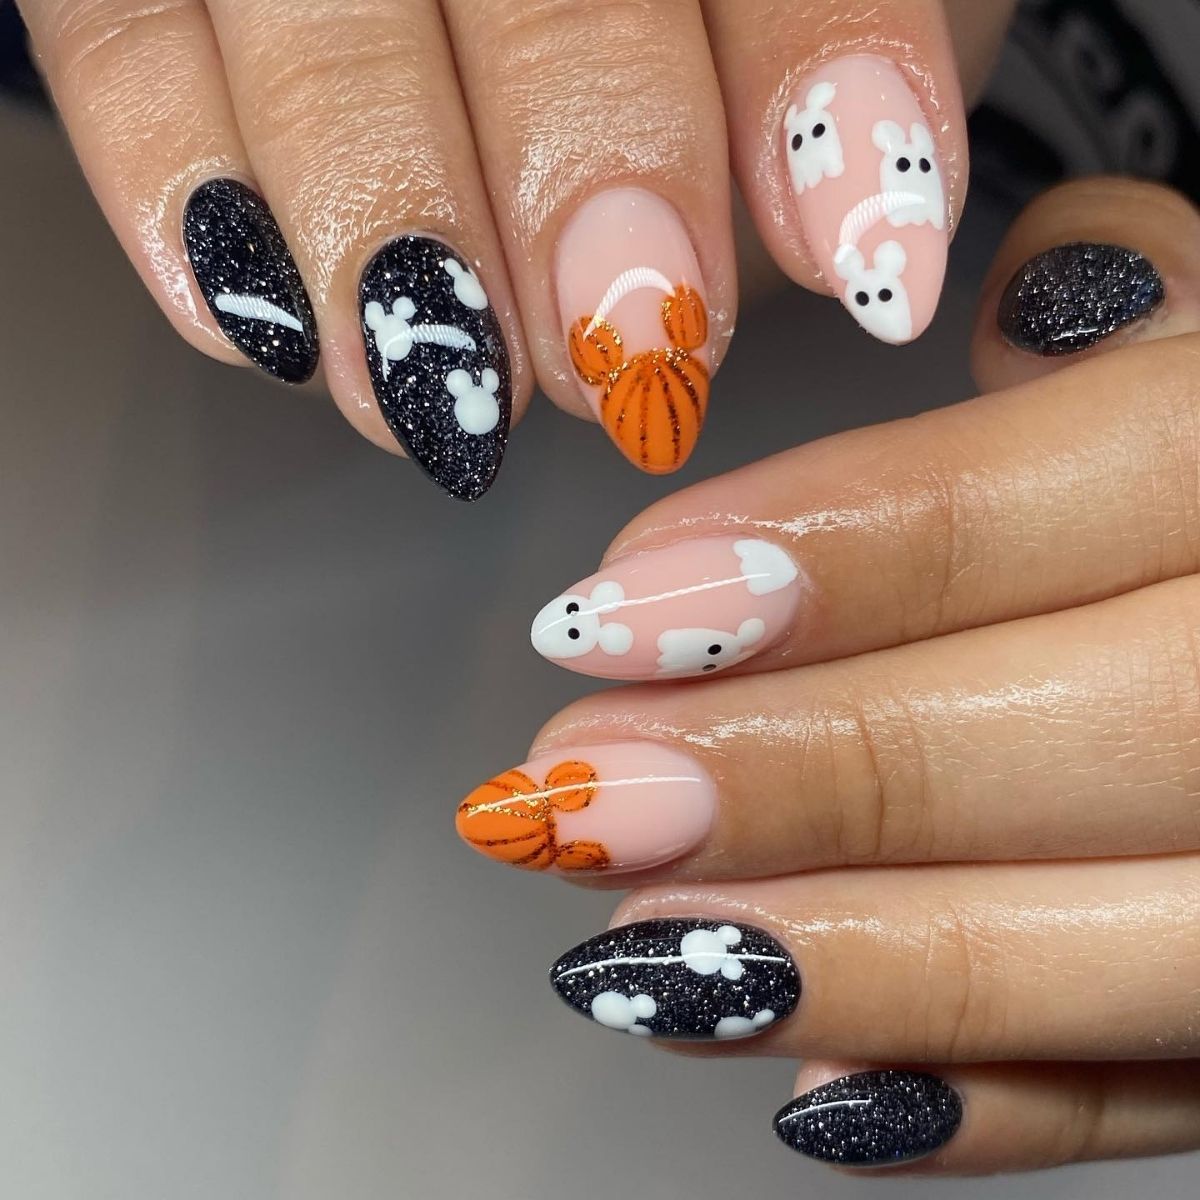
    41. Mickey Halloween Set

    Mickey Halloween Set

    image credit

    adad

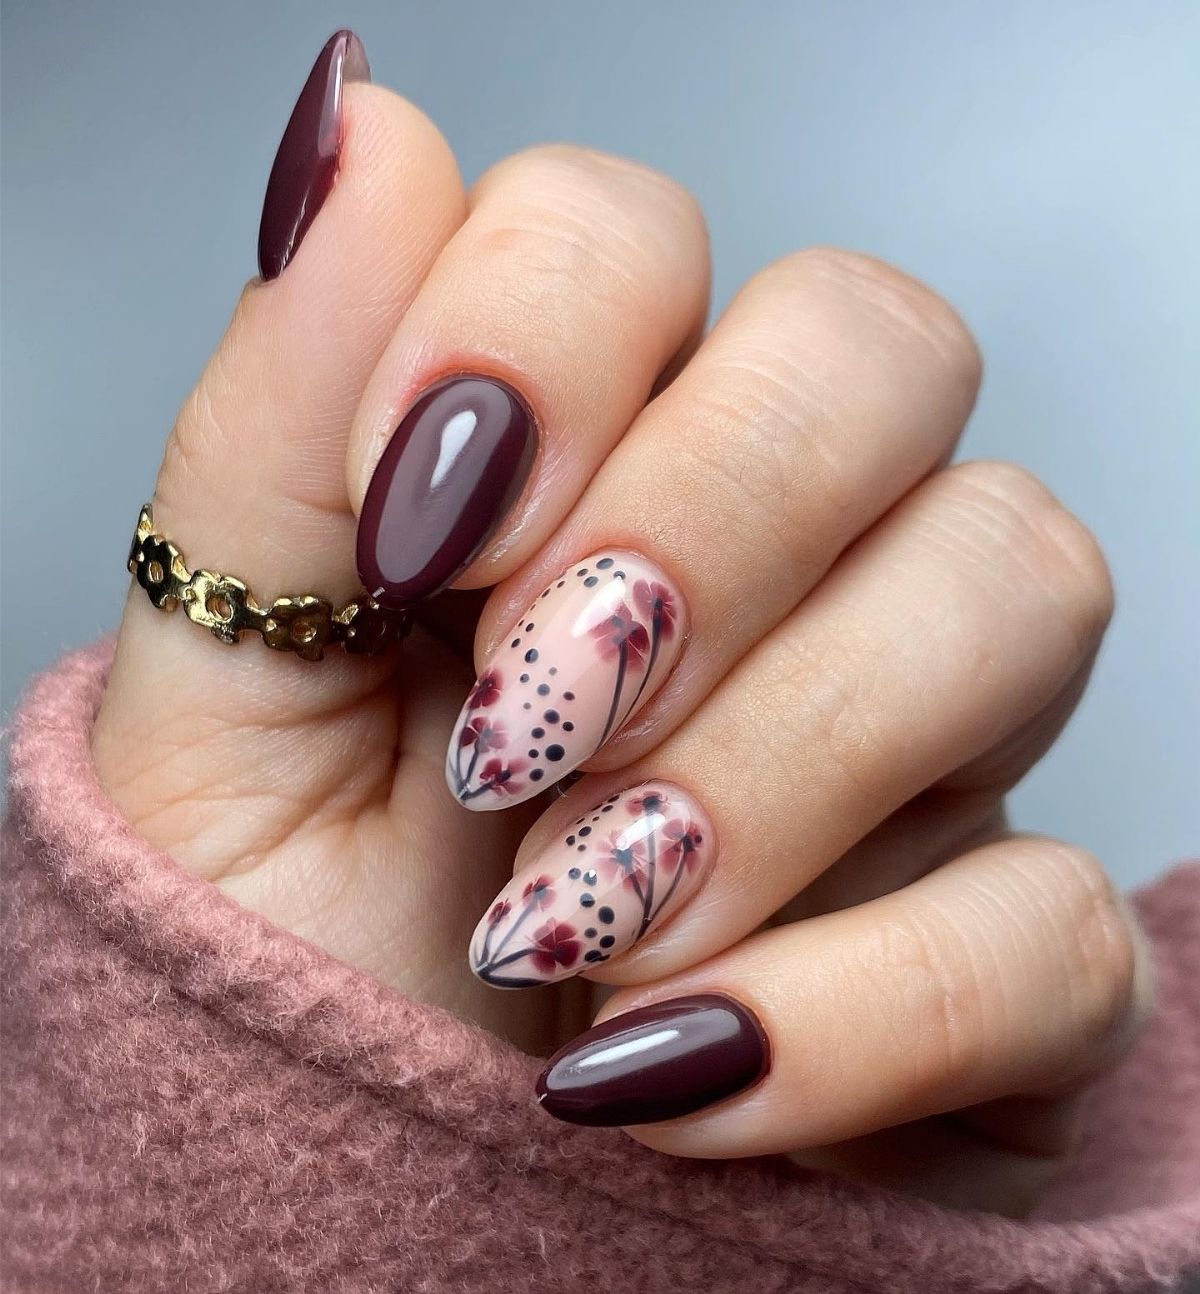
    42. Burgundy Floral Nails

    Burgundy Floral Nails

    image credit

    adad

    43. Subtle Fall Nail Idea

    Subtle Fall Nail Idea

    image credit

    adad

    44. Different Colors Nail Idea

    Different Colors Nail Idea

    image credit

    adad

    45. Gold Shimmer Nails

    Gold Shimmer Nails

    image credit

    adad

    46. Bright Pumpkin Nails

    Bright Pumpkin Nails

    image credit

    adad

    47. Short Fall Floral Nails

    Short Fall Floral Nails

    image credit

    adad

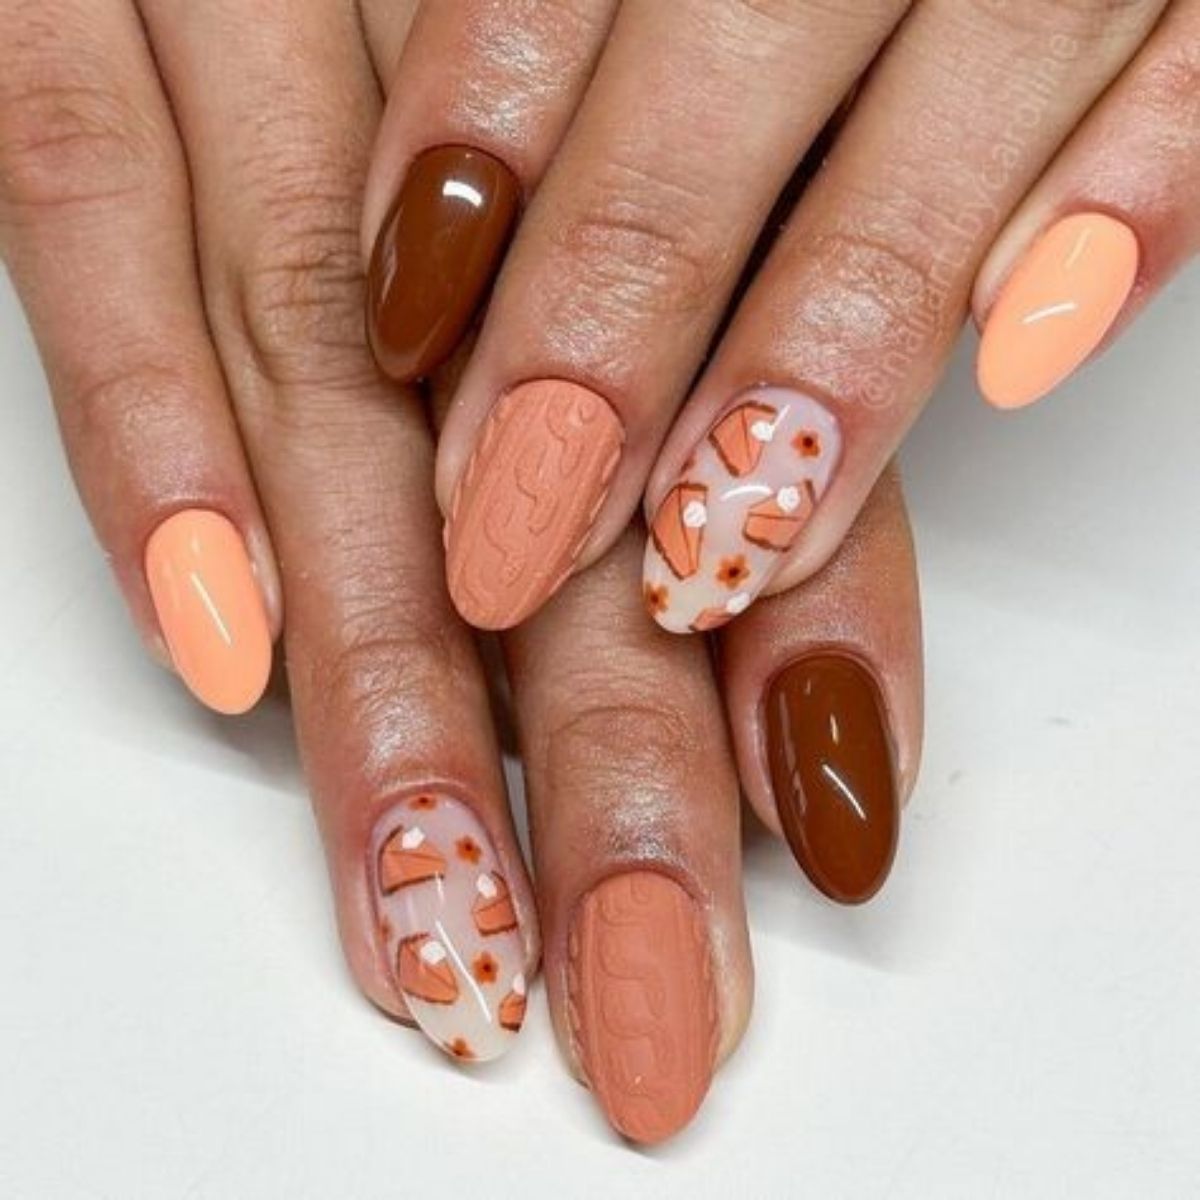
    48. Pumpkin Pie Nails

    Pumpkin Pie Nails

    image credit

    adad

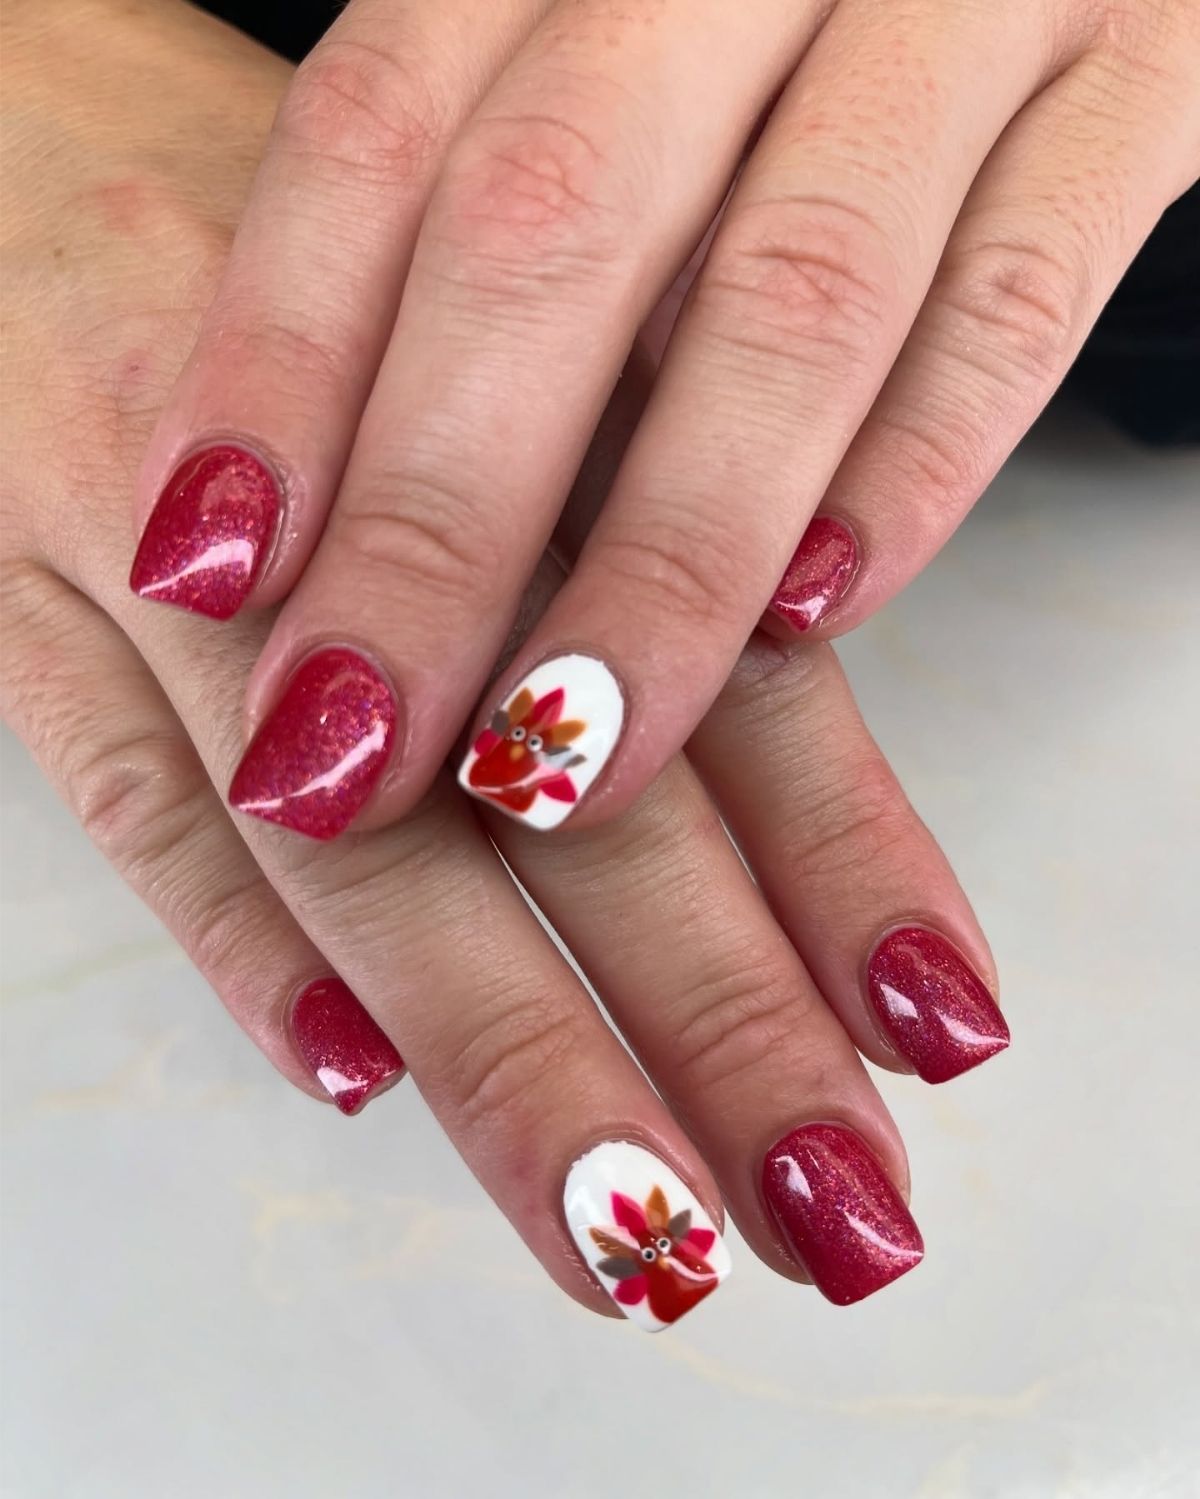
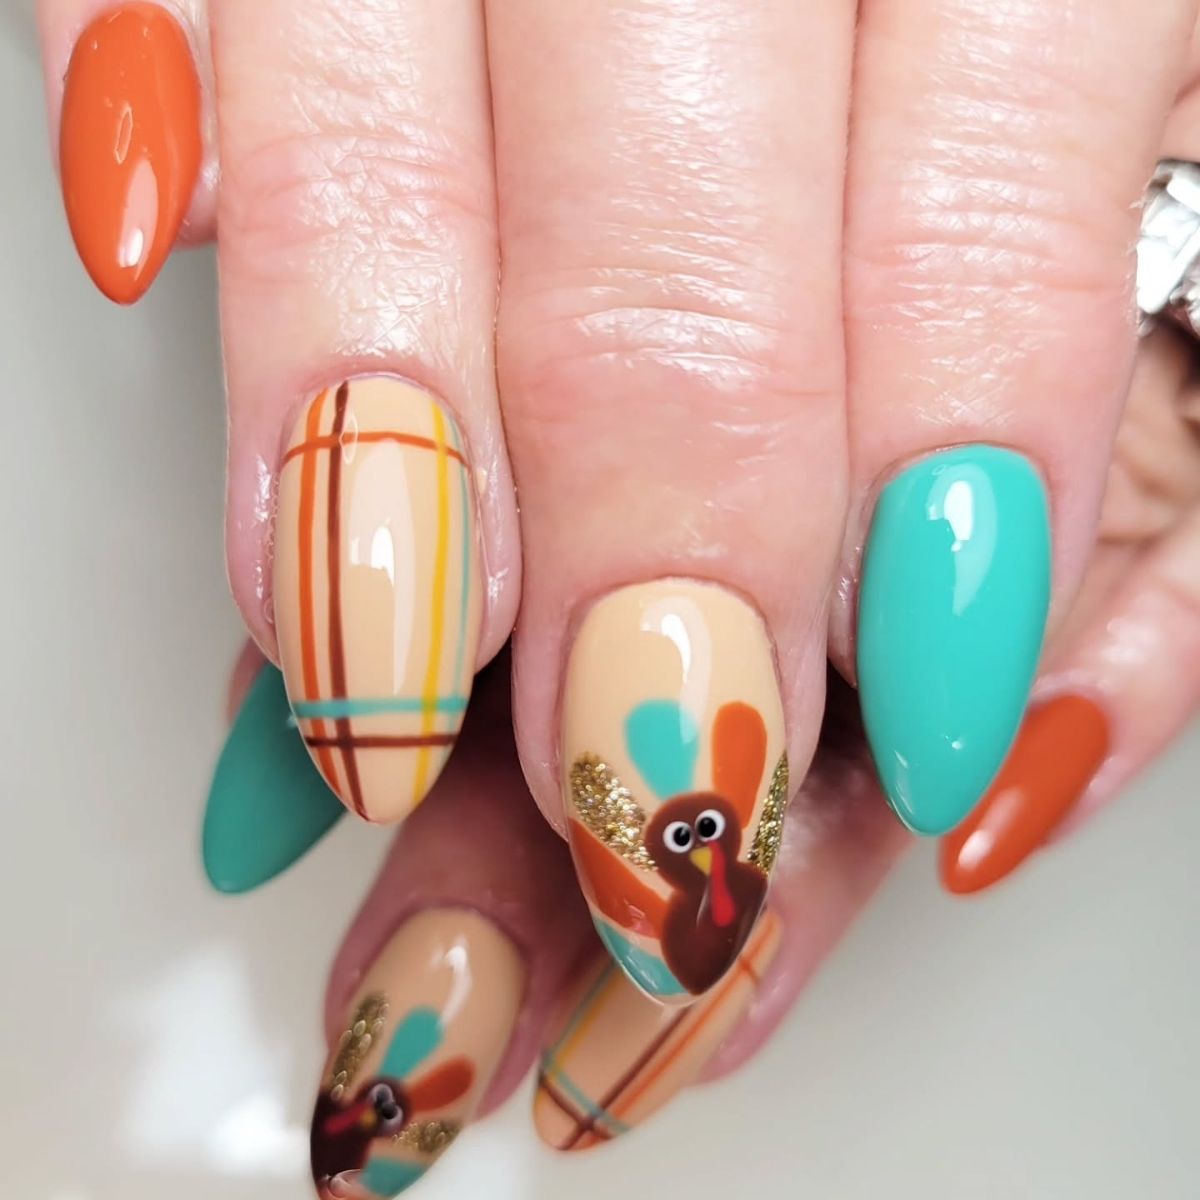
    49. Turkey Nails

    Turkey Nails

    image credit

    adad

    50. Cute Thanksgiving Nail Idea

    Cute Thanksgiving Nail Idea

    image credit

    adad

    51. Thanksgiving Snoopy Nails

    Thanksgiving Snoopy Nails

    image credit

    adad

    52. Textured Pumpkin Pie Nails

    Textured Pumpkin Pie Nails

    image credit

    adad

    53. Shiny Leaf Nails

    Shiny Leaf Nails

    image credit

    adad

    54. Square Turkey Nails

    Square Turkey Nails

    image credit

    adad

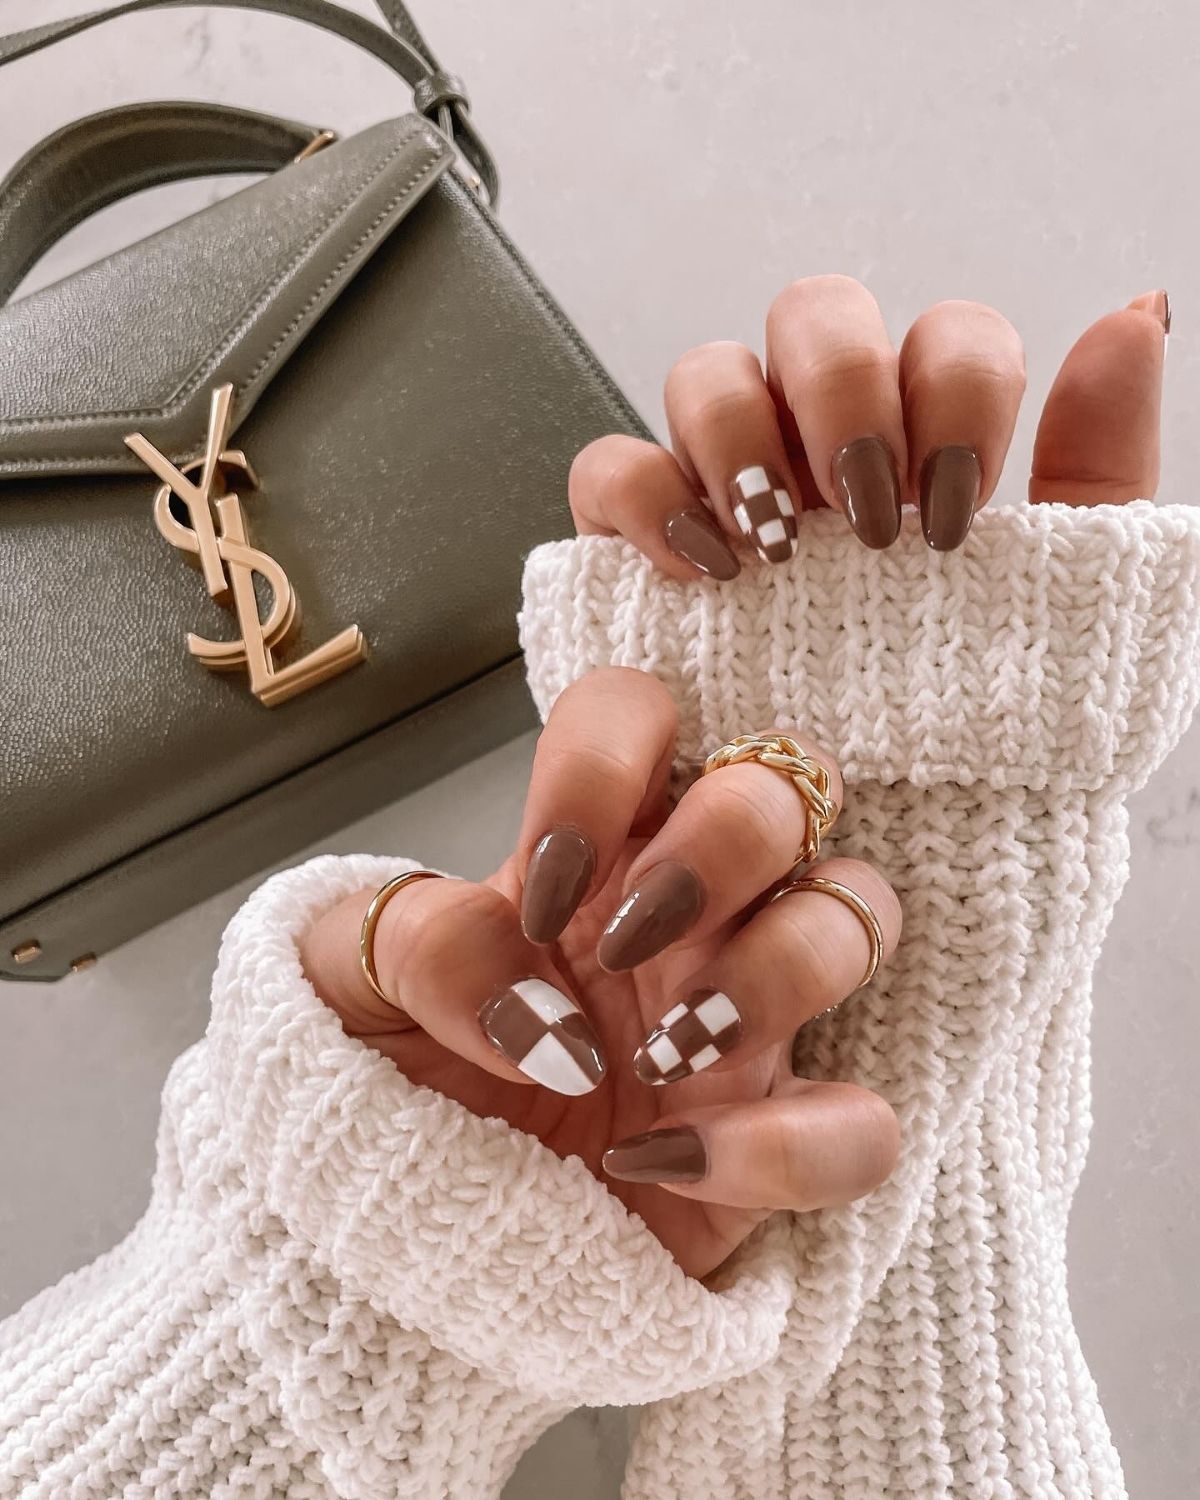
    55. Brown Checkered Nails

    Brown Checkered Nails

    image credit

    adad

    56. Cool Pumpkin Nails for Thanksgiving

    Cool Pumpkin Nails for Thanksgiving

    image credit

    adad

    57. Colorful Turkey Nails

    Colorful Turkey Nails

    image credit

    adad

    58. It’s The Great Pumpkin Charlie Brown Nails

    It’s The Great Pumpkin Charlie Brown Nails

    image credit

    adad

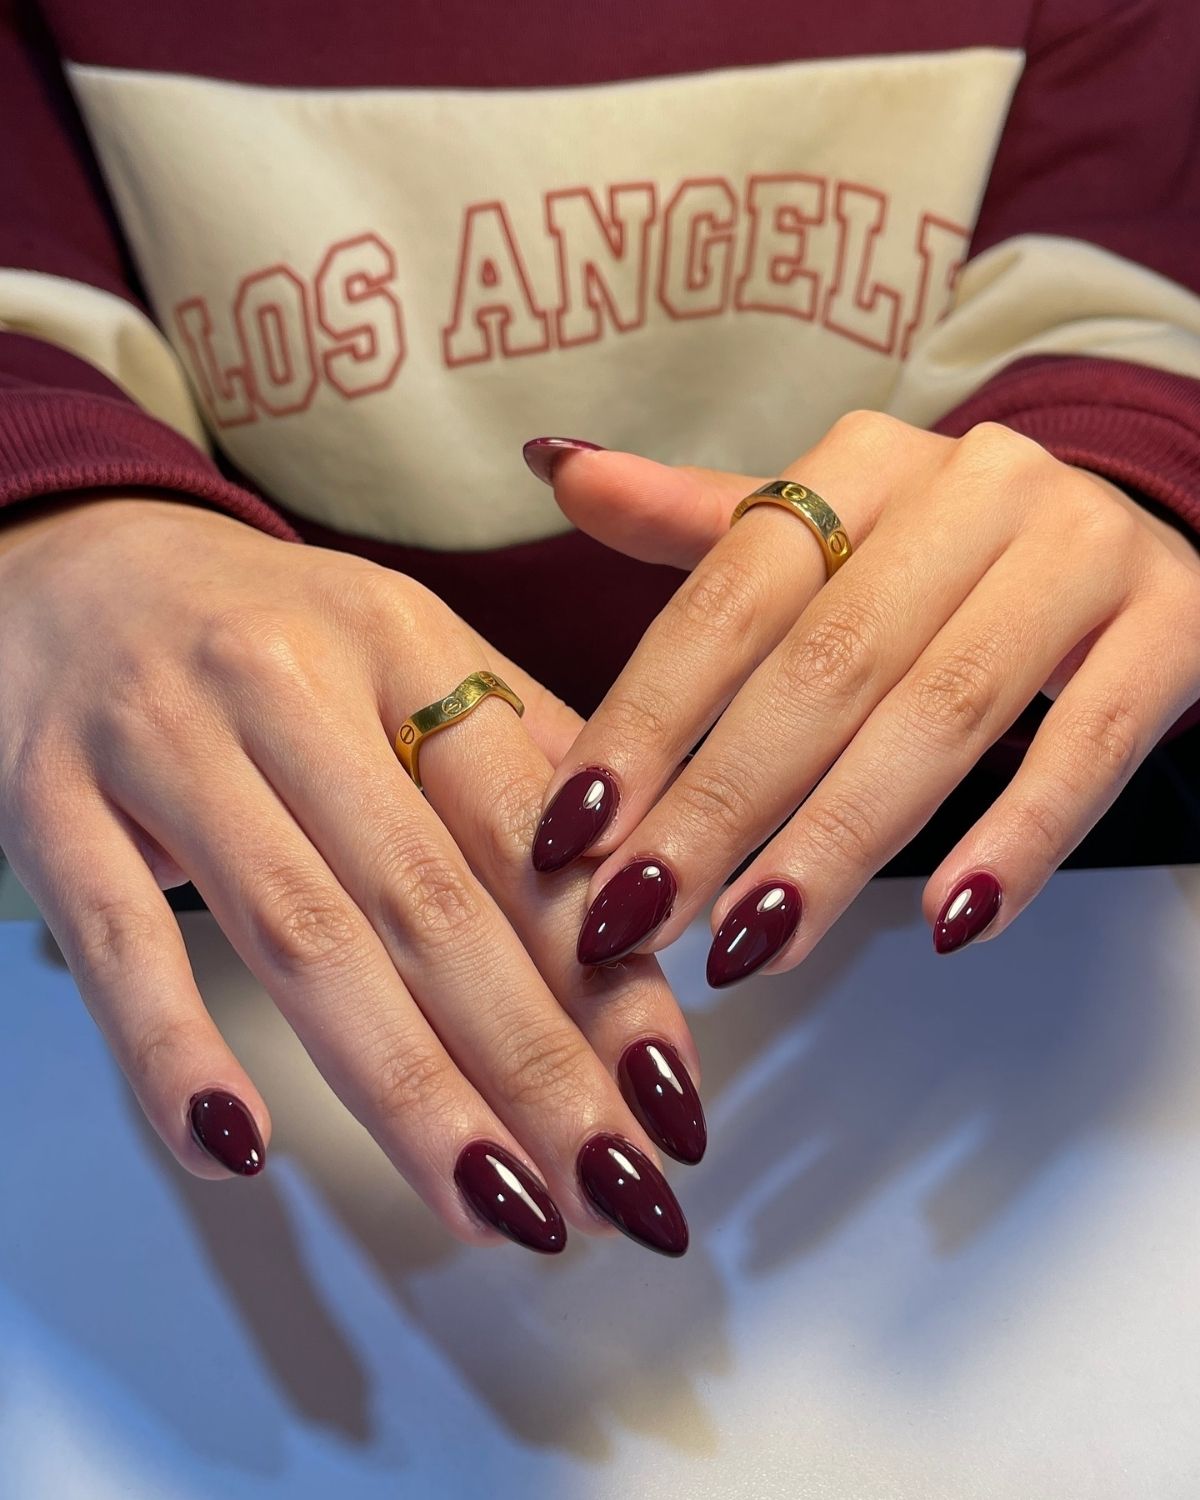
    59. Almond Shaped Burgundy Nails

    Almond Shaped Burgundy Nails

    image credit

    adad

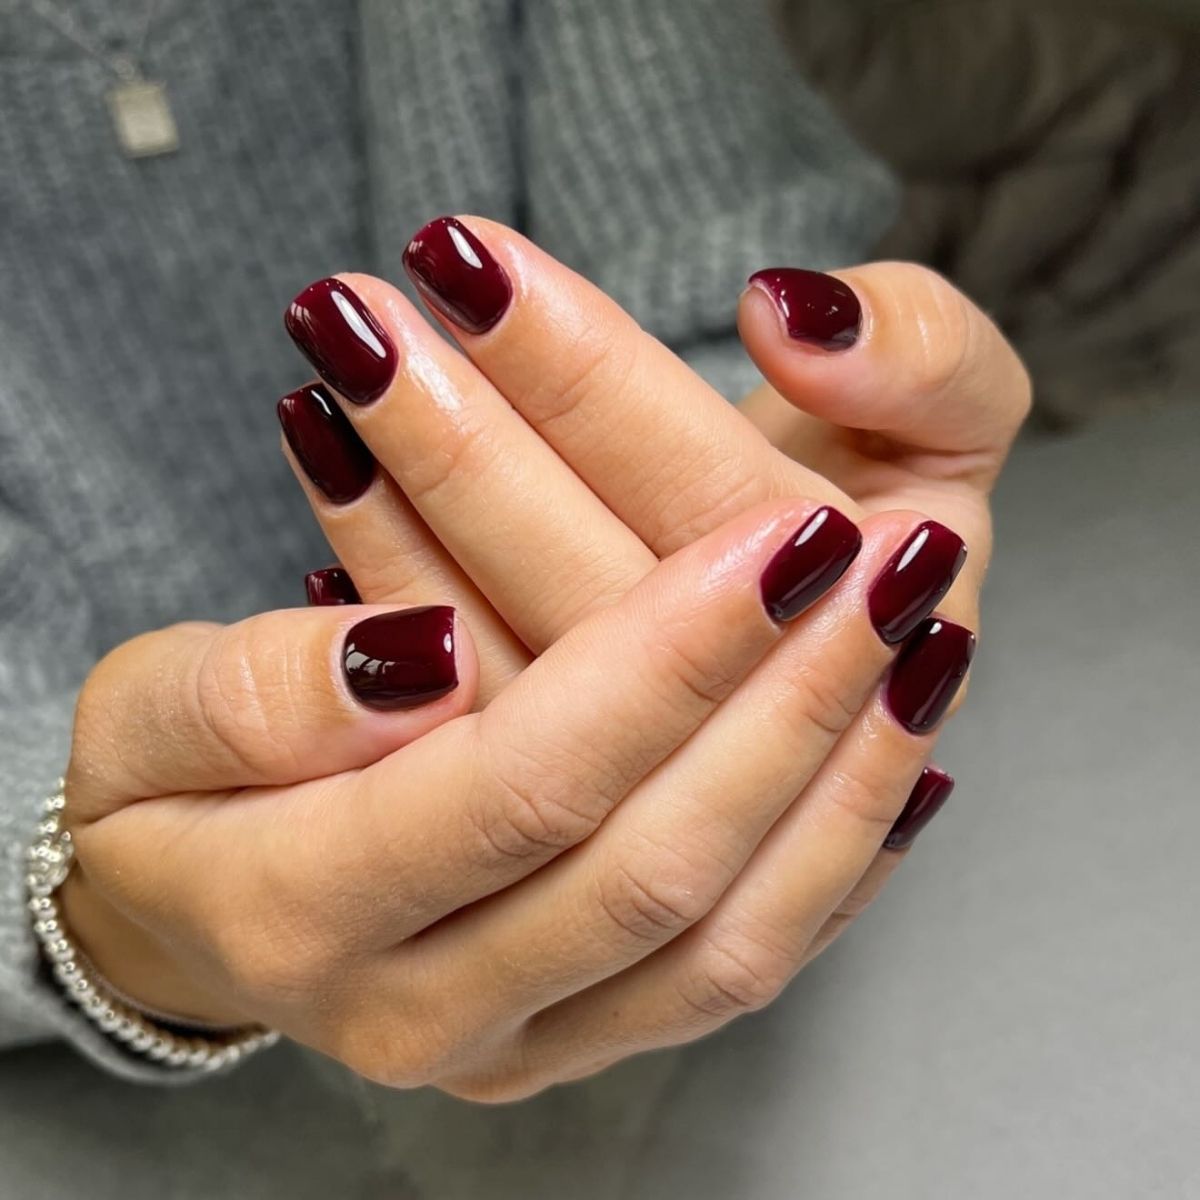
    60. Short Square Burgundy Nails

    Short Square Burgundy Nails

    image credit

    adad

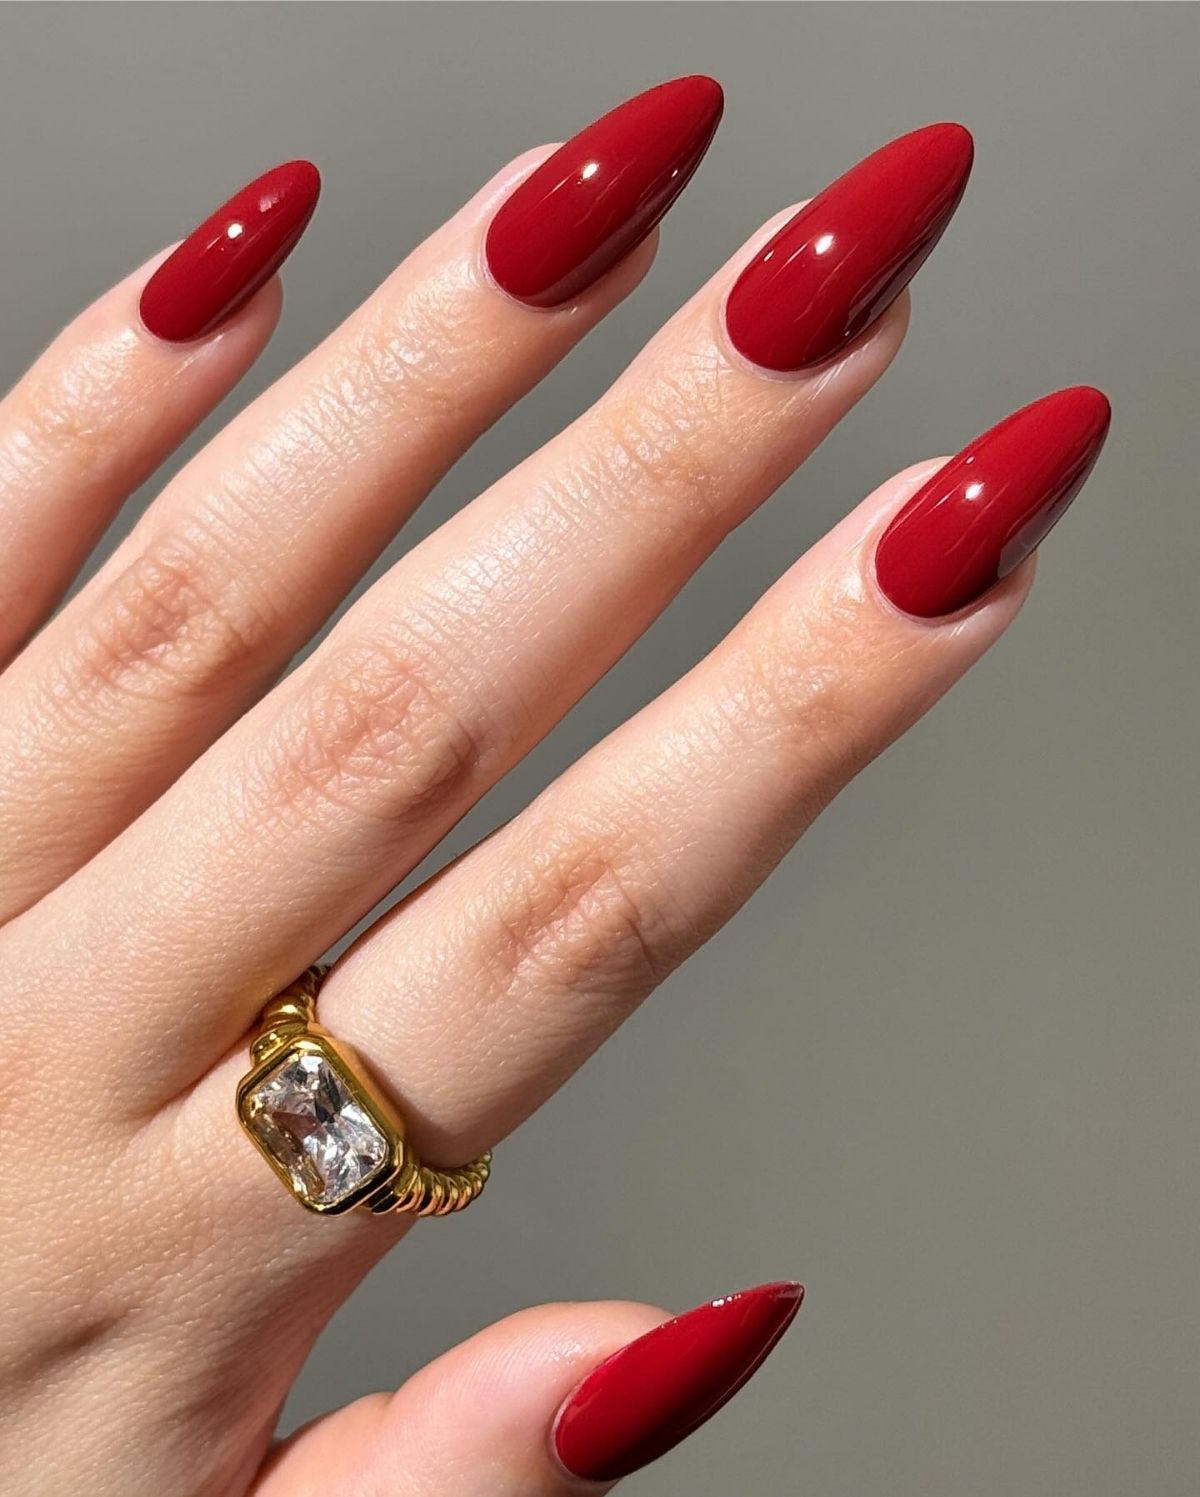
    61. Long Red Nails

    Long Red Nails

    image credit

    adad

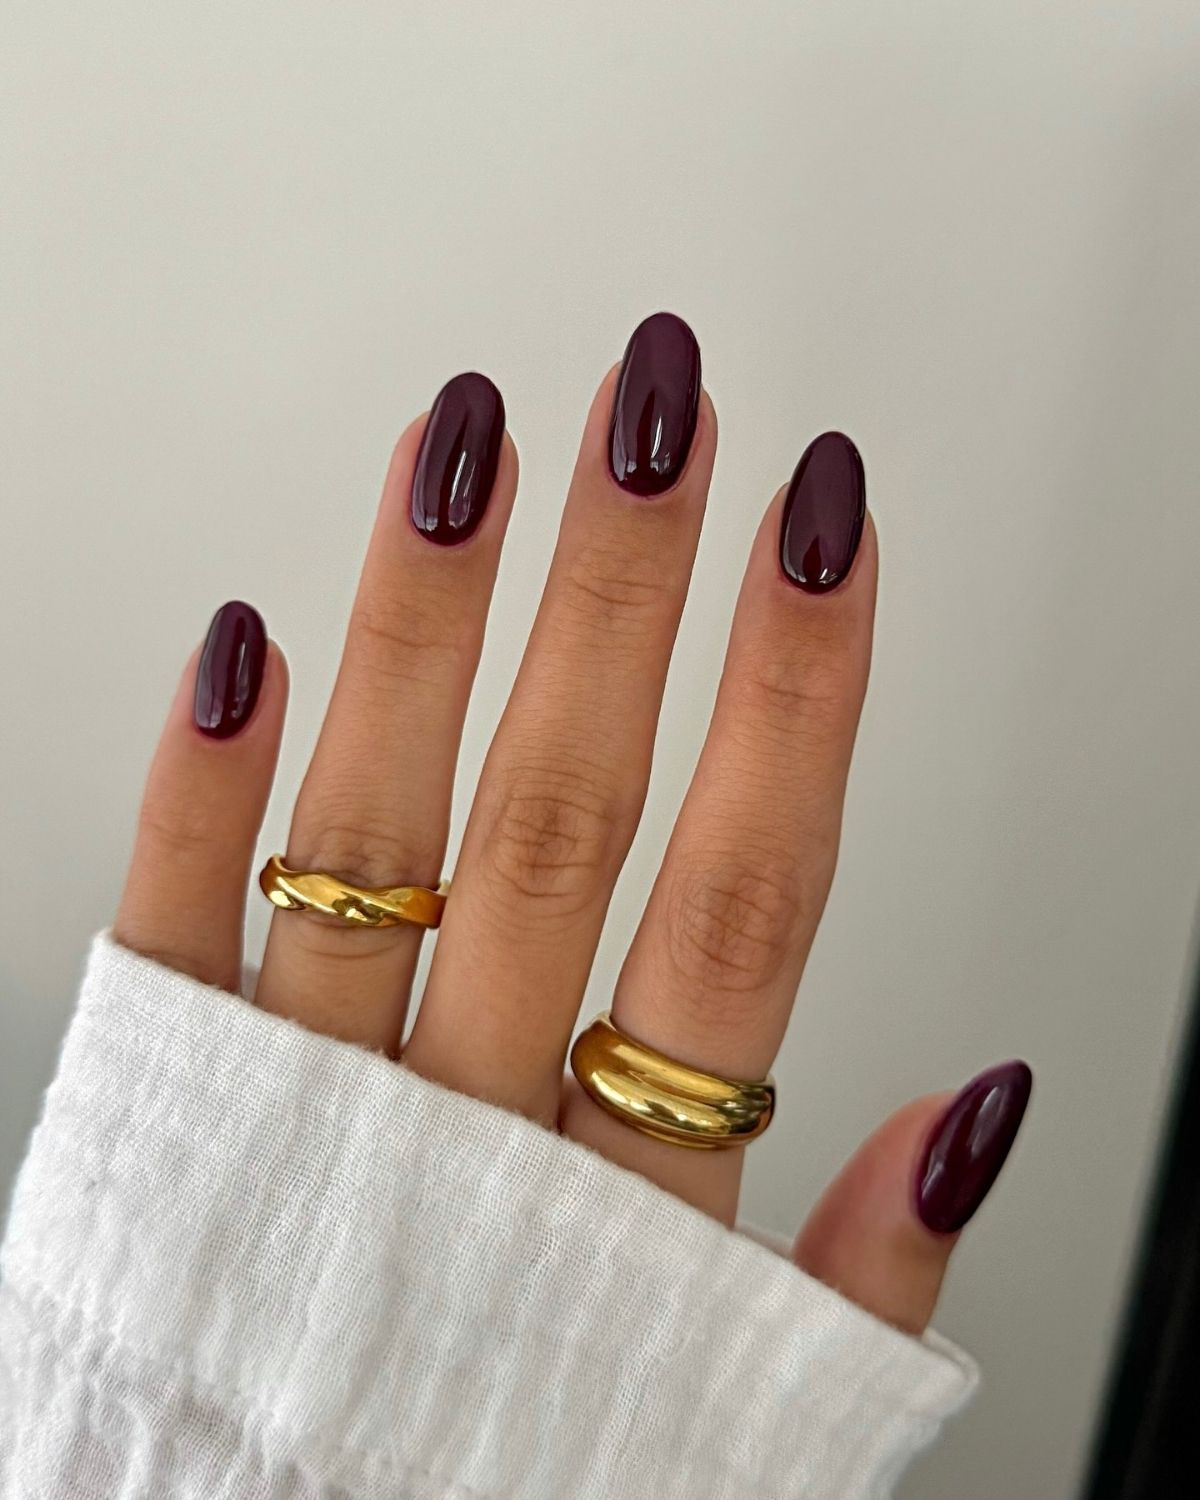
    62. Dark Purple Round Nails

    Dark Purple Round Nails

    image credit

    adad

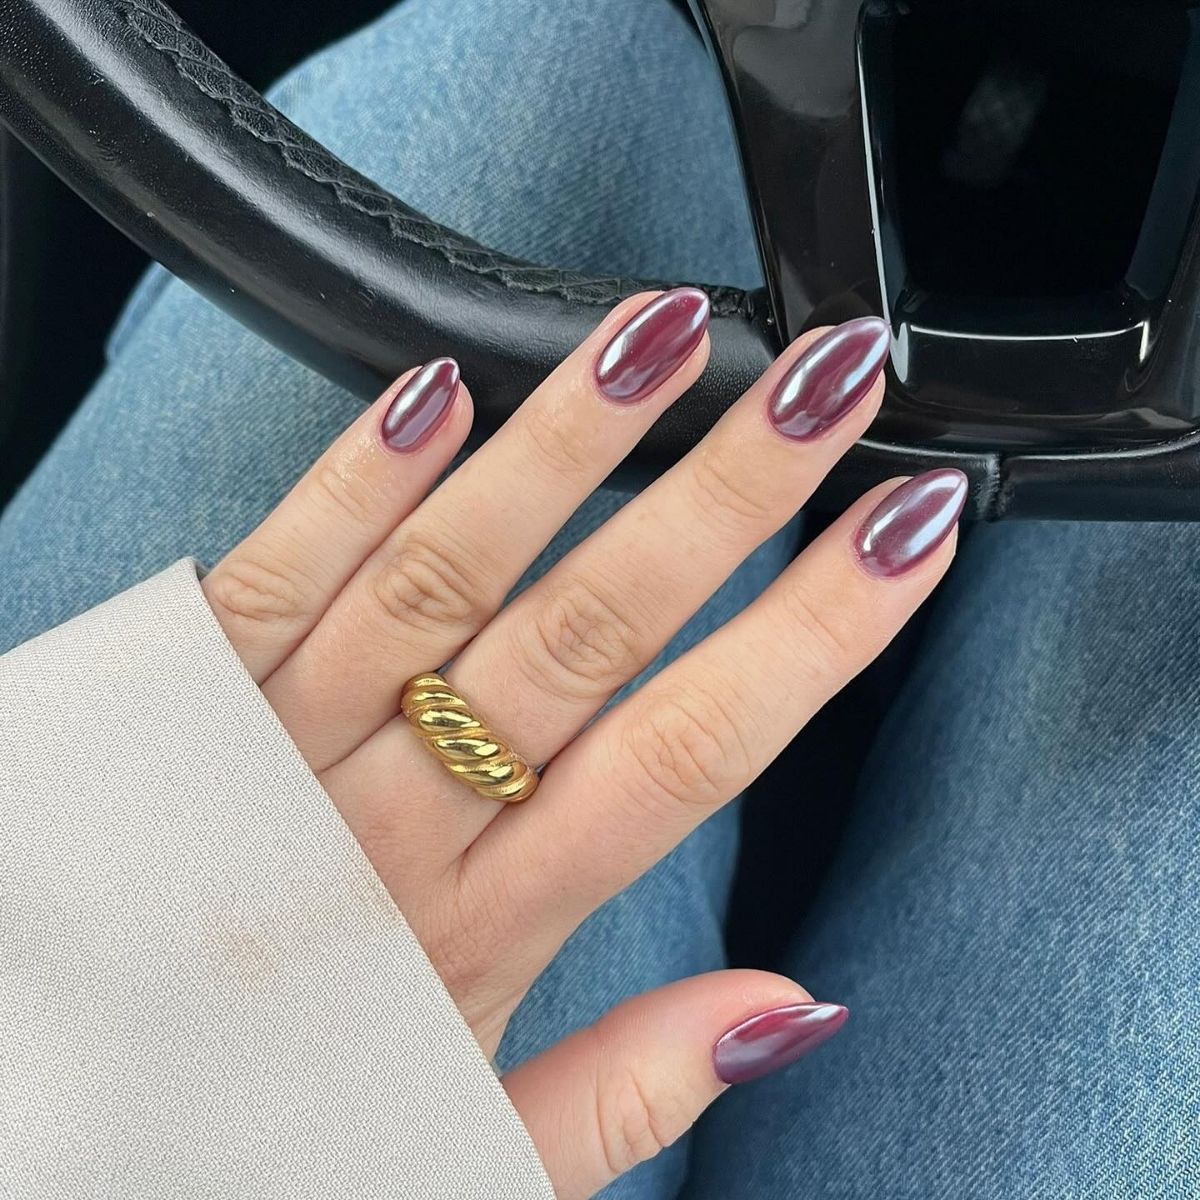
    63. Burgundy With Chrome Nails

    Burgundy With Chrome Nails

    image credit

    adad

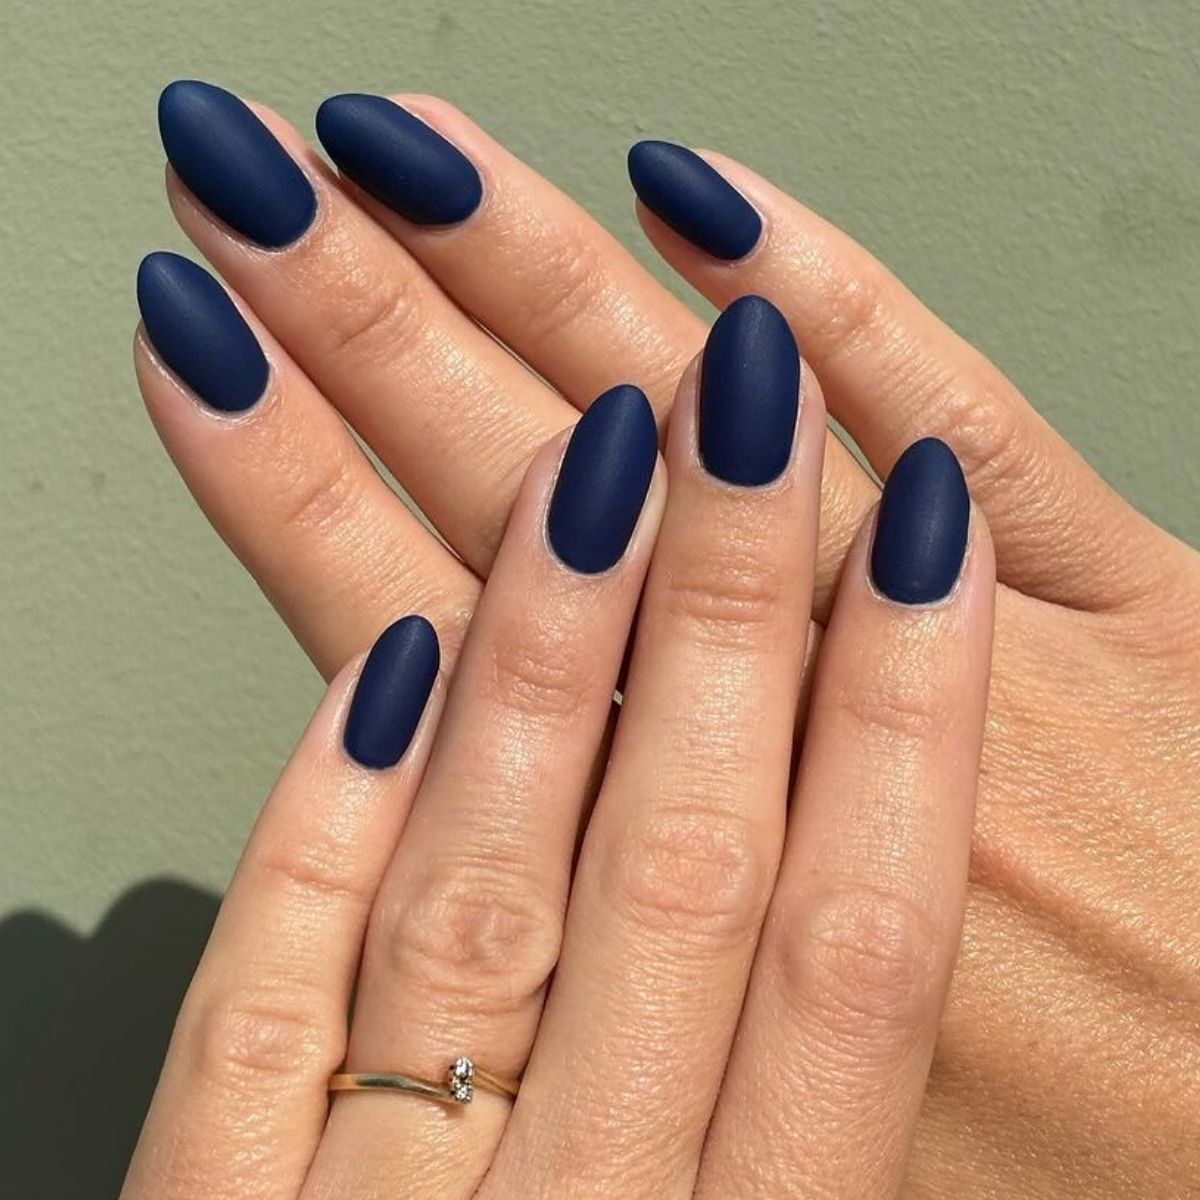
    64. Navy Nails

    Navy Nails

    image credit

    adad

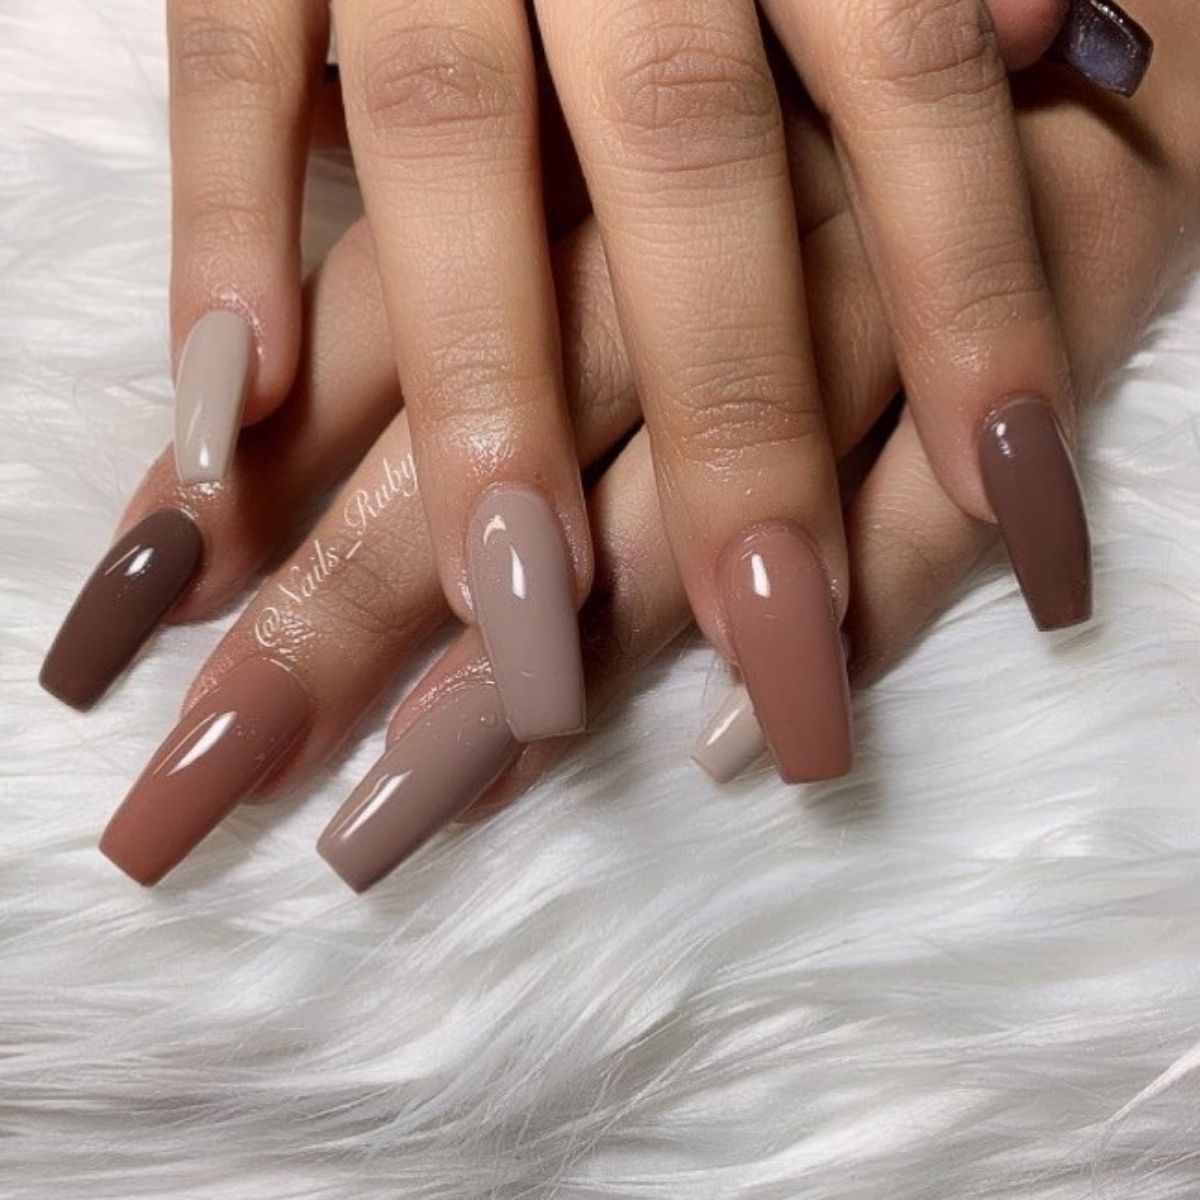
    65. Pretty Brown Nails

    Pretty Brown Nails

    image credit

    adad

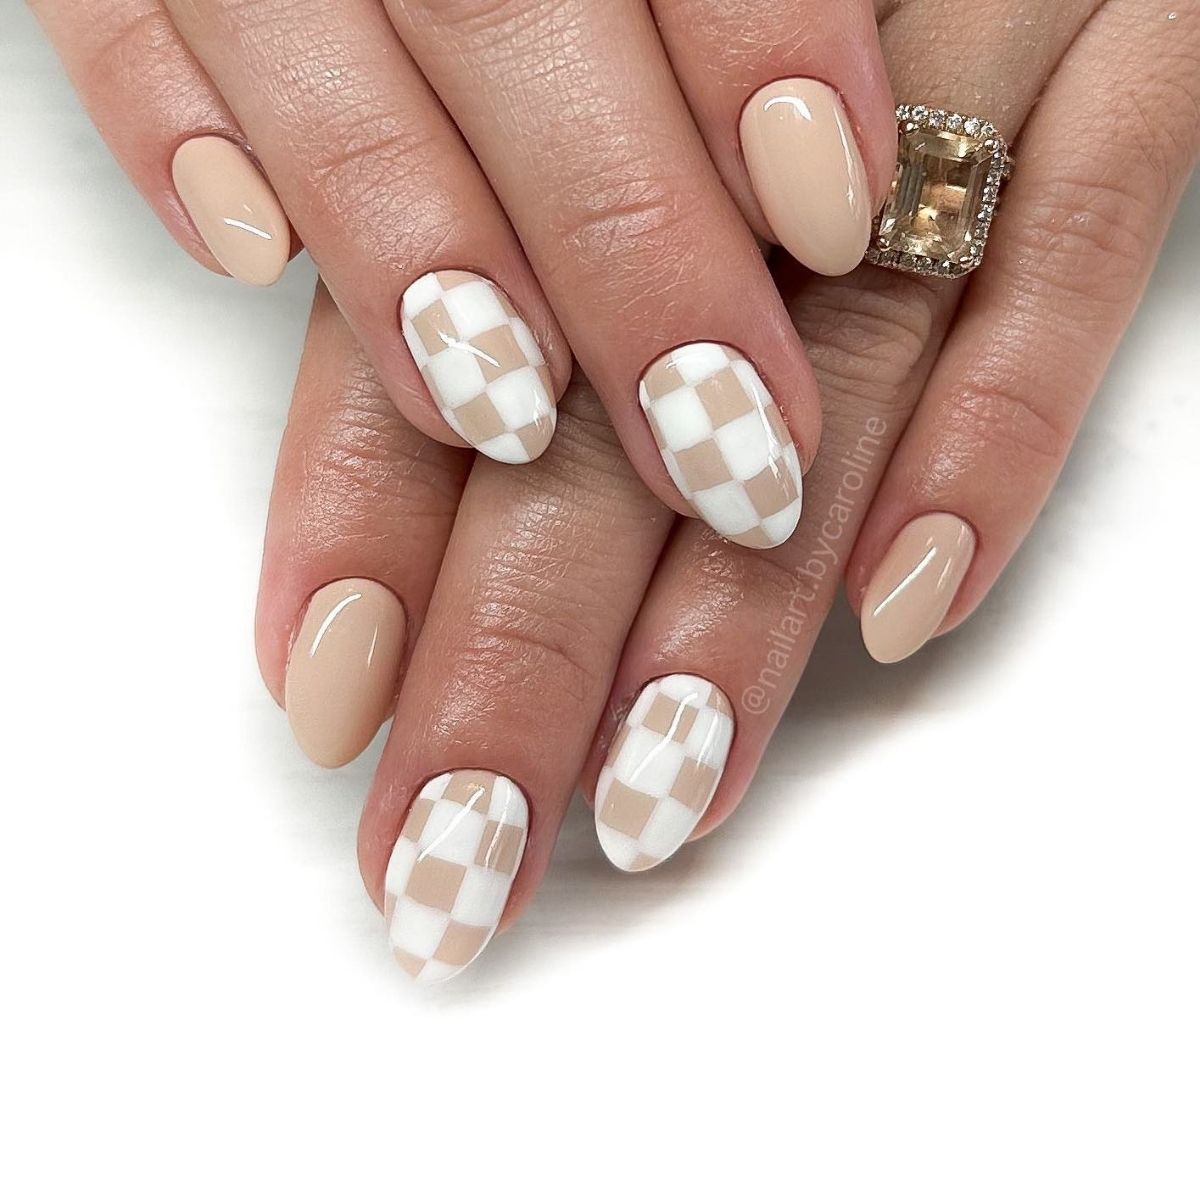
    66. Tan Checkered Nail Set

    Tan Checkered Nail Set

    image credit

    adad

    67. Fun Fall Plaid Nails

    Fun Fall Plaid Nails

    image credit

    adad

    68. Shiny Tan Nails

    Shiny Tan Nails

    image credit

    adad

    69. Almond Gradient Nails

    Almond Gradient Nails

    image credit

    adad

    70. Square Plum Nails

    Square Plum Nails

    image credit

    adad

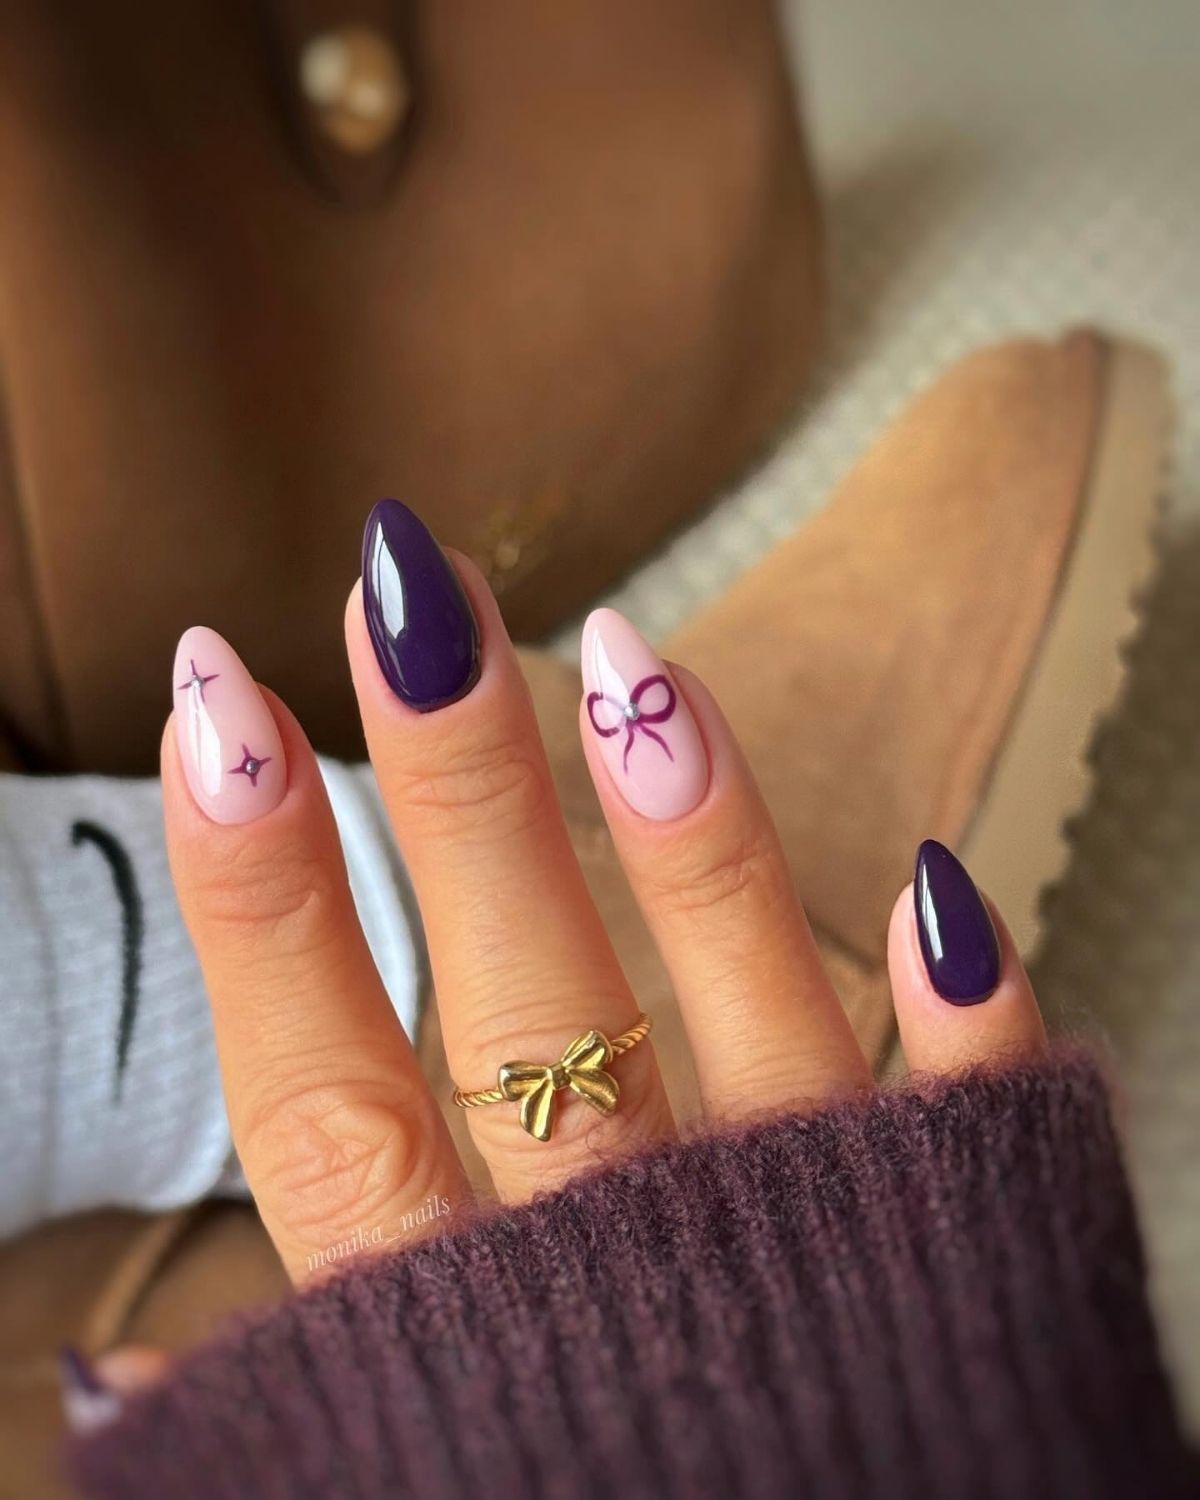
    71. Plum Bow Nails

    Plum Bow Nails

    image credit

    adad

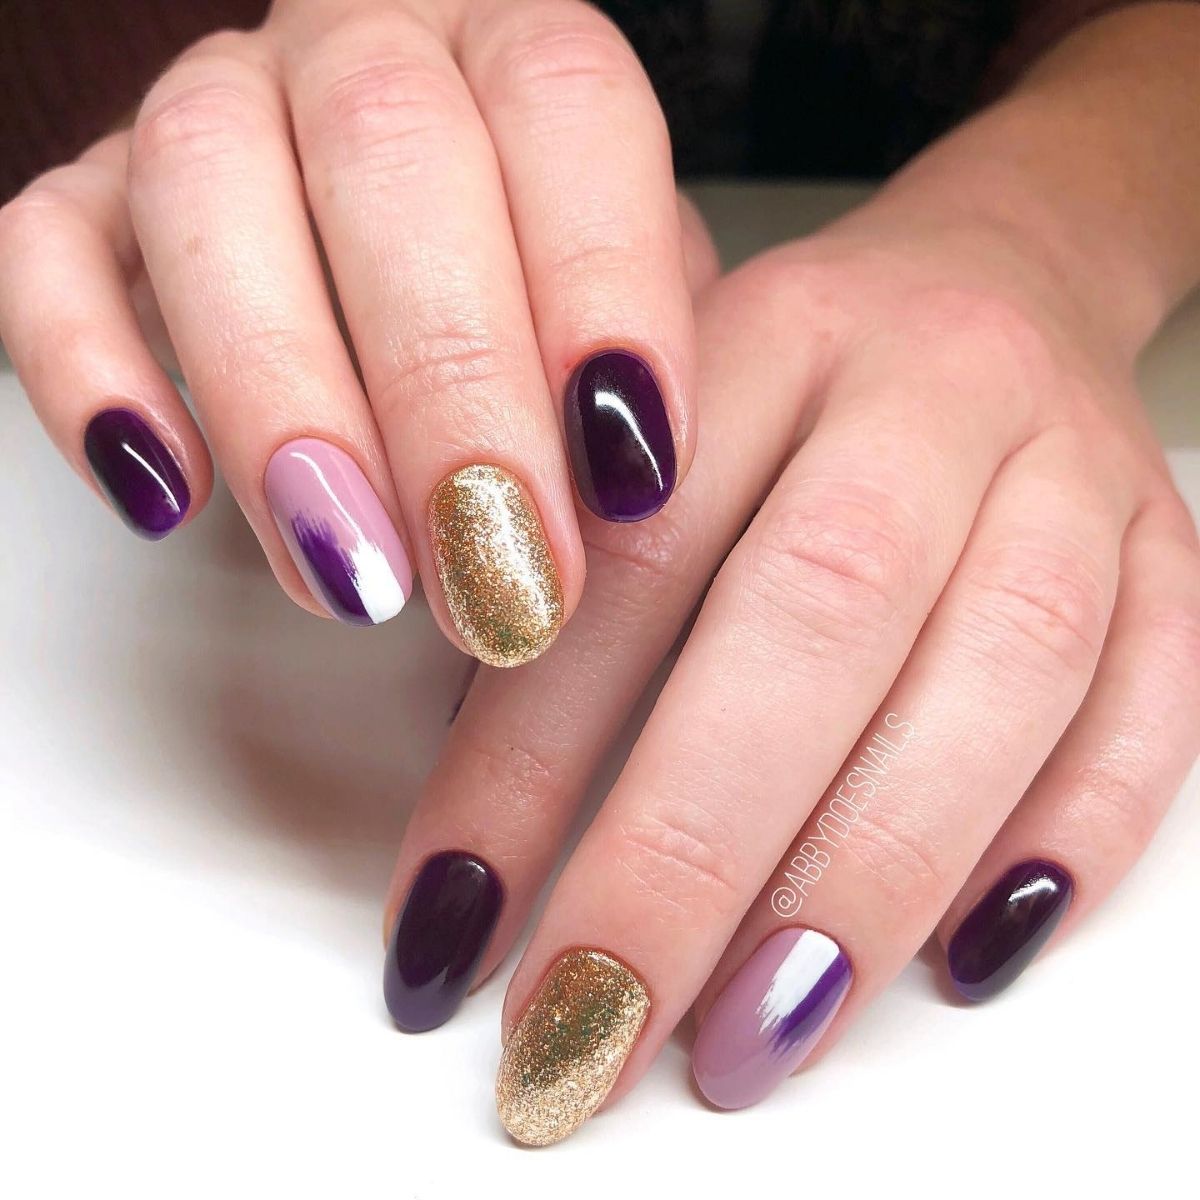
    72. Purple and Gold Nails

    Purple and Gold Nails

    image credit

    adad

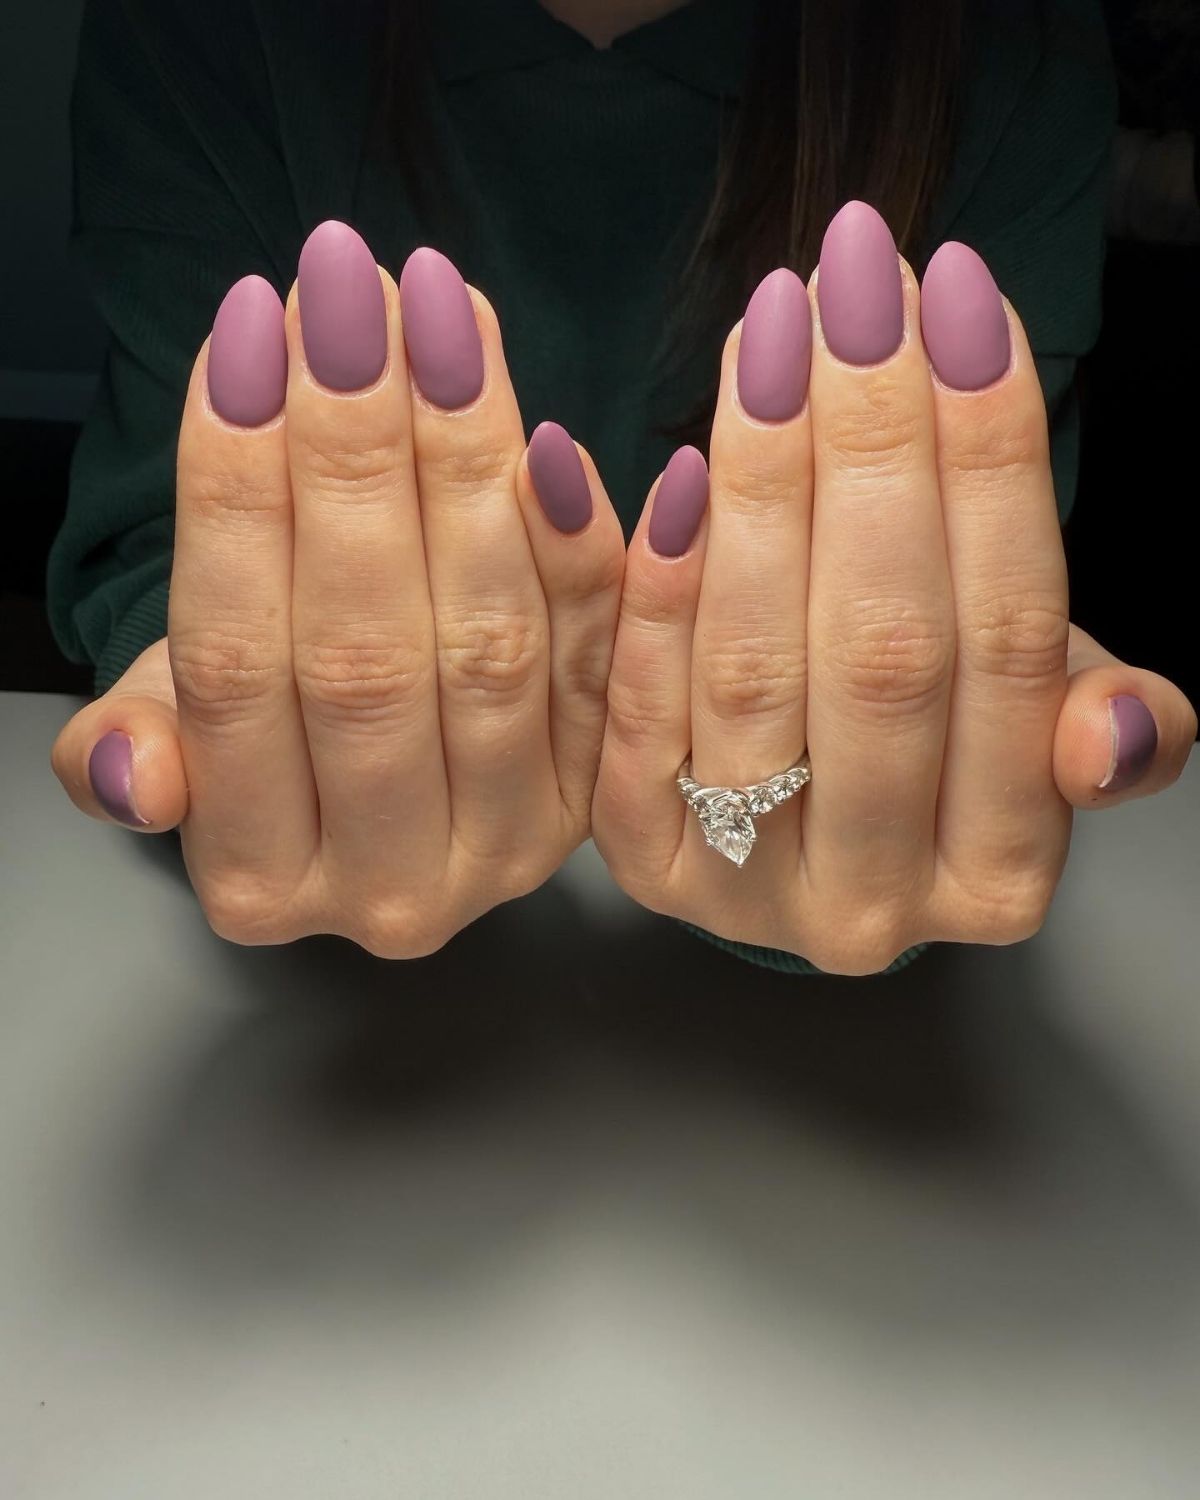
    73. Beautiful Mauve Nails

    Beautiful Mauve Nails

    image credit

    adad

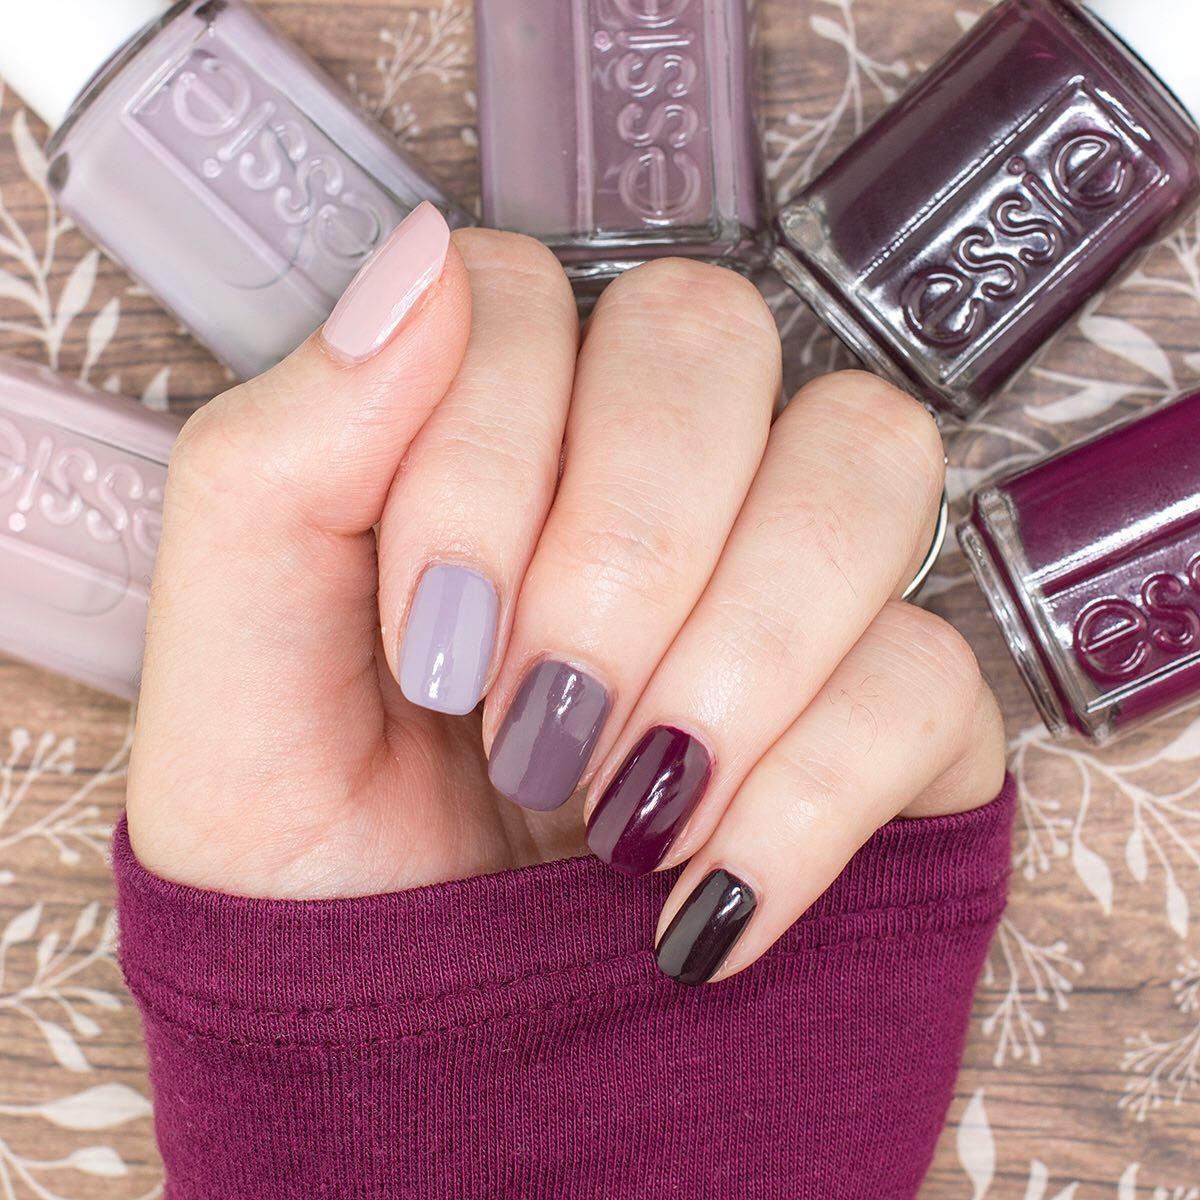
    74. Plum Ombre Nails

    Plum Ombre Nails

    image credit

    adad

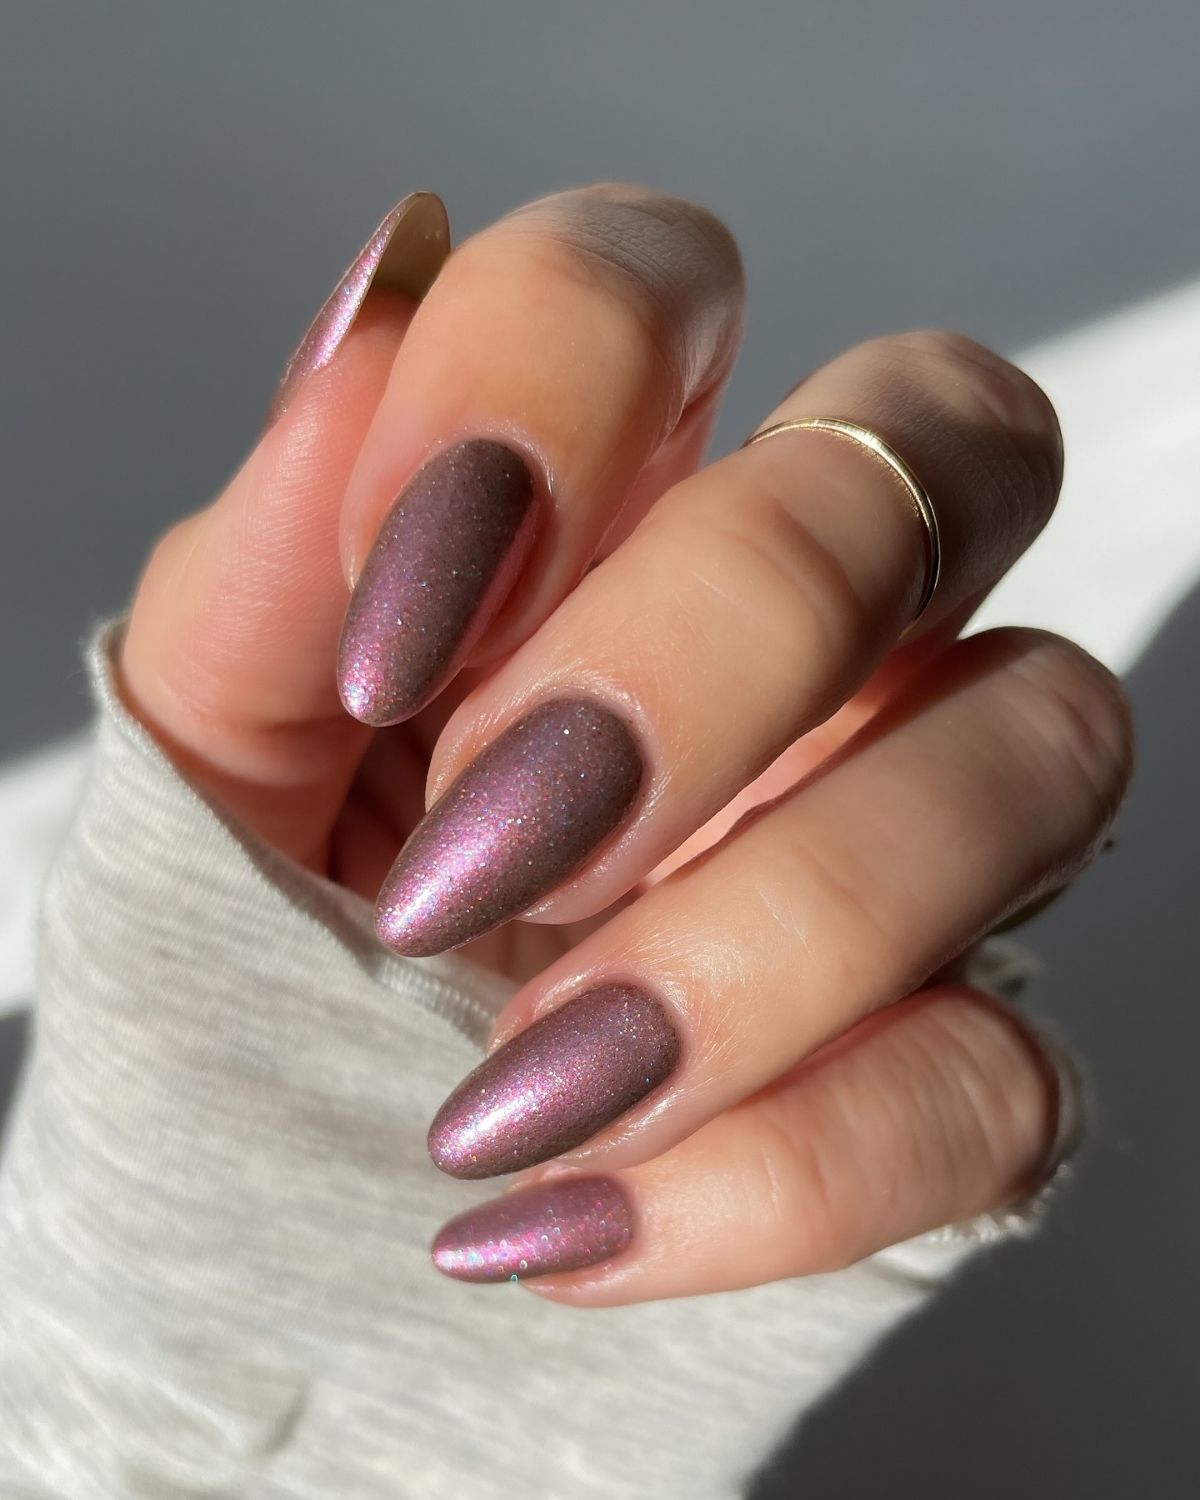
    75. Long Shimmer Nails

    Long Shimmer Nails

    image credit

    adad

    As an Amazon Associate I earn from qualifying purchases.

  • How to Apply Setting Powder Without Emphasizing Wrinkles (Especially for Mature Skin)

    As we get older, our skin changes — and so should our makeup techniques. One product that can make or break your look? Setting powder. When applied correctly, it helps your makeup last all day and gives your skin a polished finish. But if used the wrong way, it can settle into fine lines and actually make you look older — and who wants that?

    After testing dozens of powders and techniques on my own 50+ skin, here’s exactly how to apply setting powder for a smooth, youthful finish.

    1. Choose the Right Powder

    Skip the ultra-matte, heavy formulas. Instead, look for a finely-milled, lightweight translucent powder — ideally one that’s hydrating or even infused with skincare ingredients like hyaluronic acid or niacinamide.

    Loose powders tend to work better than pressed on mature skin, as they’re easier to control and blend.

    2. Prep Your Skin Properly

    Hydration is everything. Apply moisturizer and primer first to give the powder a smooth canvas. My go-to prep steps help blur texture and extend the wear of my makeup all day.

    Not sure where to start? Here’s my full guide on how to prep mature skin for foundation — including skincare tips and techniques I personally rely on.

    3. Apply Powder Strategically (Not All Over!)

    Here’s where it really counts:

    • Use a small fluffy brush, not a puff or sponge.
    • Dip lightly into the powder, then tap off excess.
    • Gently press the powder into areas that need it:
    • Under the eyes (very lightly)
    • Around the nose
    • Chin and T-zone

    Avoid applying powder over dry patches or areas with deep lines.

    I walk through the exact step-by-step process in this tutorial on applying setting powder for mature skin in 2025 — including product picks and technique tweaks that really work.

    4. Set It and Forget It

    Once the powder is on, don’t go over it again and again with your brush — that’s how you kick up texture. Let it melt into the skin with the warmth of your face or mist lightly with a setting spray for a fresh, skin-like finish.

    Final Thoughts

    Powder doesn’t have to be the enemy of mature skin. With the right product and a lighter hand, it can be your secret weapon for a polished, glowing look — not a flat, dry one.